Sony VPL-FHZ120L Operating Instructions - Page 17
Adjusting the Projected Image, Focusing the image (Focus), Adjusting the image size (Zoom)
 |
View all Sony VPL-FHZ120L manuals
Add to My Manuals
Save this manual to your list of manuals |
Page 17 highlights
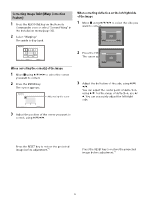
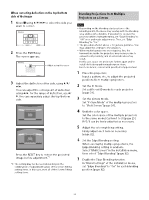
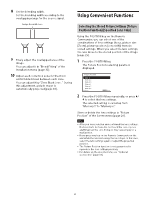
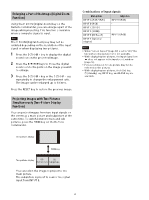
Adjusting the Projected Image Focusing the image (Focus) Adjusting the position of the image (Lens shift) Press the LENS SHIFT/SHIFT key on the projector or the Remote Commander then press the key. When attaching the Electric focus lens Press the FOCUS key on the projector or the Remote Commander then press the key. When attaching the Manual focus lens Turn the focus ring. To return the lens to the center position of the projected image Press the RESET key on the Remote Commander while adjusting the position of the image. Adjusting the tilt of the projector with the adjustable feet When the projector is placed on an uneven surface, adjust it using the adjustable feet. Adjusting the image size (Zoom) When attaching the Electric zoom lens Press the ZOOM key on the projector or the Remote Commander then press the key. Notes Be careful not to pinch your fingers. Do not push hard on the top of the projector with the adjustable feet extended. It may cause a malfunction. Displaying a pattern for adjusting an image You can display a pattern for adjusting the projected image with the PATTERN key on the Remote Commander. Use / to change the pattern and / to change its color. Press the PATTERN key again to restore the previous image. 17
-
 1
1 -
2
-
3
-
4
-
5
-
6
-
7
-
8
-
9
-
10
-
11
-
 12
12 -
 13
13 -
 14
14 -
 15
15 -
 16
16 -
 17
17 -
 18
18 -
 19
19 -
 20
20 -
 21
21 -
 22
22 -
23
-
24
-
25
-
26
-
27
-
28
-
29
-
30
-
31
-
32
-
33
-
34
-
35
-
36
-
37
-
38
-
39
-
40
-
41
-
42
-
43
-
44
-
45
-
46
-
47
-
48
-
49
-
50
-
51
-
52
-
53
-
54
-
55
-
56
-
57
-
58
-
59
-
60
-
61
-
62
-
63
 |
 |
