Sony VPL-FHZ120L Operating Instructions - Page 21
Using Convenient Functions
 |
View all Sony VPL-FHZ120L manuals
Add to My Manuals
Save this manual to your list of manuals |
Page 21 highlights
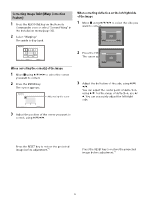
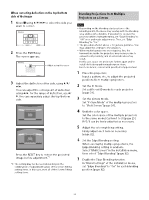
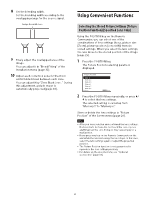
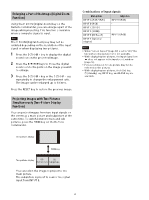
8 Set the blending width. Set the blending width according to the overlapping range for the source signal. Assign the width here. 9 Finely adjust the overlapped area of the image. You can adjust it in "Blend Fitting" of the Installation menu (page 32). 10 Adjust each correction zone for the most uniform black level between each zone. You can adjust it by "Zone Black Level." During this adjustment, a black image is automatically projected (page 33). Using Convenient Functions Selecting the Stored Picture Settings (Picture Position Function) (Specified Lens Only) Using the POSITION key on the Remote Commander, you can select one of the combinations of lens settings (focus, picture size (Zoom), picture position (Lens shift)) from six stored settings. When you select the lens settings, the lens move to the stored position of the image (page 29). 1 Press the POSITION key. The Picture Position selecting palette is displayed. 2 Press the POSITION key repeatedly, or press / to select the lens settings. The selected setting is called up from "Memory 1" to "Memory 6." Store or delete the lens settings in "Picture Position" of the Screen menu (page 26). Notes After you have selected and confirmed the lens settings, the lens starts to move. Do not touch the lens or place anything near the lens. Doing so may cause injury or a malfunction. If you press any key on the Remote Commander or the unit while the lens is moving, the lens stops. In this case, select the lens settings again or adjust the projected position. The Picture Position function is not guaranteed to reproduce the lens settings precisely. For details on the specified lens, see "Optional accessories" (page 53). 21
-
 1
1 -
2
-
3
-
4
-
5
-
6
-
7
-
8
-
9
-
10
-
11
-
12
-
13
-
14
-
15
-
 16
16 -
 17
17 -
 18
18 -
 19
19 -
 20
20 -
 21
21 -
 22
22 -
 23
23 -
 24
24 -
 25
25 -
 26
26 -
27
-
28
-
29
-
30
-
31
-
32
-
33
-
34
-
35
-
36
-
37
-
38
-
39
-
40
-
41
-
42
-
43
-
44
-
45
-
46
-
47
-
48
-
49
-
50
-
51
-
52
-
53
-
54
-
55
-
56
-
57
-
58
-
59
-
60
-
61
-
62
-
63
 |
 |
