Sub-Zero 427R Wine Storage Installation Instructions - Page 29
Models 427G and 427RG Installation, Side Panels, Complete the Installation
 |
View all Sub-Zero 427R manuals
Add to My Manuals
Save this manual to your list of manuals |
Page 29 highlights
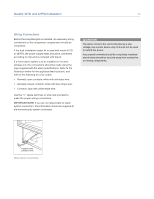
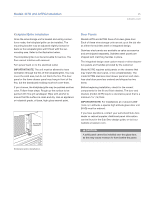
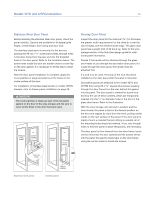
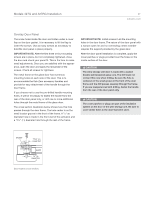
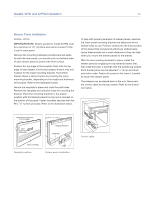
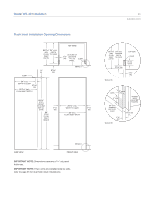
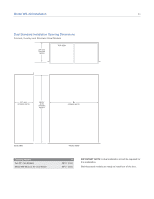
Models 427G and 427RG Installation 29 subzero.com Side Panels Side panels for models 427G and 427RG are not attached to the unit. You must securely fasten the panels to the adjacent cabinets and floor. Panels should be fastened to the floor and walls using L-brackets (hardware not provided). To help you move the unit into place, rout out an area in the floor so the L-bracket will sit flush with the floor level. Complete the Installation ANCHORING Brackets and screws are provided for mounting the unit to adjoining cabinets and side panels. Each unit has four side-mounting clips on each side. For dual installations or installations where you are not attaching to a side wall, you must remove the sidemounting clips before moving the unit into position. After removing the clips, replace the screws into the appliance. A dual installation heater kit is necessary for anchoring two model 427G, 427RG or integrated units together. The kit is available through your authorized Sub-Zero dealer, or call Sub-Zero customer care at 800-222-7820. You can also visit our website at subzero.com. OPTIONAL 90° DOOR STOP The door of models 427G and 427RG opens to 105°. A 90° door stop is built into the hinge system for installations where the door opening must be limited. To engage the door stop, use the blade edge of a standard screwdriver and rotate the cam in the center portion of the hinge. You must make this adjustment to both the bottom and top hinge. Refer to the illustration below. INSTALLATION CHECKLIST When you have completed installation of the model 427G or 427RG wine storage unit, refer to page 54 for an installation checklist and page 55 for service information. 90° door stop.
-
 1
1 -
2
-
3
-
4
-
5
-
6
-
7
-
8
-
9
-
10
-
11
-
12
-
13
-
14
-
15
-
16
-
17
-
18
-
19
-
20
-
21
-
22
-
23
-
 24
24 -
 25
25 -
 26
26 -
 27
27 -
 28
28 -
 29
29 -
 30
30 -
 31
31 -
 32
32 -
 33
33 -
 34
34 -
35
-
36
-
37
-
38
-
39
-
40
-
41
-
42
-
43
-
44
-
45
-
46
-
47
-
48
-
49
-
50
-
51
-
52
-
53
-
54
-
55
-
56
 |
 |
