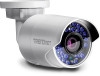
TRENDnet TV-IP322WI Users Guide - Page 20
WiFi Camera Mounting
 |
View all TRENDnet TV-IP322WI manuals
Add to My Manuals
Save this manual to your list of manuals |
Page 20 highlights
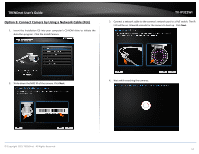
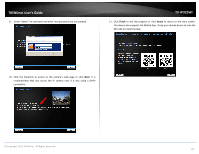
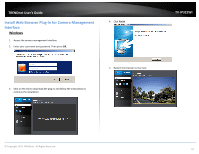
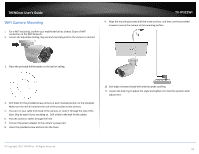
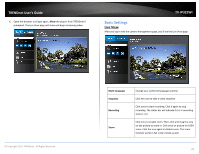
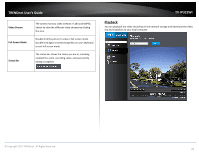
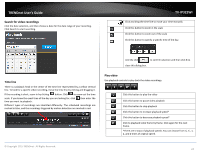
TRENDnet User's Guide WiFi Camera Mounting 1. For a WiFi mounting, confirm your mobile device has at least 2 bars of WiFi connection to the WiFi Network. 2. Loosen the adjustable locking ring and and manually position the camera as desired. TV-IP322WI 9. Align the mounting bracket with the screw anchors, and then use the provided screws to secure the camera to the mounting surface. 3. Place the provided drill template on the wall or ceiling. 4. Drill holes for the provided screw anchors at each marked position on the template. Make sure the drill bit matches the size of the provided screw anchors. 5. You can run your cable from back of the camera, or route it through the side of the base. Skip to step 6 if you are doing so. Drill a hole in the wall for the cables. 6. Pass the camera's cables through the hole. 7. Connect the power adapter to the camera's power port. 8. Insert the provided screw anchors into the holes. 10. Seal edge of camera based with exterior grade caulking. 11. Loosen the lock ring to adjust the angle and tighten it to hold the position after adjustment. © Copyright 2015 TRENDnet. All Rights Reserved. 19
-
 1
1 -
2
-
3
-
4
-
5
-
6
-
7
-
8
-
9
-
10
-
11
-
12
-
13
-
14
-
 15
15 -
 16
16 -
 17
17 -
 18
18 -
 19
19 -
 20
20 -
 21
21 -
 22
22 -
 23
23 -
 24
24 -
 25
25 -
26
-
27
-
28
-
29
-
30
-
31
-
32
-
33
-
34
-
35
-
36
-
37
-
38
-
39
-
40
-
41
-
42
-
43
-
44
-
45
-
46
-
47
-
48
-
49
-
50
-
51
-
52
-
53
-
54
-
55
-
56
-
57
-
58
-
59
-
60
-
61
-
62
 |
 |
