Thermador UCVP36XS Installation Instructions - Page 15
blower - mounted in a remote location
 |
View all Thermador UCVP36XS manuals
Add to My Manuals
Save this manual to your list of manuals |
Page 15 highlights
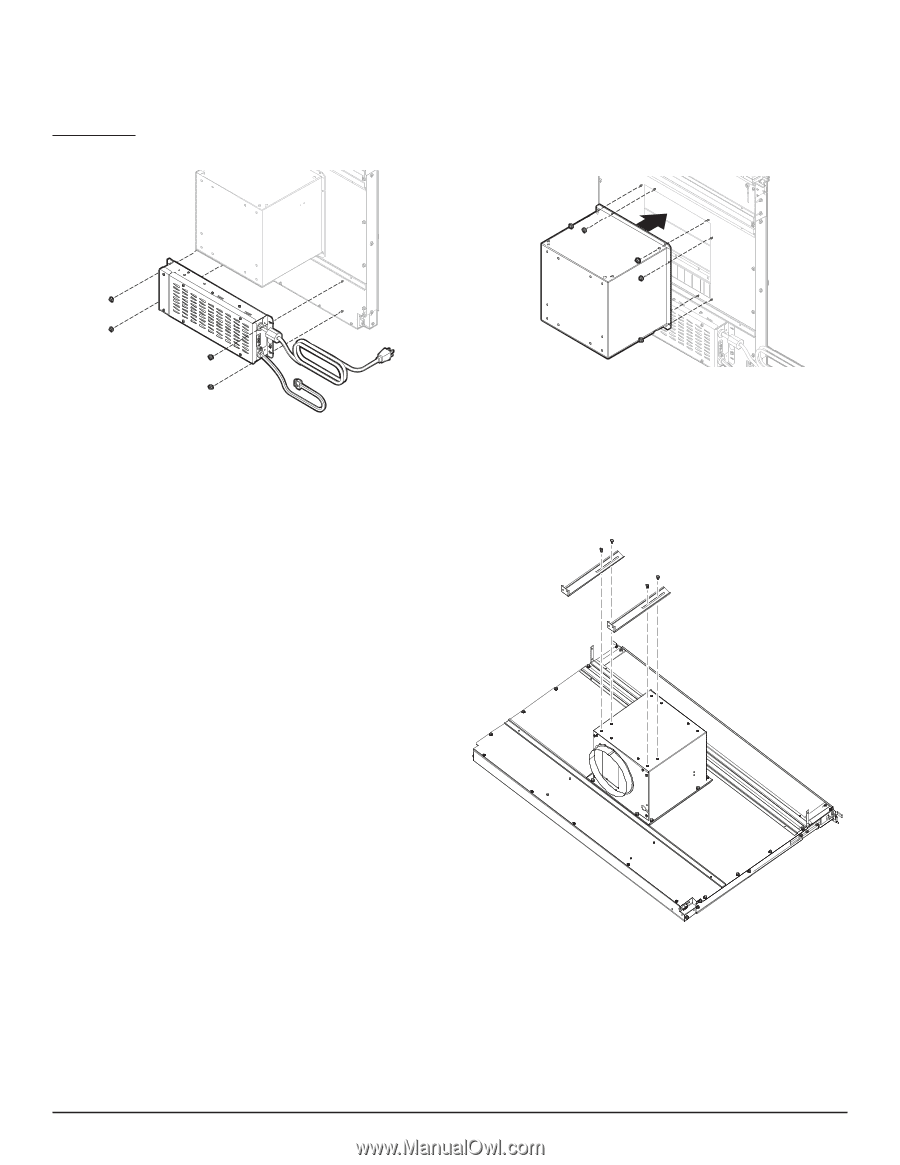
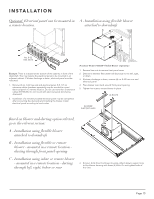
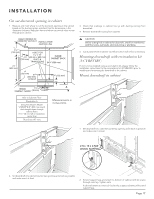
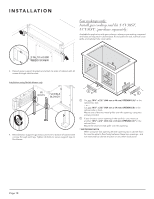
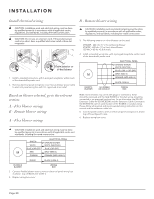
I N S TA L L AT I O N Optional: Electrical panel can be mounted in A - Installation using flexible blower a remote location. attached to downdraft No. 8-32 HEX NUTS Example: There is a drawer at the bottom of the cabinet, in front of the downdraft. This may require the electrical panel to be mounted in an adjacent cabinet. If blower discharge is down, electrical panel must be relocated. 1. Remove (4) no. 8-32 hex nuts and electrical panel. 5-ft. (1.5 m) extension cables (purchase separately) may be needed to mount electrical panel in a remote location. Do not use more than 2 extension cables (EXTNCE5). Do not mount with electrical panel slots facing downward. 2. Installation of a remotely located electrical panel may be completed after connecting the ductwork and installing the blower. Install electrical panel according to local codes. (Purchase Model VTD600P Flexible Blower separately.) 1. Remove hex nuts to remove front panel cover. 2. Determine whether lex blower will discharge to the left, right, or down. 3. If blower discharge is down, remove (4) no. 8-32 hex nuts and electrical panel. 4. Place blower over studs around front panel opening. 5. Tighten hex nuts to secure blower in place. (4) BOLTS BLOWER SUPPORT LEGS Based on blower and ducting option selected, go to the relevent section: A - Installation using flexible blower attached to downdraft B - Installation using flexible or remote blower - mounted in a remote location ducting through front panel opening C - Installation using inline or remote blower - mounted in a remote location - ducting through left, right, below or rear 6. Remove bolts from lex blower housing. Attach blower support legs to lex blower housing with these (4) bolts. Do not tighten bolts at this time. Page 15
-
 1
1 -
2
-
3
-
4
-
5
-
6
-
7
-
8
-
9
-
 10
10 -
 11
11 -
 12
12 -
 13
13 -
 14
14 -
 15
15 -
 16
16 -
 17
17 -
 18
18 -
 19
19 -
 20
20 -
21
-
22
-
23
-
24
-
25
-
26
-
27
-
28
-
29
-
30
-
31
-
32
-
33
-
34
-
35
-
36
-
37
-
38
-
39
-
40
-
41
-
42
-
43
-
44
-
45
-
46
-
47
-
48
-
49
-
50
-
51
-
52
-
53
-
54
-
55
-
56
-
57
-
58
-
59
-
60
-
61
-
62
-
63
-
64
 |
 |