Thermador UCVP36XS Installation Instructions - Page 17
Cut out ductwork opening in cabinet, Mounting downdraft with recirculation kit, UCVRECIRC, Mount
 |
View all Thermador UCVP36XS manuals
Add to My Manuals
Save this manual to your list of manuals |
Page 17 highlights
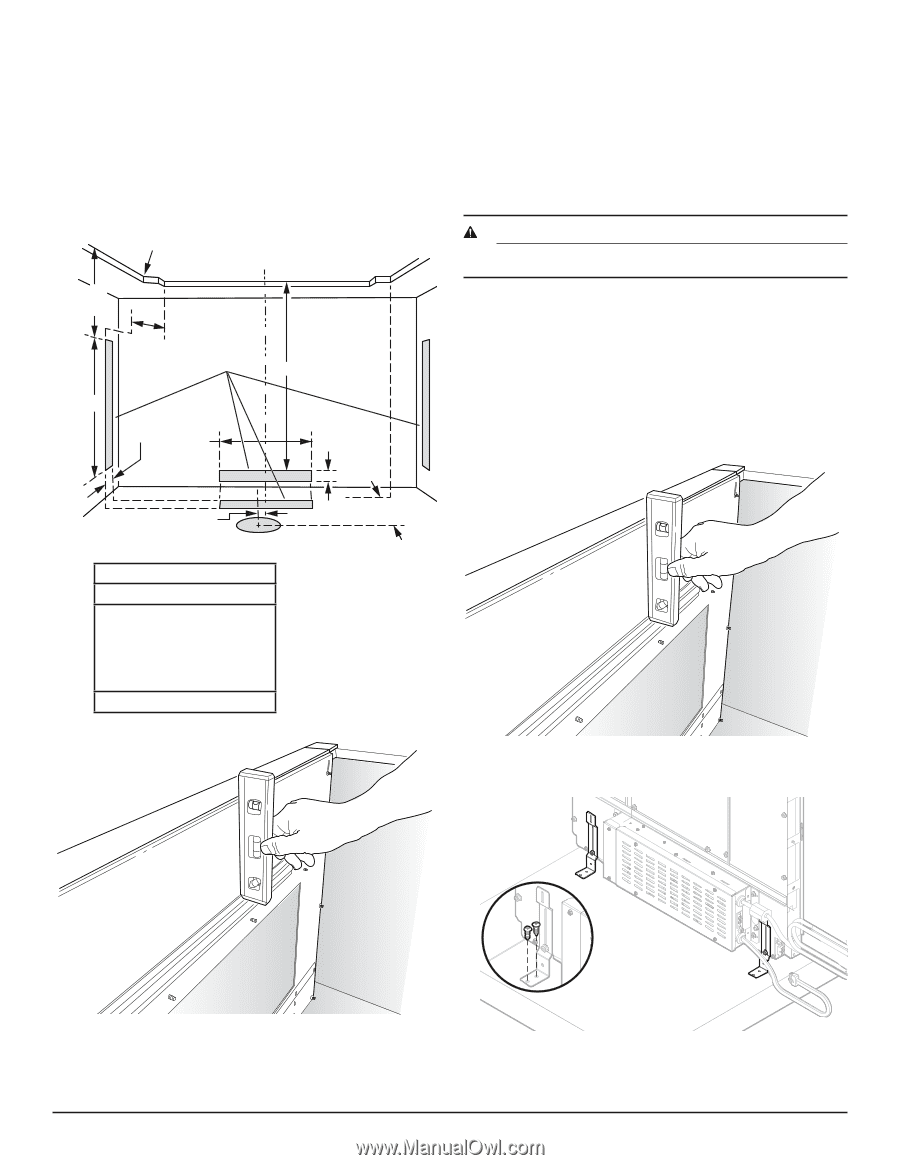
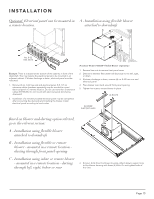
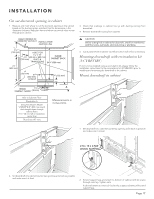
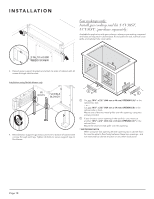
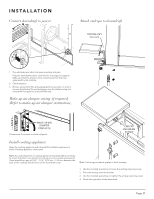
I N S TA L L AT I O N Cut out ductwork opening in cabinet 1. Measure and mark where to cut the ductwork opening in the cabinet based on the ducting option selected. Use the dimensions in the illustration below to help plan how and where to provide duct access through your cabinet. REAR CORNER OF COOKTOP CUT-OUT INSTALLATION CENTER LINE 5 7/8" (149 mm) HOLE FOR 17/8" x 19" 41/8" (48 mm x 483 mm) (105 mm) DUCT & INSIDE CABINET BACK TRANSITIONS 24¾" (629 mm) 21" (533 mm) 4" (102 mm) 21" (533 mm) centered 4" (102 mm) 3. Check that markings in cabinet line up with ducting coming from downdraft. 4. Remove downdraft housing from cabinet. CAUTION Before cutting hole in cabinet for ductwork, check for interference with loor joists, wall studs, electrical wiring or plumbing. 5. Cut ductwork hole in cabinet - as well as holes in wall or loor a necessary. Mounting downdraft with recirculation kit (UCVRECIRC) If unit is to be installed using a recirculation kit, please follow the installation instructions for the recirculation kit (UCVRECIRC) prior to installing and mounting the downdraft in the cabinet. Mount downdraft in cabinet INSIDE CABINET FLOOR 1½" (38 mm) Hole in Cabinet Floor Dimension A Using Flex Blower (Model VTD600P & 8" (203 mm) round duct straight down through cabinet loor.) (1½"/ 38 mm left of installation center line) 7¾ inches (197 mm) A Measurements in inches (mm). 1. Set downdraft into cabinet/countertop opening as far back as possible and make sure it is level. 2 No. 10 x 0.5010 WOOD SCREW 1 2. Set downdraft into cabinet/countertop opening as far back as possible and make sure it is level. 2. Extend support legs and attach to bottom of cabinet with (2) screws through each leg. Tighten nuts. If cabinet bottom is removed: Use blocks as spacers between loor and support legs. Page 17
-
 1
1 -
2
-
3
-
4
-
5
-
6
-
7
-
8
-
9
-
10
-
11
-
 12
12 -
 13
13 -
 14
14 -
 15
15 -
 16
16 -
 17
17 -
 18
18 -
 19
19 -
 20
20 -
 21
21 -
 22
22 -
23
-
24
-
25
-
26
-
27
-
28
-
29
-
30
-
31
-
32
-
33
-
34
-
35
-
36
-
37
-
38
-
39
-
40
-
41
-
42
-
43
-
44
-
45
-
46
-
47
-
48
-
49
-
50
-
51
-
52
-
53
-
54
-
55
-
56
-
57
-
58
-
59
-
60
-
61
-
62
-
63
-
64
 |
 |