Toshiba Qosmio X300 PQX32A-04S00J Users Manual AU/NZ - Page 154
Password, Display, Power On Display, Boot Priority, Setup, Boot Priority Options
 |
View all Toshiba Qosmio X300 PQX32A-04S00J manuals
Add to My Manuals
Save this manual to your list of manuals |
Page 154 highlights
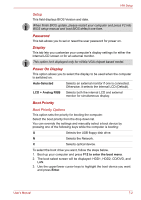
HW Setup Setup This field displays BIOS Version and date. When finish BIOS update, please restart your computer and press F2 into BIOS setup manual and load BIOS default one time. Password This tab allows you to set or reset the user password for power on. Display This tab lets you customize your computer's display settings for either the internal LCD screen or for an external monitor. This option isn't displayed only for nVidia VGA chipset based model. Power On Display This option allows you to select the display to be used when the computer is switched on. Auto-Selected Selects an external monitor if one is connected. Otherwise, it selects the internal LCD (Default). LCD + Analog RGB Selects both the internal LCD and external monitor for simultaneous display. Boot Priority Boot Priority Options This option sets the priority for booting the computer. Select the boot priority from the drop down list. You can override the settings and manually select a boot device by pressing one of the following keys while the computer is booting: U Selects the USB floppy disk drive. N Selects the Network. C Selects optical device. To select the boot drive you want, follow the steps below. 1. Boot-up your computer and press F12 to enter the boot menu. 2. The boot select screen will be displayed: HDD1, HDD2, CD/DVD, and LAN. 3. Use the upper/lower cursor keys to highlight the boot device you want and press Enter. User's Manual 7-2
-
 1
1 -
2
-
3
-
4
-
5
-
6
-
7
-
8
-
9
-
10
-
11
-
12
-
13
-
14
-
15
-
16
-
17
-
18
-
19
-
20
-
21
-
22
-
23
-
24
-
25
-
26
-
27
-
28
-
29
-
30
-
31
-
32
-
33
-
34
-
35
-
36
-
37
-
38
-
39
-
40
-
41
-
42
-
43
-
44
-
45
-
46
-
47
-
48
-
49
-
50
-
51
-
52
-
53
-
54
-
55
-
56
-
57
-
58
-
59
-
60
-
61
-
62
-
63
-
64
-
65
-
66
-
67
-
68
-
69
-
70
-
71
-
72
-
73
-
74
-
75
-
76
-
77
-
78
-
79
-
80
-
81
-
82
-
83
-
84
-
85
-
86
-
87
-
88
-
89
-
90
-
91
-
92
-
93
-
94
-
95
-
96
-
97
-
98
-
99
-
100
-
101
-
102
-
103
-
104
-
105
-
106
-
107
-
108
-
109
-
110
-
111
-
112
-
113
-
114
-
115
-
116
-
117
-
118
-
119
-
120
-
121
-
122
-
123
-
124
-
125
-
126
-
127
-
128
-
129
-
130
-
131
-
132
-
133
-
134
-
135
-
136
-
137
-
138
-
139
-
140
-
141
-
142
-
143
-
144
-
145
-
146
-
147
-
148
-
 149
149 -
 150
150 -
 151
151 -
 152
152 -
 153
153 -
 154
154 -
 155
155 -
 156
156 -
 157
157 -
 158
158 -
 159
159 -
160
-
161
-
162
-
163
-
164
-
165
-
166
-
167
-
168
-
169
-
170
-
171
-
172
-
173
-
174
-
175
-
176
-
177
-
178
-
179
-
180
-
181
-
182
-
183
-
184
-
185
-
186
-
187
-
188
-
189
-
190
-
191
-
192
-
193
-
194
-
195
-
196
-
197
-
198
-
199
-
200
-
201
-
202
-
203
-
204
-
205
-
206
-
207
-
208
-
209
-
210
-
211
-
212
-
213
-
214
-
215
-
216
-
217
-
218
-
219
-
220
-
221
-
222
-
223
-
224
-
225
-
226
-
227
-
228
-
229
-
230
-
231
-
232
-
233
-
234
-
235
-
236
-
237
-
238
-
239
-
240
-
241
-
242
-
243
-
244
-
245
 |
 |
