Toshiba Qosmio X300 PQX32A-04S00J Users Manual AU/NZ - Page 160
Removing an ExpressCard, Safely Remove Hardware, ExpressCard
 |
View all Toshiba Qosmio X300 PQX32A-04S00J manuals
Add to My Manuals
Save this manual to your list of manuals |
Page 160 highlights
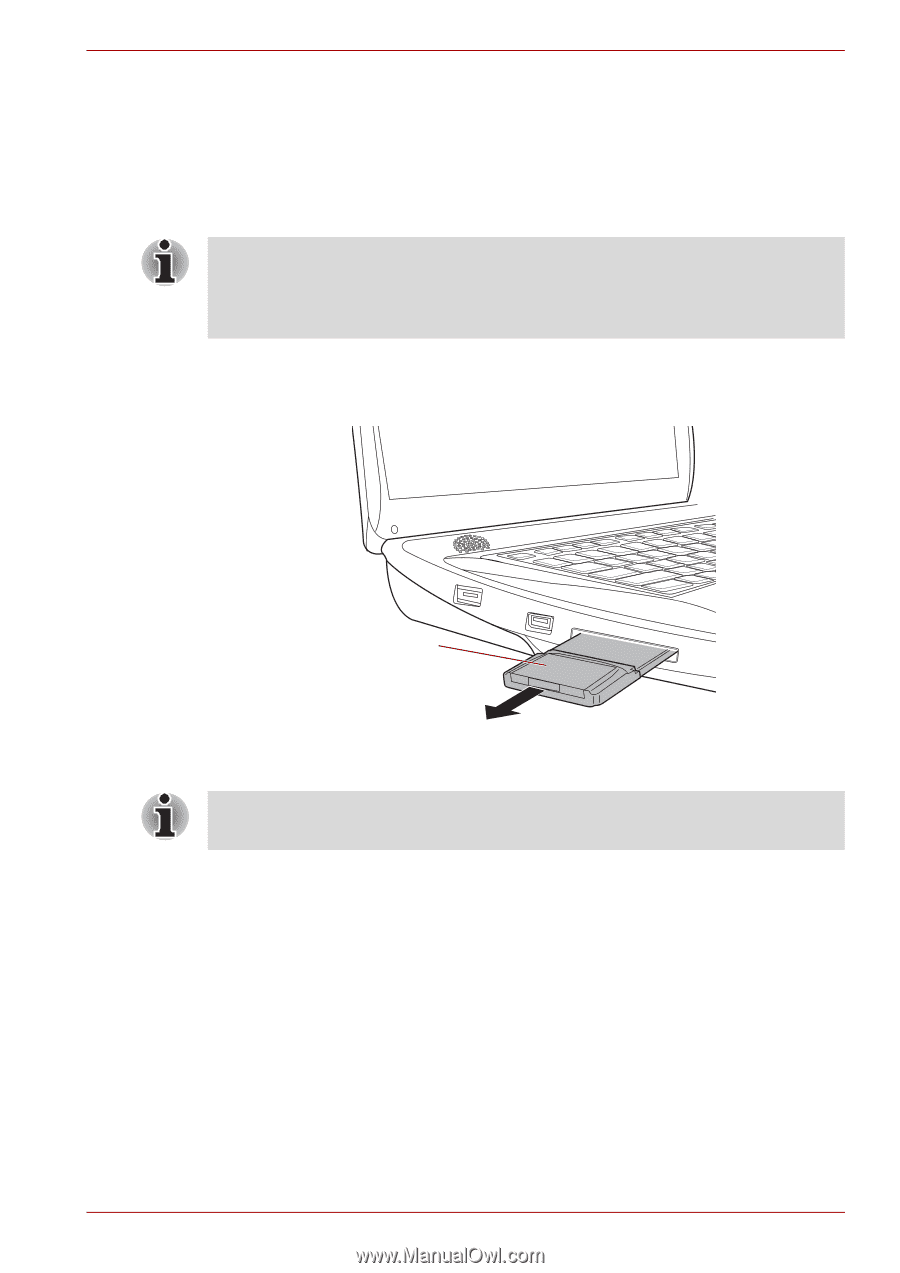
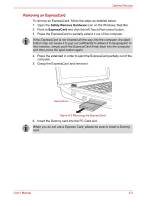
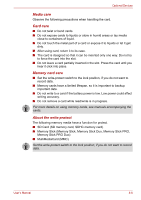
Optional Devices Removing an ExpressCard To remove an ExpressCard, follow the steps as detailed below. 1. Open the Safely Remove Hardware icon on the Windows Task Bar. 2. Point to ExpressCard and click the left Touch Pad control button. 3. Press the ExpressCard to partially extend it out of the computer. If the ExpressCard is not inserted all the way into the computer, the eject button may not cause it to pop out sufficiently to allows it to be grasped. In this instance, simply push the ExpressCard firmly back into the computer and then press the eject button again. 4. Press the extended in order to eject the ExpressCard partially out of the computer. 5. Grasp the ExpressCard and remove it. ExpressCard Figure 8-2 Removing the ExpressCard 6. Insert the Dummy card into the PC Card slot. When you do not use a Express Card, please be sure to insert a Dummy card. User's Manual 8-3
-
 1
1 -
2
-
3
-
4
-
5
-
6
-
7
-
8
-
9
-
10
-
11
-
12
-
13
-
14
-
15
-
16
-
17
-
18
-
19
-
20
-
21
-
22
-
23
-
24
-
25
-
26
-
27
-
28
-
29
-
30
-
31
-
32
-
33
-
34
-
35
-
36
-
37
-
38
-
39
-
40
-
41
-
42
-
43
-
44
-
45
-
46
-
47
-
48
-
49
-
50
-
51
-
52
-
53
-
54
-
55
-
56
-
57
-
58
-
59
-
60
-
61
-
62
-
63
-
64
-
65
-
66
-
67
-
68
-
69
-
70
-
71
-
72
-
73
-
74
-
75
-
76
-
77
-
78
-
79
-
80
-
81
-
82
-
83
-
84
-
85
-
86
-
87
-
88
-
89
-
90
-
91
-
92
-
93
-
94
-
95
-
96
-
97
-
98
-
99
-
100
-
101
-
102
-
103
-
104
-
105
-
106
-
107
-
108
-
109
-
110
-
111
-
112
-
113
-
114
-
115
-
116
-
117
-
118
-
119
-
120
-
121
-
122
-
123
-
124
-
125
-
126
-
127
-
128
-
129
-
130
-
131
-
132
-
133
-
134
-
135
-
136
-
137
-
138
-
139
-
140
-
141
-
142
-
143
-
144
-
145
-
146
-
147
-
148
-
149
-
150
-
151
-
152
-
153
-
154
-
 155
155 -
 156
156 -
 157
157 -
 158
158 -
 159
159 -
 160
160 -
 161
161 -
 162
162 -
 163
163 -
 164
164 -
 165
165 -
166
-
167
-
168
-
169
-
170
-
171
-
172
-
173
-
174
-
175
-
176
-
177
-
178
-
179
-
180
-
181
-
182
-
183
-
184
-
185
-
186
-
187
-
188
-
189
-
190
-
191
-
192
-
193
-
194
-
195
-
196
-
197
-
198
-
199
-
200
-
201
-
202
-
203
-
204
-
205
-
206
-
207
-
208
-
209
-
210
-
211
-
212
-
213
-
214
-
215
-
216
-
217
-
218
-
219
-
220
-
221
-
222
-
223
-
224
-
225
-
226
-
227
-
228
-
229
-
230
-
231
-
232
-
233
-
234
-
235
-
236
-
237
-
238
-
239
-
240
-
241
-
242
-
243
-
244
-
245
 |
 |