Toshiba Qosmio X300 PQX32A-04S00J Users Manual AU/NZ - Page 78
Enter Setup, In Touch with Tomorrow TOSHIBA, Qosmio
 |
View all Toshiba Qosmio X300 PQX32A-04S00J manuals
Add to My Manuals
Save this manual to your list of manuals |
Page 78 highlights
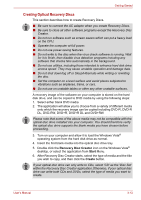
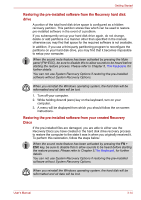
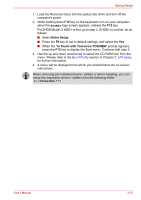
Getting Started 1. Load the Recovery Discs into the optical disc drive and turn off the computer's power. 2. While holding down F12 key on the keyboard, turn on your computer when the Qosmio logo screen appears, release the F12 key. For 2HDD Model, If HDD1 is first, go to step 3. If HDD1 is not first, do as follows: ■ Select Enter Setup. ■ Press the F9 key to set to default settings, and select the Yes. ■ When the "In Touch with Tomorrow TOSHIBA" prompt appears, press the F12 key to display the Boot menu. Continue with step 3. 3. Use the up and down cursors key to select the CD-ROM icon from the menu. Please refer to the Boot Priority section in Chapter 7, HW Setup for further information. 4. A menu will be displayed from which you should follow the on-screen instructions. When removing pre-installed drivers / utilities or when installing, you can setup the respective drivers / utilities from the following folder. C:\TOSAPINS\*** User's Manual 3-15
-
 1
1 -
2
-
3
-
4
-
5
-
6
-
7
-
8
-
9
-
10
-
11
-
12
-
13
-
14
-
15
-
16
-
17
-
18
-
19
-
20
-
21
-
22
-
23
-
24
-
25
-
26
-
27
-
28
-
29
-
30
-
31
-
32
-
33
-
34
-
35
-
36
-
37
-
38
-
39
-
40
-
41
-
42
-
43
-
44
-
45
-
46
-
47
-
48
-
49
-
50
-
51
-
52
-
53
-
54
-
55
-
56
-
57
-
58
-
59
-
60
-
61
-
62
-
63
-
64
-
65
-
66
-
67
-
68
-
69
-
70
-
71
-
72
-
 73
73 -
 74
74 -
 75
75 -
 76
76 -
 77
77 -
 78
78 -
 79
79 -
 80
80 -
 81
81 -
 82
82 -
 83
83 -
84
-
85
-
86
-
87
-
88
-
89
-
90
-
91
-
92
-
93
-
94
-
95
-
96
-
97
-
98
-
99
-
100
-
101
-
102
-
103
-
104
-
105
-
106
-
107
-
108
-
109
-
110
-
111
-
112
-
113
-
114
-
115
-
116
-
117
-
118
-
119
-
120
-
121
-
122
-
123
-
124
-
125
-
126
-
127
-
128
-
129
-
130
-
131
-
132
-
133
-
134
-
135
-
136
-
137
-
138
-
139
-
140
-
141
-
142
-
143
-
144
-
145
-
146
-
147
-
148
-
149
-
150
-
151
-
152
-
153
-
154
-
155
-
156
-
157
-
158
-
159
-
160
-
161
-
162
-
163
-
164
-
165
-
166
-
167
-
168
-
169
-
170
-
171
-
172
-
173
-
174
-
175
-
176
-
177
-
178
-
179
-
180
-
181
-
182
-
183
-
184
-
185
-
186
-
187
-
188
-
189
-
190
-
191
-
192
-
193
-
194
-
195
-
196
-
197
-
198
-
199
-
200
-
201
-
202
-
203
-
204
-
205
-
206
-
207
-
208
-
209
-
210
-
211
-
212
-
213
-
214
-
215
-
216
-
217
-
218
-
219
-
220
-
221
-
222
-
223
-
224
-
225
-
226
-
227
-
228
-
229
-
230
-
231
-
232
-
233
-
234
-
235
-
236
-
237
-
238
-
239
-
240
-
241
-
242
-
243
-
244
-
245
 |
 |