Toshiba Satellite A10-S127 Satellite A10/A15 Users Guide (PDF) - Page 195
Device Config - Shows the Device configuration, LAN - Lets you enable or disable LAN features. - bios
 |
View all Toshiba Satellite A10-S127 manuals
Add to My Manuals
Save this manual to your list of manuals |
Page 195 highlights
195 Toshiba Utilities TOSHIBA Console The TOSHIBA HWSetup window appears with tabs for the following: ❖ Display - Allows you to select the built-in LCD and/or external monitor when the computer powers on. ❖ Boot Priority - Allows you to change the sequence in which your computer searches the drives for the operating system. You can also manually choose the Boot Priority by pressing the power button, then quickly pressing the F12 key, or the right or left arrow keys. Select the boot device by pressing the right or left arrow keys or the F12 key. Then press the Enter key. Since the system is a quick-booting system, you must press the arrow keys or the F12 key immediately after pressing the power button. ❖ Keyboard - Allows you to enable or disable the "wakeup on keyboard" feature. The feature allows you to "wake" the machine from Standby by pressing a key. ❖ USB - Allows you to enable or disable USB Legacy Emulation. ❖ LAN - Lets you enable or disable LAN features. ❖ General - Shows the BIOS version, and allows you to set BIOS defaults. ❖ Password - Allows you to set or reset a user password for the power-on process and for instant security. ❖ Device Config - Shows the Device configuration options. ❖ Parallel/Printer - Allows you to configure the printer port type. Choose the desired tab and accompanying options.
-
 1
1 -
2
-
3
-
4
-
5
-
6
-
7
-
8
-
9
-
10
-
11
-
12
-
13
-
14
-
15
-
16
-
17
-
18
-
19
-
20
-
21
-
22
-
23
-
24
-
25
-
26
-
27
-
28
-
29
-
30
-
31
-
32
-
33
-
34
-
35
-
36
-
37
-
38
-
39
-
40
-
41
-
42
-
43
-
44
-
45
-
46
-
47
-
48
-
49
-
50
-
51
-
52
-
53
-
54
-
55
-
56
-
57
-
58
-
59
-
60
-
61
-
62
-
63
-
64
-
65
-
66
-
67
-
68
-
69
-
70
-
71
-
72
-
73
-
74
-
75
-
76
-
77
-
78
-
79
-
80
-
81
-
82
-
83
-
84
-
85
-
86
-
87
-
88
-
89
-
90
-
91
-
92
-
93
-
94
-
95
-
96
-
97
-
98
-
99
-
100
-
101
-
102
-
103
-
104
-
105
-
106
-
107
-
108
-
109
-
110
-
111
-
112
-
113
-
114
-
115
-
116
-
117
-
118
-
119
-
120
-
121
-
122
-
123
-
124
-
125
-
126
-
127
-
128
-
129
-
130
-
131
-
132
-
133
-
134
-
135
-
136
-
137
-
138
-
139
-
140
-
141
-
142
-
143
-
144
-
145
-
146
-
147
-
148
-
149
-
150
-
151
-
152
-
153
-
154
-
155
-
156
-
157
-
158
-
159
-
160
-
161
-
162
-
163
-
164
-
165
-
166
-
167
-
168
-
169
-
170
-
171
-
172
-
173
-
174
-
175
-
176
-
177
-
178
-
179
-
180
-
181
-
182
-
183
-
184
-
185
-
186
-
187
-
188
-
189
-
 190
190 -
 191
191 -
 192
192 -
 193
193 -
 194
194 -
 195
195 -
 196
196 -
 197
197 -
 198
198 -
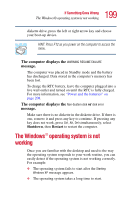 199
199 -
 200
200 -
201
-
202
-
203
-
204
-
205
-
206
-
207
-
208
-
209
-
210
-
211
-
212
-
213
-
214
-
215
-
216
-
217
-
218
-
219
-
220
-
221
-
222
-
223
-
224
-
225
-
226
-
227
-
228
-
229
-
230
-
231
-
232
-
233
-
234
-
235
-
236
-
237
-
238
-
239
-
240
-
241
-
242
-
243
-
244
-
245
-
246
-
247
-
248
-
249
-
250
-
251
-
252
-
253
-
254
-
255
-
256
-
257
-
258
-
259
-
260
-
261
-
262
 |
 |
