WestBend 47413 Instruction Manual - Page 7
Cleaning Your Breadmaker
 |
View all WestBend 47413 manuals
Add to My Manuals
Save this manual to your list of manuals |
Page 7 highlights
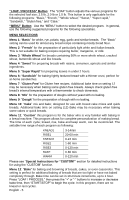
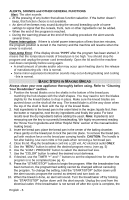
breadmaker will automatically go into a one hour "Keep Warm" period. If the machine is not turned off after the end of the "Keep Warm" period, the machine will turn itself off. 11. Remove the bread pan. CAUTION: The handle is hot after baking. Use oven mitts or hot pads when removing a hot bread pan. 12. Invert the bread pan and shake gently until the loaf falls out. Place the bread on a rack to cool 15 to 20 minutes. The knead blades will normally stay in the bread pan when the bread is removed, but may on occasion slide out in the bread. If a knead blade is inside the loaf, remove with the included hook before slicing. CAUTION: The knead blade is very hot, remove with care. If making another loaf of bread right away, be sure the machine is turned off, unplugged, and allowed to cool for 15 to 20 minutes with the lid open. Special Instructions for "CUSTOM": The "CUSTOM" setting is perfect for the user who is familiar with the intricacies of making bread at home and wants to customize their own settings. 1. Press the "LOAF / PROCESS" button once and "KNEAD1" will appear on the display; then press the the TIMER "+" and "-" buttons to adjust the minutes. Press "LOAF / PROCESS" again to confirm the time for the first kneading cycle. Press "LOAF / PROCESS" again to advance to the next step. Note: To advance the time more rapidly, press and hold the TIMER "+" and "-" buttons. 2. "RISE1" will now show on the display. Press the the TIMER "+" and "-" buttons to adjust the minutes. Once the desired time has been set, press "LOAF / PROCESS" again to advance. 3. Continue until you have customized all settings. Press "START/STOP" to exit programming, then press again to begin the cycle. Note: Your breadmaker's memory can remember your customized homemade settings unless power is lost for more than 5 minutes. When "CUSTOM" is first selected, the default setting is the same as BASIC. High Altitude Adjustment: Reduced air pressure at high altitudes causes yeast gases to expand more rapidly and the dough to rise more quickly. The dough can rise so much that when it begins to bake, it will collapse due to overstretching of the gluten structure. To slow the rising of the dough, reduce the amount of yeast by ¼ teaspoon at a time until you find the right amount. You can also reduce the amount of liquid by a teaspoon or two. Some experimentation will be needed when using your breadmaker at high altitudes. CLEANING YOUR BREADMAKER 1. Unplug the cord from the electrical outlet and allow the appliance to cool completely before cleaning. 2. After the bread is removed from the bread pan, and the pan has cooled, fill it halffull with warm water and a small amount of dish soap. Allow the bread pan to soak for 5 to 20 minutes, or until the knead blades can be lifted off of the shafts. You may need to twist the knead blades slightly to loosen. If the knead blades are difficult to remove after soaking, secure the cross bar on the underside of the bread pan while twisting the knead blades to loosen. Wash the inside of the bread pan and knead blades with a soft cloth, rinse and dry. Use a mild detergent. Never use chemical cleaning agents, oven cleaners, abrasive scouring pads, or cleansers on the bread pan or knead blades, as damage to the coating or finish can occur. Replace the knead blades on the shaft. 3. Never immerse the bread pan in water or wash in an automatic dishwasher as damage to the bearing that turns the knead blade can occur. Wipe the inside of the oven chamber and the outside surfaces of the breadmaker with a damp cloth English - 7
-
 1
1 -
 2
2 -
 3
3 -
 4
4 -
 5
5 -
 6
6 -
 7
7 -
 8
8 -
 9
9 -
 10
10 -
 11
11 -
 12
12 -
13
-
14
-
15
-
16
-
17
-
18
-
19
-
20
-
21
-
22
-
23
-
24
-
25
-
26
-
27
-
28
-
29
-
30
-
31
-
32
-
33
-
34
-
35
-
36
-
37
-
38
-
39
-
40
-
41
-
42
-
43
-
44
-
45
-
46
-
47
-
48
-
49
-
50
-
51
-
52
-
53
-
54
-
55
-
56
-
57
-
58
-
59
-
60
-
61
-
62
-
63
-
64
-
65
-
66
-
67
-
68
 |
 |
