Yamaha CVP-79A Owner's Manual - Page 86
Other Song Recording Functions
 |
View all Yamaha CVP-79A manuals
Add to My Manuals
Save this manual to your list of manuals |
Page 86 highlights
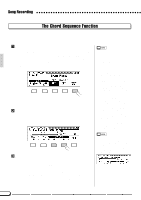
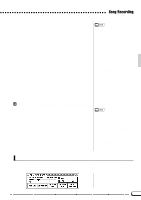
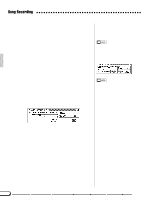
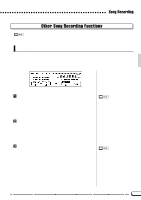
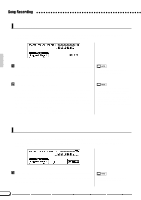
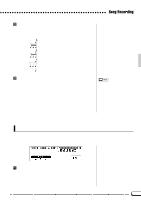
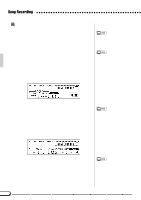
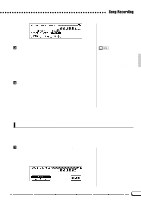
Song Recording Other Song Recording Functions • Track Mix, Track Delete, Track Quantize, Initial Edit, and Rename functions, described below, cannot be used when no disk is in the disk drive. Track Mix The TRACK MIX function combines the data from two specified tracks and places the result in a third specified track. The TRACK MIX function is accessed via the RECORD [TRACK MIX] display (RECORD display page 4). ZSpecify the Tracks to be Mixed Use the TRK A and TRK B LCD buttons - or the data dial or [+]/[-] buttons once the TRK A or TRK B parameter has been selected - to specify the tracks you want to mix. The initial voices used for the A and B tracks are shown along with the track number. XSpecify the Destination Track Use the TRK C LCD button - or the data dial or [+]/[-] buttons once the TRK C parameter has been selected - to specify the track you want the mixed data to be placed in. Any previous data in the destination track (TRK C) will be erased. • Only the data-containing tracks will appear and can be selected for TRK A and B. In addition "no track" ("- -") can also be selected for TRK B. - In this case the result will be the copy of TRK A to TRK C. • The initial data and all data other than note data is taken from that of track A. CExecute the Track Mix Operation Press the MIX LCD button to begin execution of the track mix operation. The "Are you sure?" confirmation prompt will appear. Press YES to mix the specified tracks or NO to cancel the operation. When this is done the MIX LCD button will change to UNDO, allowing you to undo the track mix operation and return to the pre-mixed data before selecting a different track or exiting from the Track Mix mode. Press the [EXIT] button, or the [RECORD] button so that its indicator goes out to exit from the Track Mix function. • A bar graph indicating the progress of the track mix operation will appear while the data is being processed. • You can check if the results are as you expected or not, by starting and stopping playback by using the [START/ STOP] button before the UNDO operation. 83
-
 1
1 -
2
-
3
-
4
-
5
-
6
-
7
-
8
-
9
-
10
-
11
-
12
-
13
-
14
-
15
-
16
-
17
-
18
-
19
-
20
-
21
-
22
-
23
-
24
-
25
-
26
-
27
-
28
-
29
-
30
-
31
-
32
-
33
-
34
-
35
-
36
-
37
-
38
-
39
-
40
-
41
-
42
-
43
-
44
-
45
-
46
-
47
-
48
-
49
-
50
-
51
-
52
-
53
-
54
-
55
-
56
-
57
-
58
-
59
-
60
-
61
-
62
-
63
-
64
-
65
-
66
-
67
-
68
-
69
-
70
-
71
-
72
-
73
-
74
-
75
-
76
-
77
-
78
-
79
-
80
-
 81
81 -
 82
82 -
 83
83 -
 84
84 -
 85
85 -
 86
86 -
 87
87 -
 88
88 -
 89
89 -
 90
90 -
 91
91 -
92
-
93
-
94
-
95
-
96
-
97
-
98
-
99
-
100
-
101
-
102
-
103
-
104
-
105
-
106
-
107
-
108
-
109
-
110
-
111
-
112
-
113
-
114
-
115
-
116
-
117
-
118
-
119
-
120
-
121
-
122
-
123
-
124
-
125
-
126
-
127
-
128
-
129
-
130
-
131
-
132
-
133
-
134
-
135
-
136
-
137
-
138
-
139
-
140
-
141
-
142
-
143
-
144
-
145
-
146
-
147
-
148
-
149
-
150
-
151
-
152
-
153
-
154
-
155
-
156
-
157
-
158
-
159
-
160
-
161
-
162
-
163
 |
 |
