Yamaha CVP-79A Owner's Manual - Page 90
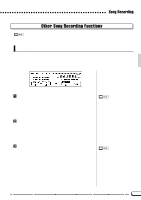
Renaming Song Files
 |
View all Yamaha CVP-79A manuals
Add to My Manuals
Save this manual to your list of manuals |
Page 90 highlights
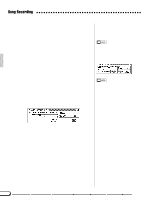
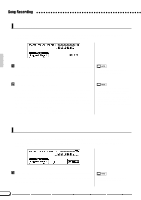
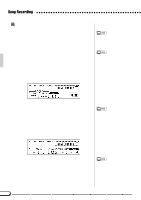
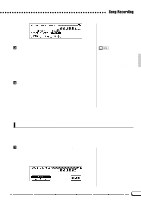
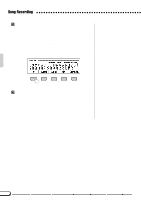
Song Recording CWrite the Changes When all the initial data changes have been made as required, go back to INITIAL EDIT page 1 and press the WRITE LCD button. The "Are you sure?" confirmation display will appear. Press YES to actually make the specified changes, or NO to abort. When this is done the WRITE LCD button will change to UNDO, allowing you to undo the write operation and return to the pre-edited data before making any other edits or exiting from the Initial Edit mode. • All edited data for any number of tracks within one song can be written in a one-time WRITE operation. • You can check if the results are as you expected or not, by starting and stopping playback by using the [START/ STOP] button before the UNDO operation. VExit ...Press the [EXIT] button, or the [RECORD] button so that its indicator goes out to exit from the Initial Edit mode. If you do this after making any edits that you have not yet written, the "Write edited data?" confirmation prompt will appear. Press YES to write the edited data and then exit from the Initial Edit mode, NO to exit without writing the data, or CANCEL to return to the Initial Edit mode. Renaming Song Files This function lets you enter an original name for, or change the existing name of, any song file on the disk recorded by the CVP-79A/69/69A/59S. The rename function is accessed via the RECORD [RENAME] display (RECORD display page 7). ZSelect a Song & Engage the Rename Mode Use the SONG v and w buttons, the data dial, or the [+]/[-] buttons to specify the song you want to rename, then press the RENAME LCD button to go to the NAMING display. 87
-
 1
1 -
2
-
3
-
4
-
5
-
6
-
7
-
8
-
9
-
10
-
11
-
12
-
13
-
14
-
15
-
16
-
17
-
18
-
19
-
20
-
21
-
22
-
23
-
24
-
25
-
26
-
27
-
28
-
29
-
30
-
31
-
32
-
33
-
34
-
35
-
36
-
37
-
38
-
39
-
40
-
41
-
42
-
43
-
44
-
45
-
46
-
47
-
48
-
49
-
50
-
51
-
52
-
53
-
54
-
55
-
56
-
57
-
58
-
59
-
60
-
61
-
62
-
63
-
64
-
65
-
66
-
67
-
68
-
69
-
70
-
71
-
72
-
73
-
74
-
75
-
76
-
77
-
78
-
79
-
80
-
81
-
82
-
83
-
84
-
 85
85 -
 86
86 -
 87
87 -
 88
88 -
 89
89 -
 90
90 -
 91
91 -
 92
92 -
 93
93 -
 94
94 -
 95
95 -
96
-
97
-
98
-
99
-
100
-
101
-
102
-
103
-
104
-
105
-
106
-
107
-
108
-
109
-
110
-
111
-
112
-
113
-
114
-
115
-
116
-
117
-
118
-
119
-
120
-
121
-
122
-
123
-
124
-
125
-
126
-
127
-
128
-
129
-
130
-
131
-
132
-
133
-
134
-
135
-
136
-
137
-
138
-
139
-
140
-
141
-
142
-
143
-
144
-
145
-
146
-
147
-
148
-
149
-
150
-
151
-
152
-
153
-
154
-
155
-
156
-
157
-
158
-
159
-
160
-
161
-
162
-
163
 |
 |
