Yamaha DVX-S100 Owner's Manual - Page 14
Preparation, Preparation Steps - instructions
 |
View all Yamaha DVX-S100 manuals
Add to My Manuals
Save this manual to your list of manuals |
Page 14 highlights
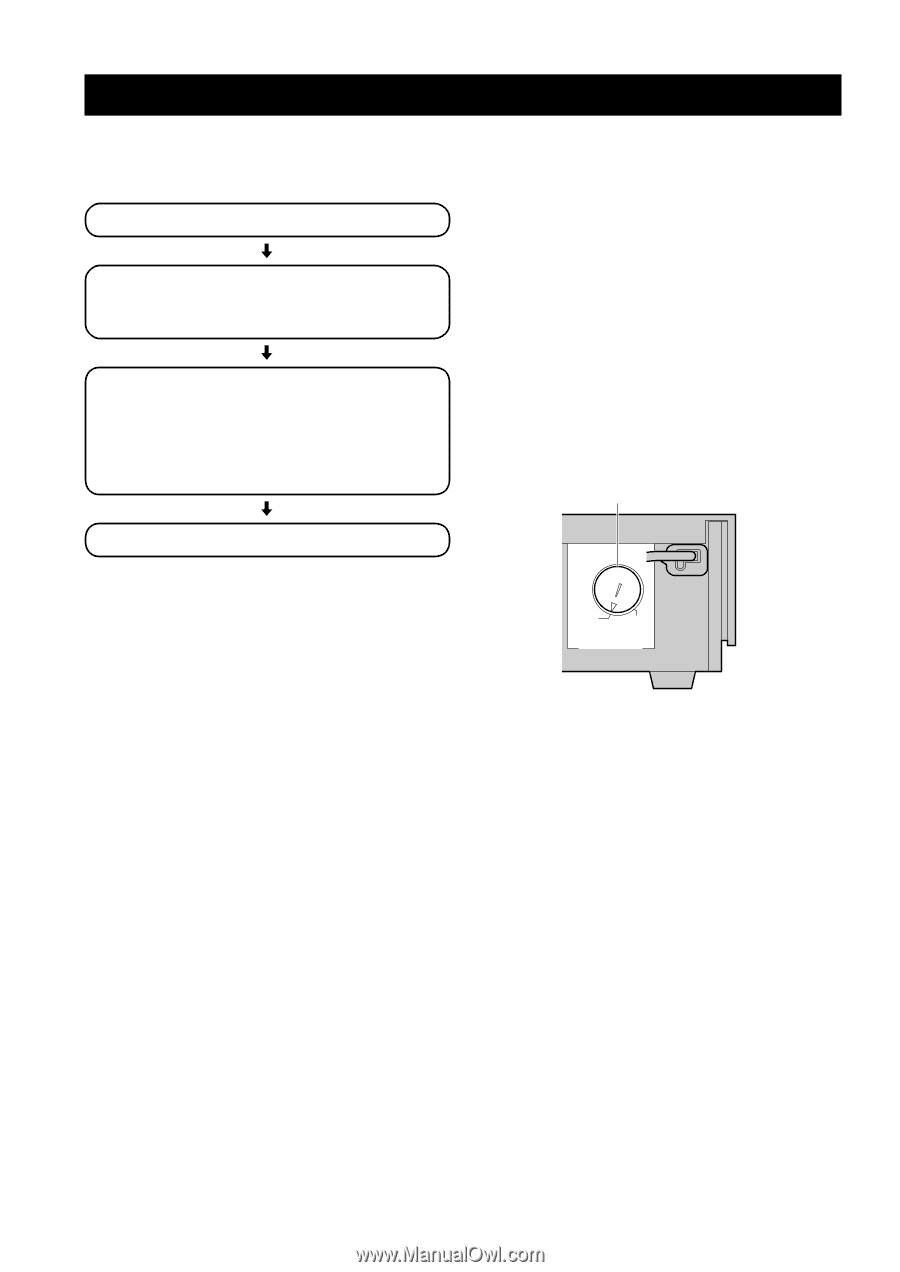
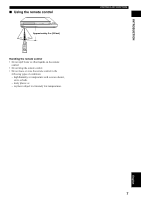
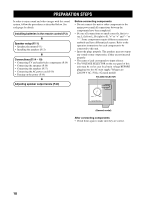
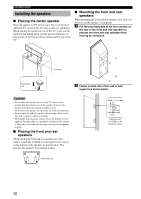
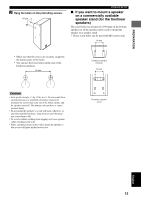
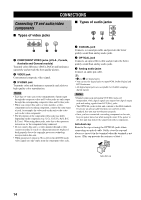
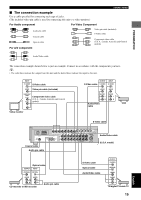
PREPARATION STEPS In order to enjoy sound and video images with this sound system, follow the procedures as described below. See each page for details. Installing batteries in the remote control (P.3) Speaker setup (P.11) • Speaker placement (P.11) • Installing the speakers (P.12) Connections (P.14 - 19) • Connecting TV and audio/video components (P.14) • Connecting the antennas (P.16) • Connecting the speakers (P.17) • Connecting the AC power cord (P.19) • Turning on the power (P.19) Before connecting components • Do not connect this unit or other components to the mains power until all connections between the components have been completed. • Be sure all connections are made correctly, that is to say, L (left) to L, R (right) to R, "+" to "+" and "-" to "-". Some components require different connection methods and have different jack names. Refer to the operation instructions for each component to be connected to this unit. • Insert the plugs properly. The speakers may not output any sound or may output noise if they are not inserted properly. • The name of jack corresponds to input selector. • The VOLTAGE SELECTOR on the rear panel of this unit must be set for your local main voltage BEFORE plugging into the AC main supply. Voltages are 220/240 V AC, 50 Hz. (General model) VOLTAGE SELECTOR Adjusting speaker output levels (P.20) 240V 220V VOLTAGE SELECTOR (General model) After connecting components • Check them again to make sure they are correct. 10
-
 1
1 -
2
-
3
-
4
-
5
-
6
-
7
-
8
-
 9
9 -
 10
10 -
 11
11 -
 12
12 -
 13
13 -
 14
14 -
 15
15 -
 16
16 -
 17
17 -
 18
18 -
 19
19 -
20
-
21
-
22
-
23
-
24
-
25
-
26
-
27
-
28
-
29
-
30
-
31
-
32
-
33
-
34
-
35
-
36
-
37
-
38
-
39
-
40
-
41
-
42
-
43
-
44
-
45
-
46
-
47
-
48
-
49
-
50
-
51
-
52
-
53
-
54
-
55
-
56
-
57
-
58
-
59
-
60
-
61
-
62
-
63
-
64
-
65
-
66
-
67
-
68
-
69
-
70
-
71
-
72
-
73
-
74
-
75
-
76
-
77
-
78
-
79
-
80
-
81
-
82
 |
 |