Yamaha DVX-S100 Owner's Manual - Page 7
Checking The Accessories, Installing Batteries In The Remote Control, Notes On Batteries - cable
 |
View all Yamaha DVX-S100 manuals
Add to My Manuals
Save this manual to your list of manuals |
Page 7 highlights
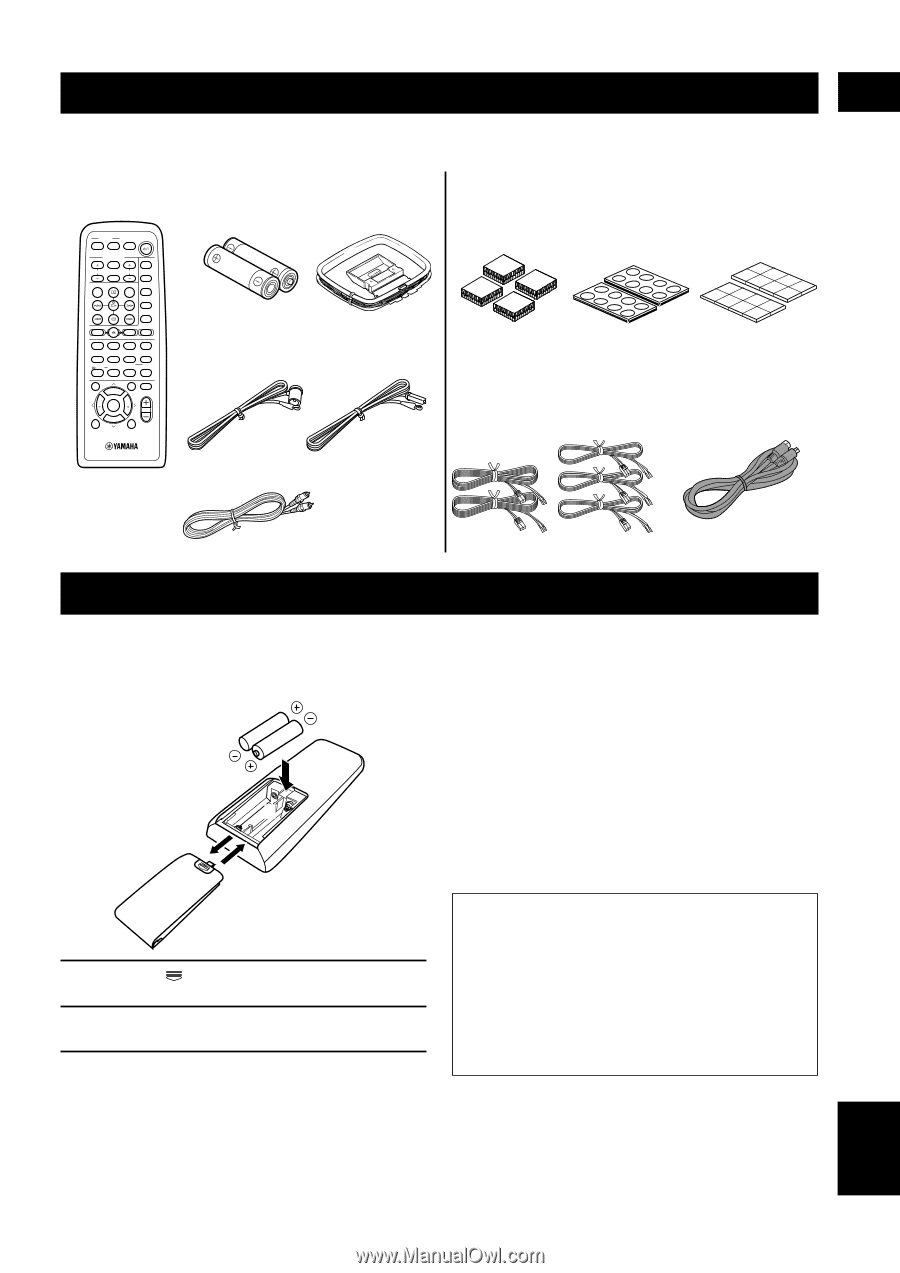
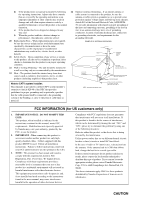
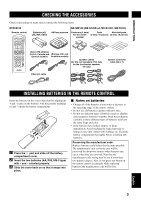
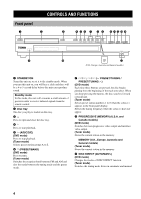
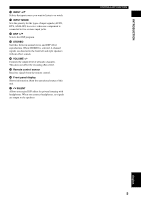
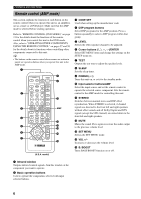
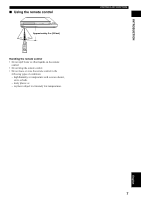
INTRODUCTION CHECKING THE ACCESSORIES Check your package to make sure it contains the following items. DVR-S100 NX-SW100 (NX-S100S x4, NX-S100C, SW-S100) Remote control POWER TV AV SLEEP POWER TV MODE INPUT CH SUBTITLE MUTE VOL AUDIO REC TUNER MD CD-R VCR VIDEO 2 VIDEO 1 CODE SET SHIFT CD DVD AMP HALL JAZZ ROCK ENTERTAINMENT 1 2 3 4 SETUP ANGLE SPORTS MONO MOVIE MOVIE 1 MARKER MOVIE 2 5 6 7 8 /DTS 9 PLAY MODE SELECT 0 REPEAT MATRIX 6.1 >-10 A-B STEREO CANCEL TOP MENU LEVEL GROUP MENU SET MENU PRESET ABCDE PAGE MUTE CH CH ENTER PRESET TEST ON SCREEN B. BOOST RETURN VOL Batteries (x2) (AA, R06, UM-3) AM loop antenna Indoor FM antenna (U.S.A., Canada and (Europe, U.K. and General models) Australia models) Fasteners (4 sets) Pads Non-skid pads for the center (2 sets: 16 pieces) (2 sets: 16 pieces) speaker Speaker cables (for the rear speakers: 15m (x2), for the front/center speaker: 5m (x3)) System connector cable (5m x 1) Video pin cable INSTALLING BATTERIES IN THE REMOTE CONTROL Insert the batteries in the correct direction by aligning the + and - marks on the batteries with the polarity markings (+ and -) inside the battery compartment. 2 1 3 1 Press the part and slide off the battery compartment cover. 2 Insert the two batteries (AA, R06, UM-3 type) with + and - oriented properly. 3 Slide the cover back on so that it snaps into place. I Notes on batteries • Change all of the batteries if you notice a decrease in the operating range of the remote control. • Do not use old batteries together with new ones. • Do not use different types of batteries (such as alkaline and manganese batteries) together. Read the packaging carefully as these different types of batteries may have the same shape and color. • If the batteries have leaked, dispose of them immediately. Avoid touching the leaked material or letting it come into contact with clothing, etc. Clean the battery compartment thoroughly before installing new batteries. Preserving the manufacturer code Replace batteries early before they become unusable. The manufacturer code set by the user will be preserved for about two minutes when batteries run out or when they are removed. Note that the manufacturer code setting may be lost if more than two minutes elapses. Also, if you press any button on the remote control accidentally while replacing batteries, the manufacturer code will be lost. English 3
-
 1
1 -
 2
2 -
 3
3 -
 4
4 -
 5
5 -
 6
6 -
 7
7 -
 8
8 -
 9
9 -
 10
10 -
 11
11 -
 12
12 -
13
-
14
-
15
-
16
-
17
-
18
-
19
-
20
-
21
-
22
-
23
-
24
-
25
-
26
-
27
-
28
-
29
-
30
-
31
-
32
-
33
-
34
-
35
-
36
-
37
-
38
-
39
-
40
-
41
-
42
-
43
-
44
-
45
-
46
-
47
-
48
-
49
-
50
-
51
-
52
-
53
-
54
-
55
-
56
-
57
-
58
-
59
-
60
-
61
-
62
-
63
-
64
-
65
-
66
-
67
-
68
-
69
-
70
-
71
-
72
-
73
-
74
-
75
-
76
-
77
-
78
-
79
-
80
-
81
-
82
 |
 |