1998 Chevrolet Express Van Owner's Manual - Page 143
1998 Chevrolet Express Van Manual

Page 143 highlights
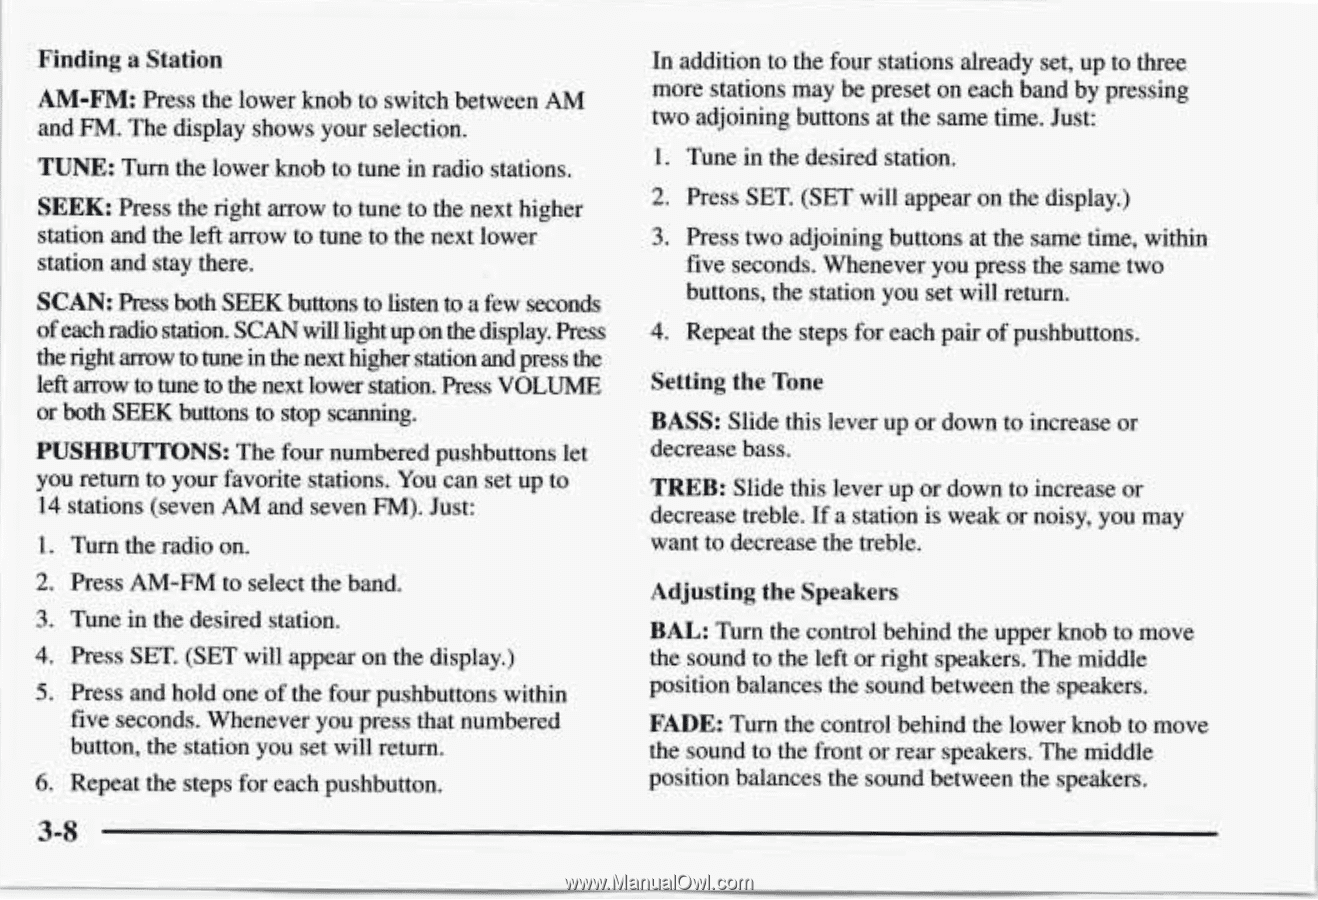
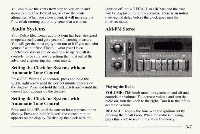
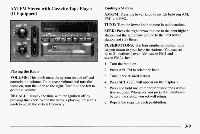
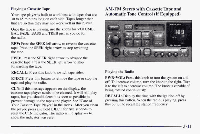
Finding a Station In addition to the four stations already up to three set, more stations may be preset on each by pressing band two adjoining buttons atthe same time. Just: 1 1 AM-FM: Press the lower knob to switch betweenAM and F M . The display shows your selection. TUNE: Turn the lower knob to tune in radio stations. SEEK: Press the rightarrow to tuneto the next higher station and the left arrowto tune to the next lower station and stay there. 1. Tune in the desired station. 2. Press SET. (SET will appear onthe display.) i 1 1 I 3. Press two adjoining buttons atthe same time, within five seconds. Whenever you press the same two buttons, the station youset will return. SCAN: Press bothSEEK buttons to listen a few seconds to of each radio station. SCAN will light up on the display. Press Repeat the stepsfor each pair of pushbuttons. 4. the right arrow to tune the next higher station and press the in Setting theTone left arrow to tune to the next lower station. VOLUME Press or both SEEK buttons to stop scanning. BASS: Slide this lever up or down to increase or decrease bass. PUSHBUTTONS: The four numbered pushbuttonslet you returnto your favorite stations. You can set up to TREB: Slide this lever up or down to increase or 14 stations (seven AM and seven F ) Just: M. decrease treble. If a station is weak or noisy, you may want to decrease the treble. 1. Turn the radio on. 2. Press AM-F'M to select the band. 3. Tune in the desiredstation. i 1 4. Press SET. (SET will appear on the display.) 5. Press and hold one of the four pushbuttons within five seconds. Whenever you press that numbered button, the station youset will return. 6. Repeat the steps for each pushbutton. Adjusting the Speakers BAL: Turn thecontrol behind the upper knob to move the sound to the left or right speakers. The middle position balancesthe sound betweenthe speakers. FADE: Turn the control behind lower knob to move the the sound to the front or rear speakers. The middle position balances the sound between the speakers. 3-8
-
 1
1 -
2
-
3
-
4
-
5
-
6
-
7
-
8
-
9
-
10
-
11
-
12
-
13
-
14
-
15
-
16
-
17
-
18
-
19
-
20
-
21
-
22
-
23
-
24
-
25
-
26
-
27
-
28
-
29
-
30
-
31
-
32
-
33
-
34
-
35
-
36
-
37
-
38
-
39
-
40
-
41
-
42
-
43
-
44
-
45
-
46
-
47
-
48
-
49
-
50
-
51
-
52
-
53
-
54
-
55
-
56
-
57
-
58
-
59
-
60
-
61
-
62
-
63
-
64
-
65
-
66
-
67
-
68
-
69
-
70
-
71
-
72
-
73
-
74
-
75
-
76
-
77
-
78
-
79
-
80
-
81
-
82
-
83
-
84
-
85
-
86
-
87
-
88
-
89
-
90
-
91
-
92
-
93
-
94
-
95
-
96
-
97
-
98
-
99
-
100
-
101
-
102
-
103
-
104
-
105
-
106
-
107
-
108
-
109
-
110
-
111
-
112
-
113
-
114
-
115
-
116
-
117
-
118
-
119
-
120
-
121
-
122
-
123
-
124
-
125
-
126
-
127
-
128
-
129
-
130
-
131
-
132
-
133
-
134
-
135
-
136
-
137
-
 138
138 -
 139
139 -
 140
140 -
 141
141 -
 142
142 -
 143
143 -
 144
144 -
 145
145 -
 146
146 -
 147
147 -
 148
148 -
149
-
150
-
151
-
152
-
153
-
154
-
155
-
156
-
157
-
158
-
159
-
160
-
161
-
162
-
163
-
164
-
165
-
166
-
167
-
168
-
169
-
170
-
171
-
172
-
173
-
174
-
175
-
176
-
177
-
178
-
179
-
180
-
181
-
182
-
183
-
184
-
185
-
186
-
187
-
188
-
189
-
190
-
191
-
192
-
193
-
194
-
195
-
196
-
197
-
198
-
199
-
200
-
201
-
202
-
203
-
204
-
205
-
206
-
207
-
208
-
209
-
210
-
211
-
212
-
213
-
214
-
215
-
216
-
217
-
218
-
219
-
220
-
221
-
222
-
223
-
224
-
225
-
226
-
227
-
228
-
229
-
230
-
231
-
232
-
233
-
234
-
235
-
236
-
237
-
238
-
239
-
240
-
241
-
242
-
243
-
244
-
245
-
246
-
247
-
248
-
249
-
250
-
251
-
252
-
253
-
254
-
255
-
256
-
257
-
258
-
259
-
260
-
261
-
262
-
263
-
264
-
265
-
266
-
267
-
268
-
269
-
270
-
271
-
272
-
273
-
274
-
275
-
276
-
277
-
278
-
279
-
280
-
281
-
282
-
283
-
284
-
285
-
286
-
287
-
288
-
289
-
290
-
291
-
292
-
293
-
294
-
295
-
296
-
297
-
298
-
299
-
300
-
301
-
302
-
303
-
304
-
305
-
306
-
307
-
308
-
309
-
310
-
311
-
312
-
313
-
314
-
315
-
316
-
317
-
318
-
319
-
320
-
321
-
322
-
323
-
324
-
325
-
326
-
327
-
328
-
329
-
330
-
331
-
332
-
333
-
334
-
335
-
336
-
337
-
338
-
339
-
340
-
341
-
342
-
343
-
344
-
345
-
346
-
347
-
348
-
349
-
350
-
351
-
352
-
353
-
354
-
355
-
356
-
357
-
358
-
359
-
360
-
361
-
362
-
363
-
364
-
365
-
366
-
367
-
368
-
369
-
370
-
371
-
372
-
373
-
374
-
375
-
376
-
377
-
378
-
379
-
380
-
381
-
382
-
383
-
384
-
385
-
386
 |
 |