3Com 3CRWE454G72 User Guide - Page 46
Modifying a MAC Address, - us open
 |
View all 3Com 3CRWE454G72 manuals
Add to My Manuals
Save this manual to your list of manuals |
Page 46 highlights
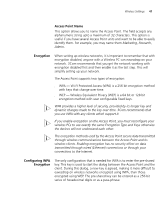
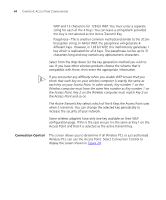
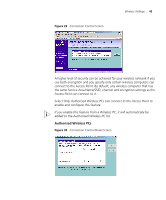
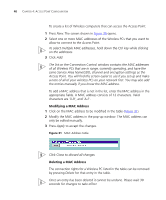
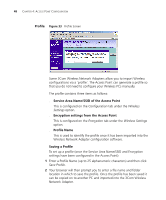
46 CHAPTER 4: ACCESS POINT CONFIGURATION To create a list of Wireless computers that can access the Access Point: 1 Press New. The screen shown in Figure 30 opens. 2 Select one or more MAC addresses of the Wireless PCs that you want to allow to connect to the Access Point. To select multiple MAC addresses, hold down the Ctrl key while clicking on the addresses. 3 Click Add. The list on the Connection Control window contains the MAC addresses of all Wireless PCs that are in range, currently operating, and have the same Service Area Name/SSID, channel and encryption settings as the Access Point. You will find this screen easier to use if you set up and make a note of all of your wireless PCs on your network first. You may also add the entries manually if you know the MAC address. To add a MAC address that is not in the list, enter the MAC address in the appropriate fields. A MAC address consists of 12 characters. Valid characters are '0-9', and 'A-F'. Modifying a MAC Address 1 Click on the MAC address to be modified in the table (Figure 31). 2 Modify the MAC address in the pop-up window. The MAC address can only be edited manually. 3 Press Apply to accept the changes. Figure 31 MAC Address Table Click Close to discard all changes. Deleting a MAC Address The connection rights for a Wireless PC listed in the table can be removed by pressing Delete for that entry in the table. Once an entry has been deleted it cannot be undone. Please wait 30 seconds for changes to take effect.
-
 1
1 -
2
-
3
-
4
-
5
-
6
-
7
-
8
-
9
-
10
-
11
-
12
-
13
-
14
-
15
-
16
-
17
-
18
-
19
-
20
-
21
-
22
-
23
-
24
-
25
-
26
-
27
-
28
-
29
-
30
-
31
-
32
-
33
-
34
-
35
-
36
-
37
-
38
-
39
-
40
-
 41
41 -
 42
42 -
 43
43 -
 44
44 -
 45
45 -
 46
46 -
 47
47 -
 48
48 -
 49
49 -
 50
50 -
 51
51 -
52
-
53
-
54
-
55
-
56
-
57
-
58
-
59
-
60
-
61
-
62
-
63
-
64
-
65
-
66
-
67
-
68
-
69
-
70
-
71
-
72
-
73
-
74
-
75
-
76
-
77
-
78
-
79
-
80
-
81
-
82
-
83
-
84
-
85
-
86
-
87
-
88
-
89
-
90
-
91
-
92
-
93
-
94
-
95
-
96
-
97
-
98
-
99
-
100
-
101
-
102
 |
 |