Adaptec 2074700-R User Guide - Page 103
Select Physical Drive and Choose Type Screens, Create Host Drive
 |
View all Adaptec 2074700-R manuals
Add to My Manuals
Save this manual to your list of manuals |
Page 103 highlights
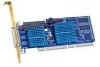
ICP RAID Console In the Select Host Drive screen, you can press to view the level-by-level detailed information on a host drive and its components which help in getting an overview of a specific host drive. Press to switch the hard disk LEDs of the selected host drive on and off. Press to refresh the window. You can create new host drives from the Select Host Drive Screen by selecting the Create new Host Drive menu option (Figure 10-41) and pressing Enter. Before creating a new host drive, the ICP RAID controller scans all channels for free hard disks (for example, hard disks which are not yet part of a host drive) and displays these free disks in the Select Physical Drive screen (see Figure 10-42). Use the arrow up and down keys to move the selection bar from one hard disk to another, and use the space bar to select/deselect hard disks. Marked hard disks show an '*' in the first column. After selecting the hard disks, press Enter, and the Choose Type window becomes active (see Figure 10-42). The Choose Type window displays all host drive types and enables the appropriate types depending on the number of selected hard disks and the firmware level of the ICP RAID controller. Select the appropriate RAID level type and press Enter to confirm your selection. Figure 10-42. Select Physical Drive and Choose Type Screens ICPCON displays a security message pointing out that all existing data on the selected hard disks will be destroyed (see Figure 10-43). Press to continue with creating the new host drive or press to cancel and return to the Select Physical Drive screen. Figure 10-43. Create Host Drive Confirmation After you press , ICPCON displays the Used Capacity per Drive popup window (see Figure 10-44). You may limit the capacity of each selected hard disk for the new host drive. This can be helpful when procuring future spare hard drives (see Section 2.1, Determine the RAID Configuration for details). Type in the capacity to use per hard disk and press Enter. Software Installation and User's Guide 103
-
 1
1 -
2
-
3
-
4
-
5
-
6
-
7
-
8
-
9
-
10
-
11
-
12
-
13
-
14
-
15
-
16
-
17
-
18
-
19
-
20
-
21
-
22
-
23
-
24
-
25
-
26
-
27
-
28
-
29
-
30
-
31
-
32
-
33
-
34
-
35
-
36
-
37
-
38
-
39
-
40
-
41
-
42
-
43
-
44
-
45
-
46
-
47
-
48
-
49
-
50
-
51
-
52
-
53
-
54
-
55
-
56
-
57
-
58
-
59
-
60
-
61
-
62
-
63
-
64
-
65
-
66
-
67
-
68
-
69
-
70
-
71
-
72
-
73
-
74
-
75
-
76
-
77
-
78
-
79
-
80
-
81
-
82
-
83
-
84
-
85
-
86
-
87
-
88
-
89
-
90
-
91
-
92
-
93
-
94
-
95
-
96
-
97
-
 98
98 -
 99
99 -
 100
100 -
 101
101 -
 102
102 -
 103
103 -
 104
104 -
 105
105 -
 106
106 -
 107
107 -
 108
108 -
109
-
110
-
111
-
112
-
113
-
114
-
115
-
116
-
117
-
118
-
119
-
120
-
121
-
122
-
123
-
124
-
125
-
126
-
127
-
128
-
129
-
130
-
131
-
132
-
133
-
134
-
135
-
136
-
137
-
138
-
139
-
140
-
141
-
142
-
143
-
144
-
145
-
146
-
147
-
148
-
149
-
150
-
151
-
152
-
153
-
154
-
155
-
156
-
157
-
158
-
159
-
160
-
161
-
162
-
163
-
164
-
165
-
166
-
167
-
168
-
169
-
170
-
171
-
172
-
173
-
174
-
175
-
176
-
177
-
178
-
179
-
180
-
181
-
182
-
183
-
184
-
185
-
186
-
187
-
188
-
189
-
190
-
191
-
192
-
193
-
194
-
195
-
196
-
197
-
198
-
199
-
200
-
201
-
202
-
203
-
204
-
205
-
206
-
207
-
208
-
209
-
210
-
211
-
212
-
213
-
214
 |
 |
