Asus CUR-DLS CUR-DLS User Manual - Page 71
C. Existing System Installation
 |
View all Asus CUR-DLS manuals
Add to My Manuals
Save this manual to your list of manuals |
Page 71 highlights
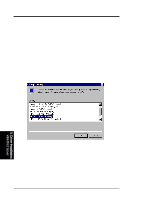
5. Motherboard Driver Installation 6. When a screen displays the SCSI adapters found, choose S to configure additional SCSI adapters. 7. Move the highlight bar to Other and press Enter. 8. When prompted for the manufacturer-supplied hardware support disk, insert the appropriate LSI driver diskette containing the Windows NT driver required to support your LSI adapter(s) and press Enter. The driver files are distributed with ASUS Driver Support CD and created from the previous section "Preparing a LSI Driver Diskette" section. 9. Depending on the driver being installed, either "LSI PCI High Performance Driver", or LSI Logic Ultra3 PCI SCSI Driver is shown highlighted. Press Enter to proceed. 10. The Windows NT Workstation Setup window reappears. If using an IDE CDROM Drive for installation, press S to load additional drives. Another window appears. Scroll up and select: IDE CD-ROM (ATAPI 1.2/PCI IDE Controller Press Enter. (-or-) If you have completed configuring additional SCSI adapters, press Enter. 11. Windows NT should now recognize the miniport driver and the SCSI hardware. Press Enter to continue. At this point, simply follow the Microsoft Windows NT installation procedure. As for onboard LAN and VGA installation, please refer the later sections for network and VGA driver installation. C. Existing System Installation 1. Boot Windows NT system and log on as Administrator. 2. Click on the Start button. Select Settings->Control Panel. 3. Double click on SCSI Adapters icon. 4. Click the Drivers tab. If the old NCRSDMS.SYS, NCRC810.SYS, NCRC8XX.SYS, or SYMC810.SYS drivers are listed, select the driver(s) and choose Remove before adding the new driver. If the driver name of the driver you are installing SYM_HI.SYS or LSI_U3.SYS is listed, remove it before adding the new driver. Select OK when the Remove Driver message prompts: "Are you sure you want to remove this driver?" Click OK. 5. Click Add. A list of installed adapters will appear. 6. Click the Have Disk button. 7. When prompted, insert the appropriate LSI driver diskette containing the Windows NT driver required to support your LSI adapter(s). The path to copy manufacturer's files is: A:\WINNT\MINIPORT and select OK. 8. Depending on the driver being installed, either LSI PCI High Performance Driver or LSI Logic Ultra3 PCI SCSI Driver is shown highlighted on the Install Driver menu. If it is not highlighted, select it. Choose OK. 5. Driver Installation WinNT4.0 Server ASUS CUR-DLS User's Manual 71
-
 1
1 -
2
-
3
-
4
-
5
-
6
-
7
-
8
-
9
-
10
-
11
-
12
-
13
-
14
-
15
-
16
-
17
-
18
-
19
-
20
-
21
-
22
-
23
-
24
-
25
-
26
-
27
-
28
-
29
-
30
-
31
-
32
-
33
-
34
-
35
-
36
-
37
-
38
-
39
-
40
-
41
-
42
-
43
-
44
-
45
-
46
-
47
-
48
-
49
-
50
-
51
-
52
-
53
-
54
-
55
-
56
-
57
-
58
-
59
-
60
-
61
-
62
-
63
-
64
-
65
-
 66
66 -
 67
67 -
 68
68 -
 69
69 -
 70
70 -
 71
71 -
 72
72 -
 73
73 -
 74
74 -
 75
75 -
 76
76 -
77
-
78
-
79
-
80
-
81
-
82
-
83
-
84
-
85
-
86
-
87
-
88
-
89
-
90
-
91
-
92
-
93
-
94
-
95
-
96
-
97
-
98
-
99
-
100
-
101
-
102
-
103
-
104
-
105
-
106
-
107
-
108
-
109
-
110
 |
 |
