Asus CUR-DLS CUR-DLS User Manual - Page 85
C. NetWare 3.12 Installations
 |
View all Asus CUR-DLS manuals
Add to My Manuals
Save this manual to your list of manuals |
Page 85 highlights
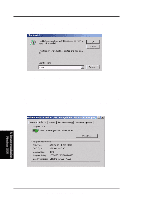
5. Motherboard Driver Installation 4. Installation of the Intel 82559 Network Adapter for NetWare 5.x or 4.xx is complete. Add or check the load and bind statements you need to the server's AUTOEXEC.NCF file so the PRO/100+ adapter driver loads automatically load and bind the server driver as follows: LOAD C:\E100B SLOT=x FRAME=ETHERNET_802.2 BIND IPX TO E100B NET=xxxxxxxx Where: SLOT=x Specifies the NBI (NetWare Bus Interface) slot number. Substitute x with the valid value for the adapter. You will be prompted with the slot number(s) of installed PRO/100+ adapters. The NBI numbers are different from the slot number indicated in the SETUP.EXE utility. NET=xxxxxxxx is the unique network address for that LAN segment. The default frame type is 802.2. If your workstation needs to use the 802.3 frame type, see the section later in this document about using multiple frame types on one adapter. C. NetWare 3.12 Installations 1. Copy the Intel PRO/100+ server drivers (\NWSERVER\E100B.LAN) from ASUS driver support CD and any updated NLMs to a diskette. 2. Install NetWare 3.12 according to the NetWare instructions. And remember to copy the Intel PRO/100+ driver into NetWare home directory c:\server.312. 3. Download LAN NLMs patch file "ODI33G.EXE" from Novel support web site at "http:\\Support.novell.com". 4. Copy the download file "ODI33G.EXE" to a temporary directory c:\server.312\odi33g. 5. Run ODI33G.EXE .It will create a new SERVER directory. 6. Run SERVER.EXE to startup the server. Execute load Install under NetWare command prompt. Select and highlight "Product Options". Press Enter to load additional product. 7. Then use the INS key to add a product. Given the prior created path c:\server.312\odi33g. 8. Select Server to be installed. Press Yes to install the product. After finish the product installation. Select Exit the product installation screen. 9. Form the System Console, enter the command LOAD E100B.LAN. When console prompted for a slot number, accept the slot numbers displayed. Make sure to write these slot numbers down for future reference. 10. Modify or/add the AUTOEXEC.BAT file as below: LOAD E100B SLOT=xxxxx FRAME=ETHERNET_802.2 BIND IPX TO E100B NET=yyyyyyyyyy Where: SLOT=xxxxx can be specified at step 9. 5. Driver Installation Novell Netware ASUS CUR-DLS User's Manual 85
-
 1
1 -
2
-
3
-
4
-
5
-
6
-
7
-
8
-
9
-
10
-
11
-
12
-
13
-
14
-
15
-
16
-
17
-
18
-
19
-
20
-
21
-
22
-
23
-
24
-
25
-
26
-
27
-
28
-
29
-
30
-
31
-
32
-
33
-
34
-
35
-
36
-
37
-
38
-
39
-
40
-
41
-
42
-
43
-
44
-
45
-
46
-
47
-
48
-
49
-
50
-
51
-
52
-
53
-
54
-
55
-
56
-
57
-
58
-
59
-
60
-
61
-
62
-
63
-
64
-
65
-
66
-
67
-
68
-
69
-
70
-
71
-
72
-
73
-
74
-
75
-
76
-
77
-
78
-
79
-
 80
80 -
 81
81 -
 82
82 -
 83
83 -
 84
84 -
 85
85 -
 86
86 -
 87
87 -
 88
88 -
 89
89 -
 90
90 -
91
-
92
-
93
-
94
-
95
-
96
-
97
-
98
-
99
-
100
-
101
-
102
-
103
-
104
-
105
-
106
-
107
-
108
-
109
-
110
 |
 |
