Brother International HL-2170W Users Manual - English - Page 87
Troubleshooting, Identifying your problem
 |
UPC - 012502619468
View all Brother International HL-2170W manuals
Add to My Manuals
Save this manual to your list of manuals |
Page 87 highlights
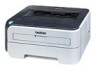
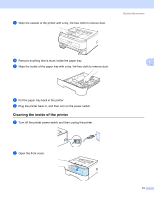
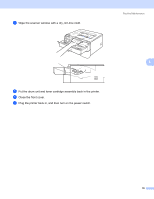
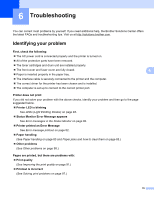
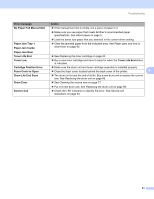
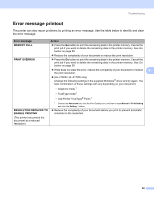
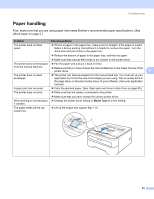
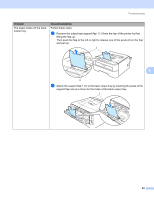
6 Troubleshooting 6 You can correct most problems by yourself. If you need additional help, the Brother Solutions Center offers the latest FAQs and troubleshooting tips. Visit us at http://solutions.brother.com. Identifying your problem First, check the following: „ The AC power cord is connected properly and the printer is turned on. „ All of the protective parts have been removed. „ The toner cartridges and drum unit are installed properly. „ The front cover and fuser cover are fully closed. „ Paper is inserted properly in the paper tray. „ The interface cable is securely connected to the printer and the computer. „ The correct driver for the printer has been chosen and is installed. „ The computer is set up to connect to the correct printer port. Printer does not print: If you did not solve your problem with the above checks, identify your problem and then go to the page suggested below. „ Printer LED is blinking See LEDs (Light Emitting Diodes) on page 48. „ Status Monitor Error Message appears See Error messages in the Status Monitor on page 80. „ Printer printed an Error Message See Error message printout on page 82. „ Paper handling (See Paper handling on page 83 and Paper jams and how to clear them on page 85.) „ Other problems (See Other problems on page 98.) Pages are printed, but there are problems with: „ Print quality (See Improving the print quality on page 91.) „ Printout is incorrect (See Solving print problems on page 97.) 6 6 6 6 6 79
-
 1
1 -
2
-
3
-
4
-
5
-
6
-
7
-
8
-
9
-
10
-
11
-
12
-
13
-
14
-
15
-
16
-
17
-
18
-
19
-
20
-
21
-
22
-
23
-
24
-
25
-
26
-
27
-
28
-
29
-
30
-
31
-
32
-
33
-
34
-
35
-
36
-
37
-
38
-
39
-
40
-
41
-
42
-
43
-
44
-
45
-
46
-
47
-
48
-
49
-
50
-
51
-
52
-
53
-
54
-
55
-
56
-
57
-
58
-
59
-
60
-
61
-
62
-
63
-
64
-
65
-
66
-
67
-
68
-
69
-
70
-
71
-
72
-
73
-
74
-
75
-
76
-
77
-
78
-
79
-
80
-
81
-
 82
82 -
 83
83 -
 84
84 -
 85
85 -
 86
86 -
 87
87 -
 88
88 -
 89
89 -
 90
90 -
 91
91 -
 92
92 -
93
-
94
-
95
-
96
-
97
-
98
-
99
-
100
-
101
-
102
-
103
-
104
-
105
-
106
-
107
-
108
-
109
-
110
-
111
-
112
-
113
-
114
-
115
-
116
-
117
-
118
-
119
-
120
-
121
-
122
-
123
-
124
-
125
-
126
-
127
-
128
-
129
-
130
-
131
-
132
-
133
-
134
-
135
-
136
-
137
-
138
 |
 |