Brother International KE-436C Instruction Manual - English
Brother International KE-436C Manual
 |
View all Brother International KE-436C manuals
Add to My Manuals
Save this manual to your list of manuals |
Brother International KE-436C manual content summary:
- Brother International KE-436C | Instruction Manual - English - Page 1
KE-436C INSTRUCTION MANUAL Please read this manual before using the machine. Please keep this manual within easy reach for quick reference. ELECTRONIC LOCKSTITCH PATTERN TACKER WITH STEPPING FOOT AND PROGRAMMING FUNCTION - Brother International KE-436C | Instruction Manual - English - Page 2
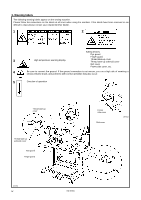
much for buying a BROTHER sewing machine. Before using your new machine, please read the safety instructions below and the explanations given in the instruction manual. With industrial sewing machines, it is normal to , the symbol at left means "you must make the ground connection".) KE-436C i - Brother International KE-436C | Instruction Manual - English - Page 3
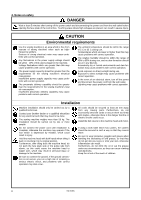
problems with correct operation. Installation Machine installation should only be carried out by a qualified technician. Contact your Brother dealer or a qualified electrician for any electrical work that may need to be done. The sewing machine to the machine head and motor. If using a work KE-436C - Brother International KE-436C | Instruction Manual - English - Page 4
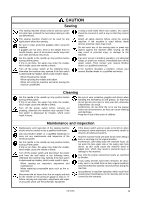
Maintenance and inspection of the sewing machine should only be carried out by a qualified technician. Ask your Brother dealer or a qualified using the machine. Any problems in machine operation which result from unauthorized modifications to the machine will not be covered by the warranty. KE-436C - Brother International KE-436C | Instruction Manual - English - Page 5
sewing machine. Please follow the instructions on the labels at all times when using the machine. If the labels have been removed or are difficult to read, please contact your nearest Brother of receiving a serious electric shock, and problems with correct operation may also occur. 5 Direction - Brother International KE-436C | Instruction Manual - English - Page 6
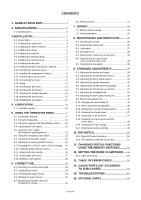
inside the control box 51 11. CHANGING SPECIAL FUNCTIONS USING THE MEMORY SWITCHES......... 52 12. SETTING THE WORK CLAMP MODE .....56 12-1. Light work clamp 57 13. TABLE OF ERROR CODES 58 14. GAUGE PARTS LIST ACCORDING TO SUBCLASSES 60 15. TROUBLESHOOTING 63 16. OPTIONAL PARTS 66 KE-436C - Brother International KE-436C | Instruction Manual - English - Page 7
stand (12) Thread take-up lever (13) Wiper solenoid cover (14) Thread wiper switch (15) Dip switch (16) Integrater (17) Solenoid valve Safety devices; (18) Finger guard (19) Eye guard (20) Thread take-up cover (21) Belt cover (22) Frame side cover (23) Thread take-up solenoid cover 1 KE-436C - Brother International KE-436C | Instruction Manual - English - Page 8
Power source Machine head: 56 use] Patterns up to a maximum size of 100 mm × 60 mm can be sewn. For plain stitching of small articles, curtain darts, etc. Two-stage work clamp, light work clamp and inner clamping device (optional) can be used. For attaching items, sewing labels, etc. KE-436C - Brother International KE-436C | Instruction Manual - English - Page 9
problems with correct operation may also occur. Install the belt covers to the machine head and motor. 3-1. Power table • Use the power table which has been specially designed for each sewing machines. * If using touching, it could cause the sewing machine to operate incorrectly. 1090Q 3 KE-436C - Brother International KE-436C | Instruction Manual - English - Page 10
to the side of the control box (in the position shown in the illustration). (KE series machine heads can only be used with control boxes which have the IM sticker attached.) Spacers Flat washers Nuts 2454Q 1. two screws (9). 5. Secure the power switch cord with the three staples (10). KE-436C 4 - Brother International KE-436C | Instruction Manual - English - Page 11
pan, and secure them in place with the nails (2). * Install so that the head of the nail dose not protrude from the rubber surface. 2492Q 5 KE-436C - Brother International KE-436C | Instruction Manual - English - Page 12
machine head prevent the sewing machine from starting when the machine head is tilted back. Therefore, this means that the sewing machine in the illustration above in order to prevent them from being clamped by the machine head. 3. Install the hinge presser (6) with the two bolts and two nuts. - Brother International KE-436C | Instruction Manual - English - Page 13
of the box. Refer to "3-13. Connecting the cords" for details on connecting the cord. 5. Secure the cord with the staples (in five places). 2673Q 7 KE-436C - Brother International KE-436C | Instruction Manual - English - Page 14
. If the ground connection is not secure, you run the risk of receiving a serious electric shock, and problems with correct operation may also occur. 2741Q Connect to the power switch. However, the black wire is insulated to the inside of the box and is not used. Connect to ground KE-436C 8 - Brother International KE-436C | Instruction Manual - English - Page 15
3. INSTALLATION 3-13. Connecting the cords 2502Q 2677Q 2678Q 2748Q 9 KE-436C - Brother International KE-436C | Instruction Manual - English - Page 16
(AIR) Cord clamps used None None (G) None machine head is tilted back gently. 11. Tighten the cover (main P.C. board mounting plate (4)) with the six screws (3). Note: Check that the cords do not come into contact with the fan (14) and that they are not clamped by the cover at this time. KE-436C - Brother International KE-436C | Instruction Manual - English - Page 17
3. INSTALLATION 3-14. Piping Cylinder L Stepping cylinder Cylinder R Upper knob Lower knob Switch 0433Q 1092Q Connect to crush the air tubes at that time. * Light work clamp mode can be used by changing over the air tube connections. (Refer to "12. Setting the work clamp mode".) 11 KE-436C - Brother International KE-436C | Instruction Manual - English - Page 18
way when using the machine. (The recommended installation position is shown in Figure 1.) 3. Install the ground cord (5) to the machine head. 4. the machine head. 4. Connect the air hose (12). 5. Adjust the air pressure. (Refer to "9-14. Adjusting the air pressure".) 3-14-2. Adjusting KE-436C 12 - Brother International KE-436C | Instruction Manual - English - Page 19
A. If foot switch support plate B (13) is used in a back-to-front position, it can be used as shown in Figure B. 1. Remove the screw (14) and rubber plug (15 used, for example, if it is just hooked loosely onto the work table leg, it may cause the sewing machine to operate incorrectly. 13 KE-436C - Brother International KE-436C | Instruction Manual - English - Page 20
the four needle sub plate supports (1) with the four screws (2). 2. Insert the needle sub plate (3) from the front of the machine so that it is level. supports (7) with the washers (8) and the screws (9) and (10), and then firmly tighten the screws (9) and (10) in that order. 2601Q KE-436C 14 - Brother International KE-436C | Instruction Manual - English - Page 21
while referring to the spool stand instruction manual, and then install the spool stand (1) at the right side of the work table. 2509Q 3-19. Installing the eye guard CAUTION Attach all safety devices before using the sewing machine. If the machine is used without these devices attached, injury may - Brother International KE-436C | Instruction Manual - English - Page 22
2512Q 3. Add oil to the felt (1) of the shuttle race base. * When setting up the sewing machine and when it hasn't been used for an extended period of time, be sure to add 2-3 drops oil to the felt. 2513Q 4. If using the liquid cooling tank (2), fill it with silicon oil (100 mm2/s). KE-436C 16 - Brother International KE-436C | Instruction Manual - English - Page 23
X-SCALE indicator Illuminates when X-scale mode has been selected using the menu switch (6). (8) Y-SCALE indicator Illuminates when Y-scale mode has been selected using the menu switch (6). (9) SPEED indicator Illuminates when speed mode has been selected using the menu switch (6). 17 KE-436C - Brother International KE-436C | Instruction Manual - English - Page 24
order to confirm a programmed stitch pattern. (16) TEST indicator Lights when the TEST switch is pressed. (17) STEP BACK switch Used when winding a fresh bobbin, or when correcting a stitch pattern due to a broken (RESET switch) needle thread. Also used to reset error displays. KE-436C 18 - Brother International KE-436C | Instruction Manual - English - Page 25
be used when sewing with the KE-436C, programmer can be used to format these disks. Refer to the programmer instruction manual for details.) • TFD embroidery data can be embroidered after it has been converted by the programmer to BAS-300E data. • Restrictions when using 2DD floppy disks and KE-436C - Brother International KE-436C | Instruction Manual - English - Page 26
sewing data from the master floppy disk and write it in a new floppy disk. Do not use any damaged floppy disks again. How to use the cleaning disk 1. Insert the cleaning disk into the floppy disk drive. 2. Select a program This is normal. 4. Cancel the error and eject the cleaning disk. KE-436C 20 - Brother International KE-436C | Instruction Manual - English - Page 27
program select switch (3) on the operation panel to select the desired program number. After programming the pattern using the stitch programmer, Press the emergency stop switch (6) on the front of the machine to stop sewing machine operation, and then refer to and follow the error code list KE-436C - Brother International KE-436C | Instruction Manual - English - Page 28
position, it will then move the sewing start position and the program number will stop flashing. This only occurs the first time that a program is selected. 4. Press the start . Resuming operation from a stopping point 6. Sewing will start when the start switch (1) is pressed. 2697Q KE-436C 22 - Brother International KE-436C | Instruction Manual - English - Page 29
. Press the TEST switch (15) again to stop the machine. 4. After you have reached the desired position, depress the start switch to start sewing. Start switch 5-7. Using the thread wiper switch 1080Q The thread wiper can be turned on and off using the thread wiper switch (1). 2608Q 23 KE-436C - Brother International KE-436C | Instruction Manual - English - Page 30
5. USING THE OPERATION PANEL 5-8. Adjusting the sewing SPEED control The sewing speed can be changed in steps of 100 rpm to display. • The scale setting is displayed as a percentage. 3. The program number will flash, and after the home position is detected the flashing will stop. 2702Q KE-436C 24 - Brother International KE-436C | Instruction Manual - English - Page 31
Using from to . If the counter is set to , sewing continues irrespective of the amount of bobbin thread remaining. 2. While pressing the will sound. (The sewing machine will not start even if the start switch is pressed.) 5. Press the bobbin thread change switch (14) and replace the - Brother International KE-436C | Instruction Manual - English - Page 32
THE OPERATION PANEL 5-11. Using production counter Both PRO. NO. and the production counter value will appear on the program number display (2) and on the display screen (5). • Press the B.T. CHANGE switch (14). The PRODUCTION counter will display . return to the normal display. KE-436C 26 - Brother International KE-436C | Instruction Manual - English - Page 33
in the following order: "1" → "2" → "3" → "1" → "2" ... 4. When the start switch is pressed, only the pattern displayed on the display screen (5) will be sewn. Note: As to split sewing, refer to the instruction manual of the "electronic programmable pattern tacker programmer" 27 KE-436C - Brother International KE-436C | Instruction Manual - English - Page 34
pattern, the sewing start position can be moved to any desired point within the sewing area, but if the pattern goes outside the sewing area, an error will occur during sewing and you will not be able to sew the pattern. Give consideration to the pattern as a whole when moving it. KE-436C 28 - Brother International KE-436C | Instruction Manual - English - Page 35
used for different sewing applications. Refer to the table at right for details on which needle and thread to select. 6-2. Installing the needle Needle DP × 5 #14 threading the thread, otherwise the machine may operate if the foot using the liquid cooling tank] Approx. 40mm 2710Q KE-436C 0102Q - Brother International KE-436C | Instruction Manual - English - Page 36
USE 6-4. Winding the lower thread CAUTION Do not touch any of the moving parts or press any objects against the machine while winding the lower thread, as this may result in personal injury or damage to the machine feed mechanism to the sewing start. 2527Q 2712Q KE-436C Case A Case B 2531Q 2532Q 30 - Brother International KE-436C | Instruction Manual - English - Page 37
(mm) 9 - 11 ← 9 - 11 ← Thread take-up spring tension (N) 0.15 - 0.35 ← 0.4 - 0.6 ← Pre-tension (N) 0.1 - 0.3 ← 0.3 - 0.5 ← Needle DP × 5 #14 ← DP × 17NY #19 ← The sewing conditions given in the above table may need to be changed depending on the article being sewn. 31 KE-436C - Brother International KE-436C | Instruction Manual - English - Page 38
Guide to maximum sewing speed Use 8 layers of denim 12 layers of denim Ordinary materials Max. sewing speed (rpm) Standard hook Large hook 2,500 2,500 2,300 2,500 2,500 Note: The thread may break due to heat under some sewing conditions. If this happens, reduce the sewing speed, or use - Brother International KE-436C | Instruction Manual - English - Page 39
of the adjustable range for arm thread guide R (1). To adjust the position, loosen the screw (2) and then move arm thread guide R (1). * When sewing thick material, move arm thread guide R (1) to the left. (The amount, move the stopper (2) upward. Become greater Become less 2717Q 33 KE-436C - Brother International KE-436C | Instruction Manual - English - Page 40
• When not using the machine and when leaving the machine unattended Do not touch any of the moving parts or press any objects against the machine while sewing, as this may result in personal injury or damage to the machine. Note: At the time of shipment from the factory, this sewing machine is set - Brother International KE-436C | Instruction Manual - English - Page 41
9. After sewing is completed, the thread cutter will automatically operate, then the work clamp will rise. 2720Q Note: When the power is turned on after once being turned off, the same pattern of sewing can be continued since the machine will stores the sewing data from the last time. 35 KE-436C - Brother International KE-436C | Instruction Manual - English - Page 42
out cleaning, otherwise the machine may operate if the foot may be hot immediately after it has been used, and it may cause burns if touched. and also the needle is not bent before starting sewing. 8-2. Cleaning the rotary hook 1236S 0122Q 1. Pull guide and the shuttle race. 2549Q KE-436C 36 - Brother International KE-436C | Instruction Manual - English - Page 43
3. Add oil to the felt (1) of the shuttle race base. * When setting up the sewing machine and when it hasn't been used for an extended period of time, be sure to add 2-3 drops oil to the felt. 2512Q 4. If using the liquid cooling tank (2), fill it with silicon oil (100 mm2/s). 2513Q 37 KE-436C - Brother International KE-436C | Instruction Manual - English - Page 44
at least once a month. * If the machine is used while the air inlet port is blocked, the inside of the control box will overheat. When this happens, the overheating error code "E-d0" will be displayed and you will not be able to operate the sewing machine. 2551Q 8-6. Cleaning the air holes of belt - Brother International KE-436C | Instruction Manual - English - Page 45
Maintenance and inspection of the sewing machine should only be carried out by a qualified technician. Ask your Brother dealer or a qualified electrician the needle center line. * If using a DP × 5 needle, use the second reference line from the top of the needle (reference line b). 39 KE-436C - Brother International KE-436C | Instruction Manual - English - Page 46
2557Q Turn the machine pulley to align the guide is in the wrong position, thread breakages, soiled thread or catching of the thread may occur. The position of the shuttle race thread guide is adjusted at the time of shipment from the factory. It should not be changed if at all possible. KE-436C - Brother International KE-436C | Instruction Manual - English - Page 47
standard setting of 5 mm. You may need to adjust this setting depending on the sewing conditions to prevent the thread from pulling out at the sewing start. Adjustment method Loosen the screw (2) and move the stopper (3.57 nut) the underside of the article being sewn may become untidy. 41 KE-436C - Brother International KE-436C | Instruction Manual - English - Page 48
roller (3) into the groove of the thread trimmer cam (4). 3. In this condition, turn the machine pulley to align the position of the roller (3) with the mark on the thread trimmer cam (4). 3.) and the movable knife (5) is pushed to the machine pulley side so that there is no play. KE-436C 42 - Brother International KE-436C | Instruction Manual - English - Page 49
check that the movable knife (8) and the fixed knife (9) cut the thread cleanly. If necessary, adjust by using the appropriate movable knife washer (10) (supplied as accessories). * Apply grease to the outside of the collar ( rod lever pin (7), and then install to the needle plate (5). 43 KE-436C - Brother International KE-436C | Instruction Manual - English - Page 50
The lift amount is adjusted as shown in the table at the time of shipment. Uses Lift amount Medium materials 10 +1 0 mm 0150Q Heavy materials 14 +1 0 mm 25 mm max. 2618Q 1. Raise the work clamp (1) and loosen the time of shipment), and check that the movement becomes easier. KE-436C 44 - Brother International KE-436C | Instruction Manual - English - Page 51
screw (1). Note: If the work clamp is lowered too far, the work piece will shift when sewing. Also, if the work clamp is too high, skipped stitches may occur. 2. Turn the pulley connecting rod (12) to the upper screw hole (14) of the stepping work clamp arm (F) (13). 2628Q 2629Q 45 KE-436C - Brother International KE-436C | Instruction Manual - English - Page 52
be loosened. * If the index mark (2) is not inside the mark (4) when the sewing machine is started, error code "E.22" will be displayed (when memory switch No.14 is on). Turn the machine pulley to move the index mark (2) to the correct position and then start the sewing machine. 2576Q KE-436C 46 - Brother International KE-436C | Instruction Manual - English - Page 53
16mm 2724Q 2726Q 1. Loosen the set screw (2) and move the wiper arm support (3) up or down to adjust so that there is a clearance of 15 up or down to adjust so that the distance is approximately 25 mm. 9-14. Adjustment of air pressure 1. Air pressure should be 0.5 Mpa. The air 47 KE-436C - Brother International KE-436C | Instruction Manual - English - Page 54
switch B are changed at this time, the number of the changed switch will appear in the bottom row of the program number display (7). 5. Press the TEST switch (2). The display will return to normal. Note: You need to move always be turned off before DIP switch settings can be changed. KE-436C 48 - Brother International KE-436C | Instruction Manual - English - Page 55
more to return the display to the normal condition. 9-17. Clearing all memory settings If the sewing machine stops operating normally, the cause may be that an incorrect memory setting may have been made by means and also clears all contents of the memory such as user programs. 2732Q 49 KE-436C - Brother International KE-436C | Instruction Manual - English - Page 56
detector device is used, detection precision is increased from 8 to 14. When a fiber-type thread breakage detector device is used, detection precision is increased from 5 to 10. Fiber-type thread breakage detector device is ON, and DIP switch A-8 is ON (available as an option). − − KE-436C 50 - Brother International KE-436C | Instruction Manual - English - Page 57
are sewn at a low speed of 400 rpm. DIPC-6 Low speed sewing is not performed at the start of sewing. DIPC-7 DIPC-8 The motor operates in reverse when the upper shaft stops will rise slightly at the sewing start, and this may result in the thread pulling out under certain conditions. 51 KE-436C - Brother International KE-436C | Instruction Manual - English - Page 58
SPECIAL FUNCTIONS USING THE MEMORY program number. 6. Once the program data has been read from the floppy disk, change to memory switch setting mode and then press the B.T. SET switch (7). The buzzer will sound twice, and the current memory switch settings will be written to the floppy disk. KE-436C - Brother International KE-436C | Instruction Manual - English - Page 59
sewing is finished, the feed plate moves via the machine 13 memo-14 memo-15 using an external switch. (Use option connector P3 on the operation panel.) Program number is changed automatically by using outside switch. (Use optional connector P3 on the operation panel.) − − − − : OFF 53 KE-436C - Brother International KE-436C | Instruction Manual - English - Page 60
ON Initial value During feed test operation, jump feeding 100 stitches at a time is possible using the STEP BACK switch. After the home position is detected and the machine moves to the sewing start position, the work clamp rises automatically. − − − The enlargement and reduction ratio settings at - Brother International KE-436C | Instruction Manual - English - Page 61
(Slow) Number of low-speed stitches sewn at 400 rpm at sewing start. Changes the sewing start speed for the number of stitches specified by memo-34. memo by KE-436C → Set memo-37=2. memo-38 − − − − memo-39 0 - 11 Changes the reference point for enlargement and reduction using the - Brother International KE-436C | Instruction Manual - English - Page 62
is lowered at the sewing start. When memo-3b has been used to make a special setting, DIP switches A-1 and A-2 function as follows. • When DIP switch A-1 is at ON, the pressers are not raised automatically at the sewing end. • DIP switch A-2 is ignored except when memo-3b = 8, 11, 12. KE-436C 56 - Brother International KE-436C | Instruction Manual - English - Page 63
(Refer to "11. Changing special functions using the memory switches".) < Hose connections for light work clamp operation by both pressers > clamp the article being sewn. 3. Press the start pedal to start sewing. The hoses can be connected in 57 KE-436C - Brother International KE-436C | Instruction Manual - English - Page 64
and check the connections of cords inside the operation panel. E.41 Invalid program No., or no data. Change program No. E.43 Different floppy disk! Use original floppy disk. E.4F Error occurred during floppy disk data reading. Replace the floppy disk and repeat the operation. KE-436C 58 - Brother International KE-436C | Instruction Manual - English - Page 65
Release write-protection. Insufficient available memory on floppy disk. Use another floppy disk. Can not format this floppy disk. voltage. Start switch was pressed when there was no sewing available data. Read sewing data again. Can not detect home position. X-Y E F 6 H L o 59 KE-436C - Brother International KE-436C | Instruction Manual - English - Page 66
GAUGE PARTS LIST ACCORDING TO SUBCLASSES 14. GAUGE PARTS LIST ACCORDING TO SUBCLASSES The following are standard gauge parts according to each specification. (In the A S59162-991 LG 152686-101 B Spring tension 104525-001 107606-001 S06548-001 C Spring 145519-001 144588-001 B KE-436C 60 - Brother International KE-436C | Instruction Manual - English - Page 67
guide, needle bar Medium materials S41222-101 B Heavy materials S02438-001 A Extra heavy materials S02439-001 B Needle assy 107415-414 S37928-419 145646-425 Needle Work clamp Feed plate DP × 5 #14 clamp Feed plate 153503-001 S23379-001 (519) S27838-001 (895) 156087-001 (M) 61 KE-436C - Brother International KE-436C | Instruction Manual - English - Page 68
R L Work clamp Feed plate 5 156082-001 (L) 156083-001 (L) 156084-001 (L) 14. GAUGE PARTS LIST ACCORDING TO SUBCLASSES 6 156088-001 (S) 156089-001 (S) 156090-001 (S) • Gauge assy, 434E MK2 001 F S10213-001 FD S30926-001 FM S49980-001 H S30450-001 L S25127-001 M S34348-001 3 S40217-001 KE-436C 62 - Brother International KE-436C | Instruction Manual - English - Page 69
CAUTION Turn off the power switch and disconnect the power cord before carrying out troubleshooting, otherwise the machine will operate if the foot switch is depressed by mistake, which could result in injury. Problem Cause Check Remedy Work clamp does not Work clamp operation is Sliding part - Brother International KE-436C | Instruction Manual - English - Page 70
15. TROUBLESHOOTING Problem Cause Check Remedy Upper thread breaks. Upper thread tension is too strong. Upper thread tension Adjust the amount. 39 Needle is bent. Bent needle Replace the needle. Needle is too thin. Needle and thread Use the correct needle for the material. KE-436C 64 - Brother International KE-436C | Instruction Manual - English - Page 71
TROUBLESHOOTING Problem Cause Check Remedy Upper thread is not trimmed. Movable knife is bent. Movable knife blade Replace the movable knife. Fixed knife is blunt. Fixed knife blade Sharpen or replace the fixed knife. Movable knife dose not pick up the thread. Shuttle race thread guide - Brother International KE-436C | Instruction Manual - English - Page 72
useful when sewing thicker materials at high sewing speeds. The thread wiper is driven by a pneumatic cylinder. Allows the upper thread tension to be switched between two settings at any position desired by using the programmer. *Refer to the separate Parts Book for details. KE-436C 66 - Brother International KE-436C | Instruction Manual - English - Page 73
INSTRUCTION MANUAL 15-1, Naeshiro-cho, Mizuho-ku, Nagoya 467-8561, Japan. Phone: 81-52-824-2177 Printed in Japan 118-P34 S91P34-102 2002.10.B(1)
-
 1
1 -
 2
2 -
 3
3 -
 4
4 -
 5
5 -
 6
6 -
 7
7 -
8
-
9
-
10
-
11
-
12
-
13
-
14
-
15
-
16
-
17
-
18
-
19
-
20
-
21
-
22
-
23
-
24
-
25
-
26
-
27
-
28
-
29
-
30
-
31
-
32
-
33
-
34
-
35
-
36
-
37
-
38
-
39
-
40
-
41
-
42
-
43
-
44
-
45
-
46
-
47
-
48
-
49
-
50
-
51
-
52
-
53
-
54
-
55
-
56
-
57
-
58
-
59
-
60
-
61
-
62
-
63
-
64
-
65
-
66
-
67
-
68
-
69
-
70
-
71
-
72
-
73
 |
 |
KE-436C
Please read this manual before using the machine.
Please keep this manual within easy reach for quick reference.
ELECTRONIC LOCKSTITCH PATTERN TACKER WITH STEPPING FOOT
AND PROGRAMMING FUNCTION
INSTRUCTION MANUAL