Brother International KE-436C Instruction Manual - English - Page 13
Installing the head rest, 3-9. Installing the liquid cooling tank, optional
 |
View all Brother International KE-436C manuals
Add to My Manuals
Save this manual to your list of manuals |
Page 13 highlights
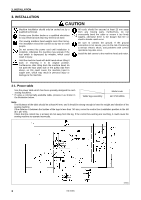
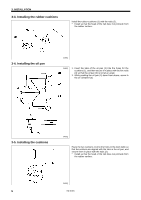
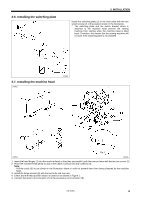
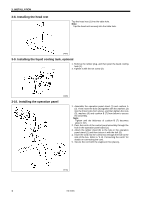
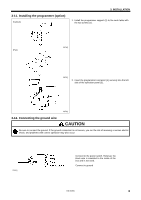
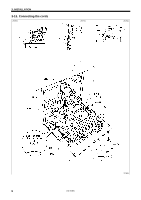
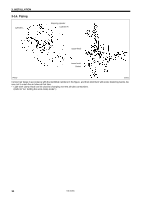
3. INSTALLATION 3-8. Installing the head rest Tap the head rest (1) into the table hole. Note: Tap the head rest securely into the table hole. 2497Q 3-9. Installing the liquid cooling tank, optional 1. Remove the rubber plug, and then push the liquid cooling tank (1). 2. Tighten it with the set screw (2). 3-10. Installing the operation panel 2498Q 1. Assemble the operation panel stand (1) and cushion A (2). Then insert the bolts (4) together with the washers (3) into the three holes from above, and then tighten the nuts (5), washers (6) and cushion B (7) from below to secure the assembly. Note: Tighten until the thickness of cushion B (7) becomes about 1 mm. 2. Pass the cords of the control panel assembly through the hole in the operation panel stand (1). 3. Attach the rubber sheet (8) to the hole in the operation panel stand (1) and then secure it with the bolt (9). 4. Insert the cord into the control box through the hole at the side of the box. Refer to "3-13. Connecting the cords" for details on connecting the cord. 5. Secure the cord with the staples (in five places). 2673Q 7 KE-436C
-
 1
1 -
2
-
3
-
4
-
5
-
6
-
7
-
 8
8 -
 9
9 -
 10
10 -
 11
11 -
 12
12 -
 13
13 -
 14
14 -
 15
15 -
 16
16 -
 17
17 -
 18
18 -
19
-
20
-
21
-
22
-
23
-
24
-
25
-
26
-
27
-
28
-
29
-
30
-
31
-
32
-
33
-
34
-
35
-
36
-
37
-
38
-
39
-
40
-
41
-
42
-
43
-
44
-
45
-
46
-
47
-
48
-
49
-
50
-
51
-
52
-
53
-
54
-
55
-
56
-
57
-
58
-
59
-
60
-
61
-
62
-
63
-
64
-
65
-
66
-
67
-
68
-
69
-
70
-
71
-
72
-
73
 |
 |
