Brother International MFC-J6510DW Software Users Manual - English - Page 198
Scan to File, Black Start, Color Start, Login, Scan to FTP/Network - default password
 |
UPC - 012502626626
View all Brother International MFC-J6510DW manuals
Add to My Manuals
Save this manual to your list of manuals |
Page 198 highlights
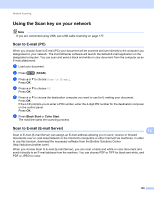
Network Scanning Scan to File 13 When you choose Scan to File, you can scan a black and white or color document and send it directly to a computer you designate on your network. The file will be saved in the folder and file format that you have configured in ControlCenter. a Load your document. b Press (SCAN). c Press a or b to choose Scan to File. Press OK. d Press a or b to choose the destination computer you want to send to. Press OK. If the LCD prompts you to enter a PIN number, enter the 4-digit PIN number for the destination computer on the control panel. Press OK. e Press Black Start or Color Start. The machine starts the scanning process. Scan to FTP 13 When you choose Scan to FTP, you can scan a black and white or color document directly to an FTP server on your local network, or on the internet. The details required to use Scan to FTP can be entered by using Web Based Management to pre-configure and store the details in an FTP Profile. Note • Scan to FTP is available when FTP profiles are configured by using Web Based Management. • We recommend Microsoft® Internet Explorer® 6.0 (or greater) or Firefox 3.0 (or greater) for Windows® and Safari 3.0 (or greater) for Macintosh. Please also make sure that JavaScript and Cookies are always 13 enabled in whichever browser you use. If a different web browser is used, make sure it is compatible with HTTP 1.0 and HTTP 1.1. To use Web Based Management, type http://xxx.xxx.xxx.xxx (where xxx.xxx.xxx.xxx is the IP address of your machine) into your browser and enter your password (the default value is "access") in the Login field, and then you can configure or change the settings in Scan to FTP/Network in the Scan tab. You can configure up to five FTP server profiles and you can choose what profile numbers (1 to 5) to use for Scan to FTP settings in Scan to FTP/Network Profile. Note If you want to find the IP address of your machine, see Printing the Network Configuration List in the Network User's Guide. 191
-
 1
1 -
2
-
3
-
4
-
5
-
6
-
7
-
8
-
9
-
10
-
11
-
12
-
13
-
14
-
15
-
16
-
17
-
18
-
19
-
20
-
21
-
22
-
23
-
24
-
25
-
26
-
27
-
28
-
29
-
30
-
31
-
32
-
33
-
34
-
35
-
36
-
37
-
38
-
39
-
40
-
41
-
42
-
43
-
44
-
45
-
46
-
47
-
48
-
49
-
50
-
51
-
52
-
53
-
54
-
55
-
56
-
57
-
58
-
59
-
60
-
61
-
62
-
63
-
64
-
65
-
66
-
67
-
68
-
69
-
70
-
71
-
72
-
73
-
74
-
75
-
76
-
77
-
78
-
79
-
80
-
81
-
82
-
83
-
84
-
85
-
86
-
87
-
88
-
89
-
90
-
91
-
92
-
93
-
94
-
95
-
96
-
97
-
98
-
99
-
100
-
101
-
102
-
103
-
104
-
105
-
106
-
107
-
108
-
109
-
110
-
111
-
112
-
113
-
114
-
115
-
116
-
117
-
118
-
119
-
120
-
121
-
122
-
123
-
124
-
125
-
126
-
127
-
128
-
129
-
130
-
131
-
132
-
133
-
134
-
135
-
136
-
137
-
138
-
139
-
140
-
141
-
142
-
143
-
144
-
145
-
146
-
147
-
148
-
149
-
150
-
151
-
152
-
153
-
154
-
155
-
156
-
157
-
158
-
159
-
160
-
161
-
162
-
163
-
164
-
165
-
166
-
167
-
168
-
169
-
170
-
171
-
172
-
173
-
174
-
175
-
176
-
177
-
178
-
179
-
180
-
181
-
182
-
183
-
184
-
185
-
186
-
187
-
188
-
189
-
190
-
191
-
192
-
 193
193 -
 194
194 -
 195
195 -
 196
196 -
 197
197 -
 198
198 -
 199
199 -
 200
200 -
 201
201 -
 202
202 -
 203
203 -
204
-
205
-
206
-
207
 |
 |