Brother International NX-600 Users Manual - English - Page 88
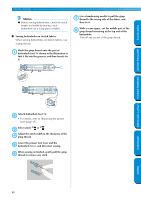
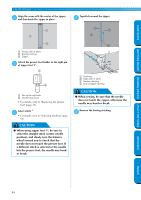
When sewing, be sure that the needle, does not touch the button, otherwise
 |
View all Brother International NX-600 manuals
Add to My Manuals
Save this manual to your list of manuals |
Page 88 highlights
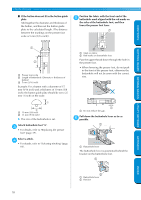
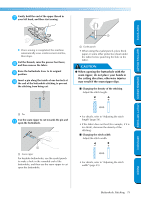
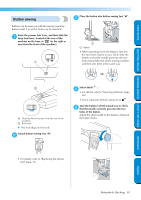
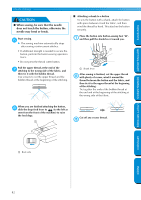
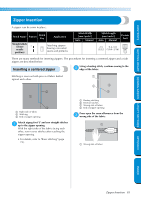
GETTING READY SEWING BASICS UTILITY STITCHES UTILITY STITCHES CONTENTS CAUTION ● When sewing, be sure that the needle does not touch the button, otherwise the needle may bend or break. Start sewing. f X The sewing machine automatically stops after sewing reinforcement stitches. • If additional strength is needed to secure the button, perform the button-sewing operation twice. • Do not press the thread cutter button. Pull the upper thread at the end of the g stitching to the wrong side of the fabric, and then tie it with the bobbin thread. Use scissors to cut the upper thread and the bobbin thread at the beginning of the stitching. ■ Attaching a shank to a button To sew the button with a shank, attach the button with space between it and the fabric, and then wind the thread by hand. This attaches the button securely. Place the button into button-sewing foot "M", a and then pull the shank lever toward you. 1 a Shank lever After sewing is finished, cut the upper thread b with plenty of excess, wind it around the thread between the button and the fabric, and then tie it to the upper thread at the beginning of the stitching. Tie together the ends of the bobbin thread at the end and at the beginning of the stitching at the wrong side of the fabric. When you are finished attaching the button, h slide the drop feed lever to (to the left as seen from the front of the machine) to raise the feed dogs. 1 Cut off any excess thread. c APPENDIX a Back side INDEX 82
-
 1
1 -
2
-
3
-
4
-
5
-
6
-
7
-
8
-
9
-
10
-
11
-
12
-
13
-
14
-
15
-
16
-
17
-
18
-
19
-
20
-
21
-
22
-
23
-
24
-
25
-
26
-
27
-
28
-
29
-
30
-
31
-
32
-
33
-
34
-
35
-
36
-
37
-
38
-
39
-
40
-
41
-
42
-
43
-
44
-
45
-
46
-
47
-
48
-
49
-
50
-
51
-
52
-
53
-
54
-
55
-
56
-
57
-
58
-
59
-
60
-
61
-
62
-
63
-
64
-
65
-
66
-
67
-
68
-
69
-
70
-
71
-
72
-
73
-
74
-
75
-
76
-
77
-
78
-
79
-
80
-
81
-
82
-
 83
83 -
 84
84 -
 85
85 -
 86
86 -
 87
87 -
 88
88 -
 89
89 -
 90
90 -
 91
91 -
 92
92 -
 93
93 -
94
-
95
-
96
-
97
-
98
-
99
-
100
-
101
-
102
-
103
-
104
-
105
-
106
-
107
-
108
-
109
-
110
-
111
-
112
-
113
-
114
-
115
-
116
-
117
-
118
-
119
-
120
-
121
-
122
-
123
-
124
-
125
-
126
-
127
-
128
-
129
-
130
-
131
-
132
-
133
-
134
-
135
-
136
-
137
-
138
-
139
-
140
-
141
-
142
-
143
-
144
-
145
-
146
-
147
-
148
-
149
-
150
-
151
-
152
-
153
-
154
-
155
-
156
-
157
-
158
-
159
 |
 |
