Brother International PC-7000 Users Manual - English - Page 43
Brother International PC-7000 Manual
 |
View all Brother International PC-7000 manuals
Add to My Manuals
Save this manual to your list of manuals |
Page 43 highlights
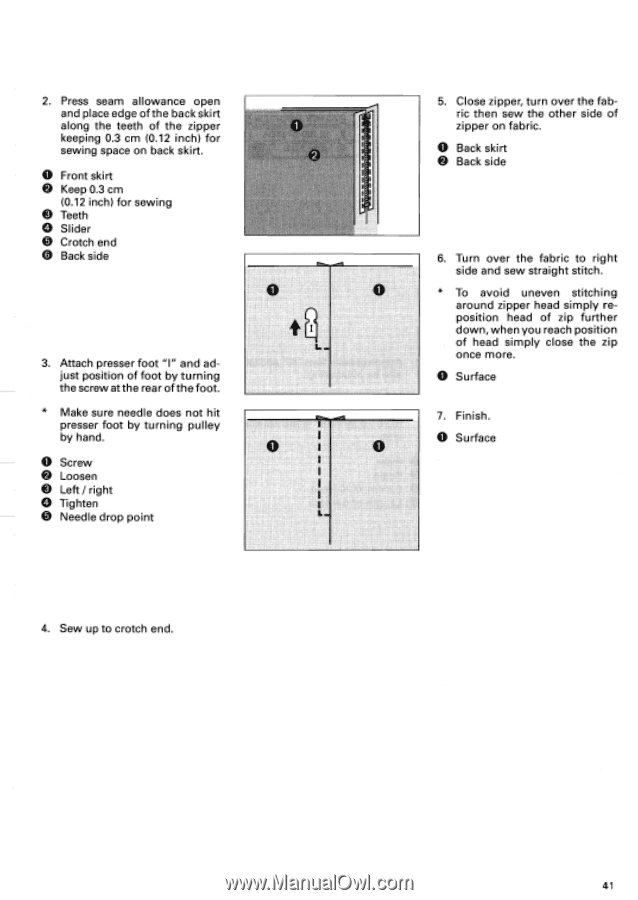
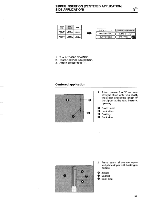
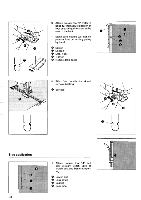
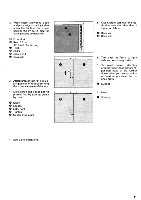
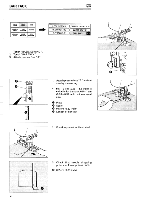
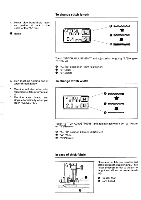
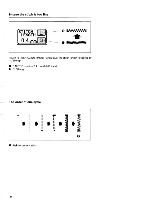
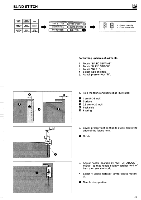
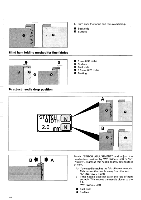
O 2. Press seam allowance open and place edge of the back skirt along the teeth of the zipper keeping 0.3 cm (0.12 inch) for sewing space on back skirt. O Front skirt • Keep 0.3 cm (0.12 inch) for sewing O Teeth Slider • Crotch end O Back side 3. Attach presser foot "I" and adjust position of foot by turning the screw at the rear of the foot. 5. Close zipper, turn over the fabric then sew the other side of zipper on fabric. O Back skirt • Back side 6. Turn over the fabric to right side and sew straight stitch. 0 * To avoid uneven stitching around zipper head simply re- position head of zip further down, when you reach position of head simply close the zip once more. O Surface * Make sure needle does not hit presser foot by turning pulley 7. Finish. by hand. 0 I o O Surface O Screw • Loosen O Left / right 1 O Tighten • Needle drop point 4. Sew up to crotch end. 41
-
 1
1 -
2
-
3
-
4
-
5
-
6
-
7
-
8
-
9
-
10
-
11
-
12
-
13
-
14
-
15
-
16
-
17
-
18
-
19
-
20
-
21
-
22
-
23
-
24
-
25
-
26
-
27
-
28
-
29
-
30
-
31
-
32
-
33
-
34
-
35
-
36
-
37
-
 38
38 -
 39
39 -
 40
40 -
 41
41 -
 42
42 -
 43
43 -
 44
44 -
 45
45 -
 46
46 -
 47
47 -
 48
48 -
49
-
50
-
51
-
52
-
53
-
54
-
55
-
56
-
57
-
58
-
59
-
60
-
61
-
62
-
63
-
64
-
65
-
66
-
67
-
68
-
69
-
70
-
71
-
72
-
73
-
74
-
75
-
76
-
77
-
78
-
79
-
80
-
81
-
82
-
83
-
84
-
85
-
86
-
87
-
88
-
89
-
90
-
91
-
92
-
93
-
94
-
95
-
96
-
97
-
98
-
99
-
100
-
101
-
102
-
103
-
104
-
105
-
106
-
107
-
108
-
109
-
110
-
111
-
112
-
113
-
114
-
115
-
116
-
117
-
118
-
119
-
120
-
121
-
122
 |
 |