Brother International PE-DESIGN Ver.6 Users Manual - English - Page 69
Step 4, Step 5
 |
View all Brother International PE-DESIGN Ver.6 manuals
Add to My Manuals
Save this manual to your list of manuals |
Page 69 highlights
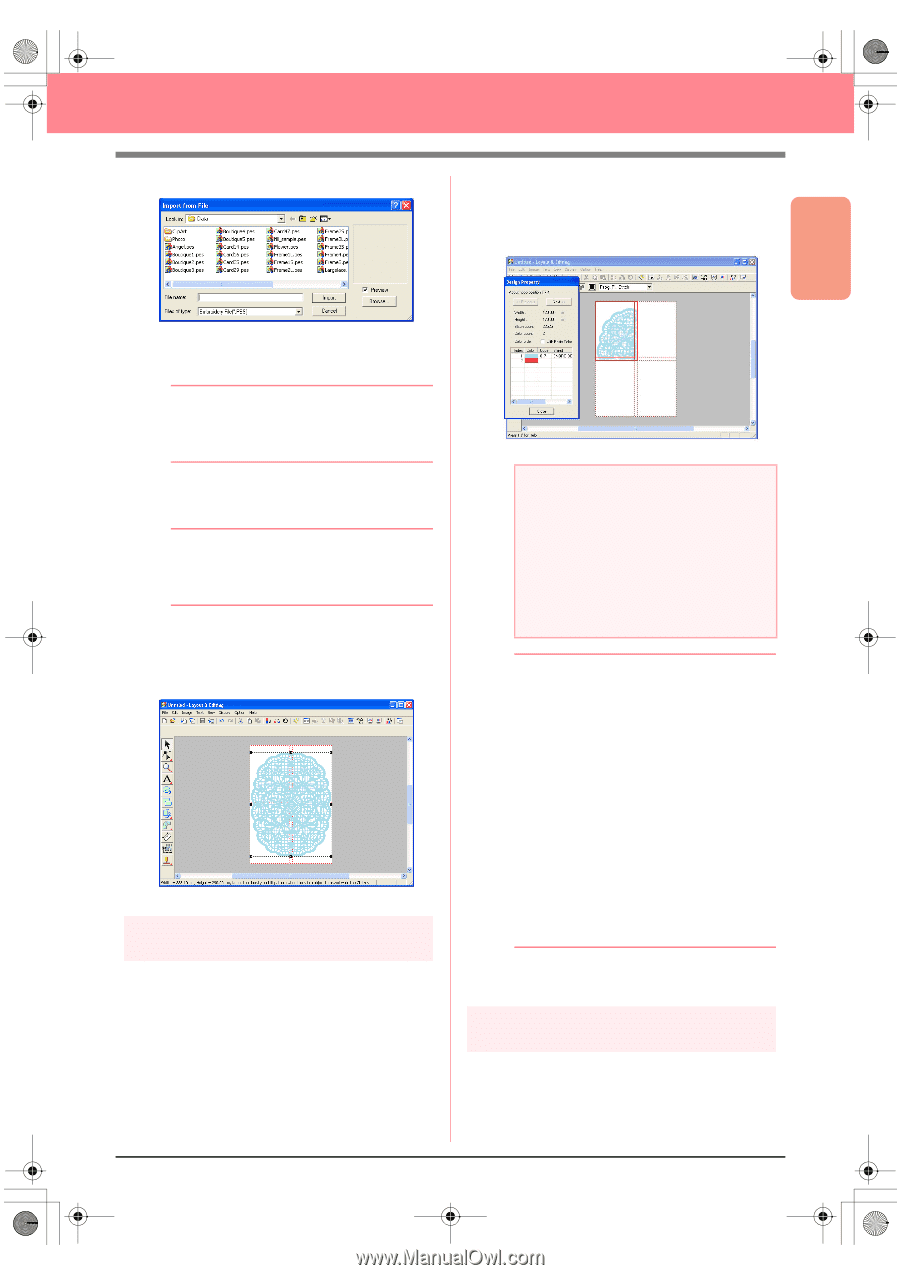
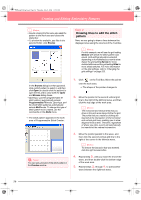
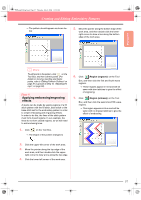
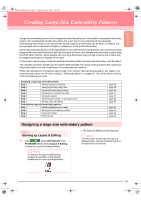
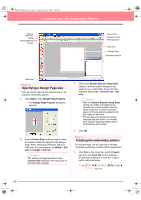
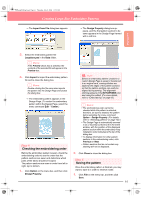
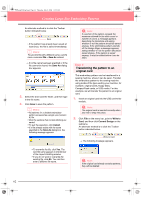
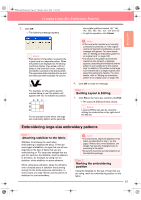
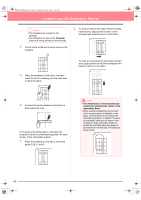
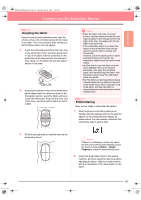
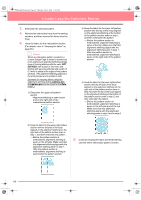
PeDesignV6Eng.book Page 61 Thursday, July 8, 2004 11:59 AM Creating Large-Size Embroidery Patterns → The Import from File dialog box appears. → The Design Property dialog box appears, and the first pattern section to be sewn appears in the Design Page framed with a red line. Basic Operation 2. Select the embroidery pattern file Largelace.pes in the Data folder. b Memo: If the Preview check box is selected, the contents of the selected file will appear in the Preview box. 3. Click Import to import the embroidery pattern file and to close the dialog box. b Memo: Double-clicking the file name also imports the pattern into the Design Page and closes the dialog box. → The embroidery pattern appears in the Design Page. (To center the embroidery pattern within the Design Page, select the menu command Edit - Center.) Step 4 Checking the embroidering order Before the embroidery pattern is sewn, check the embroidering order to see the order that the pattern sections are sewn and determine which parts of the fabric should be hooped. The pattern sections are sewn in order from left to right, top to bottom. 1. Click Option on the menu bar, and then click Design Property. a Note: Before an embroidery pattern created in a custom Design Page is saved or transferred to an original card, running stitches are added at the edges of the pattern sections so that the pattern sections can easily be aligned during sewing. This alignment stitching appears in the NOT DEFINED color and cannot be edited. (For more details, refer to "Embroidering" on page 65.) b Memo: • The embroidering order cannot be checked while the pattern is selected; therefore, be sure to deselect the pattern before selecting the menu command Option - Design Property. (For details, refer to "Selecting patterns" on page 130.) • The Design Page is automatically zoomed in on or zoomed out from to fit in the entire window, with the position of the displayed pattern section within the embroidery hoop installation order indicated at the top of the dialog box. • To display information for other pattern sections in the embroidering order, click Previous or Next. • Pattern sections that do not contain any stitching will not be displayed. 2. Click Close to close the dialog box. Step 5 Saving the pattern Once the embroidery pattern is finished, you may want to save it in order to retrieve it later. 1. Click File on the menu bar, and then click Save. 61
-
 1
1 -
2
-
3
-
4
-
5
-
6
-
7
-
8
-
9
-
10
-
11
-
12
-
13
-
14
-
15
-
16
-
17
-
18
-
19
-
20
-
21
-
22
-
23
-
24
-
25
-
26
-
27
-
28
-
29
-
30
-
31
-
32
-
33
-
34
-
35
-
36
-
37
-
38
-
39
-
40
-
41
-
42
-
43
-
44
-
45
-
46
-
47
-
48
-
49
-
50
-
51
-
52
-
53
-
54
-
55
-
56
-
57
-
58
-
59
-
60
-
61
-
62
-
63
-
 64
64 -
 65
65 -
 66
66 -
 67
67 -
 68
68 -
 69
69 -
 70
70 -
 71
71 -
 72
72 -
 73
73 -
 74
74 -
75
-
76
-
77
-
78
-
79
-
80
-
81
-
82
-
83
-
84
-
85
-
86
-
87
-
88
-
89
-
90
-
91
-
92
-
93
-
94
-
95
-
96
-
97
-
98
-
99
-
100
-
101
-
102
-
103
-
104
-
105
-
106
-
107
-
108
-
109
-
110
-
111
-
112
-
113
-
114
-
115
-
116
-
117
-
118
-
119
-
120
-
121
-
122
-
123
-
124
-
125
-
126
-
127
-
128
-
129
-
130
-
131
-
132
-
133
-
134
-
135
-
136
-
137
-
138
-
139
-
140
-
141
-
142
-
143
-
144
-
145
-
146
-
147
-
148
-
149
-
150
-
151
-
152
-
153
-
154
-
155
-
156
-
157
-
158
-
159
-
160
-
161
-
162
-
163
-
164
-
165
-
166
-
167
-
168
-
169
-
170
-
171
-
172
-
173
-
174
-
175
-
176
-
177
-
178
-
179
-
180
-
181
-
182
-
183
-
184
-
185
-
186
-
187
-
188
-
189
-
190
-
191
-
192
-
193
-
194
-
195
-
196
-
197
-
198
-
199
-
200
-
201
-
202
-
203
-
204
-
205
-
206
-
207
-
208
-
209
-
210
-
211
-
212
-
213
-
214
-
215
-
216
-
217
-
218
-
219
-
220
-
221
-
222
-
223
-
224
-
225
-
226
-
227
-
228
-
229
-
230
-
231
-
232
-
233
-
234
-
235
-
236
-
237
-
238
-
239
-
240
-
241
-
242
-
243
-
244
-
245
-
246
-
247
-
248
-
249
-
250
-
251
-
252
-
253
-
254
-
255
-
256
-
257
-
258
-
259
-
260
-
261
-
262
-
263
-
264
-
265
-
266
-
267
-
268
-
269
-
270
-
271
-
272
 |
 |