Brother International VX-1120 Users Manual - English - Page 37
Buttonhole, Button, Sewing
 |
View all Brother International VX-1120 manuals
Add to My Manuals
Save this manual to your list of manuals |
Page 37 highlights
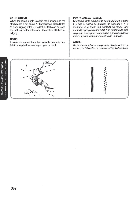
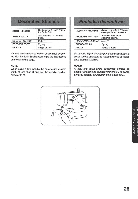
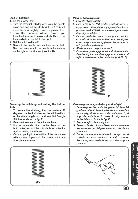
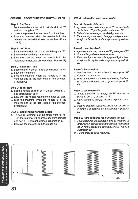
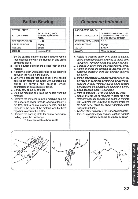
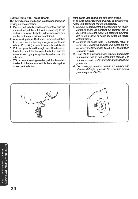
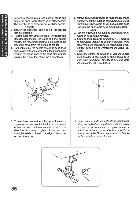
Step D: Left Row 1. Lift the presser foot. 2. Turn the material 180 degrees using the needle as an axis and set the stitch width to 0. This will move the fabric slightly. Lower the presser foot. 3. Turn the balance wheel toward you (counterclockwise) to sew one stitch. This moves the needle from the left to the right. 4. Set the stitch width to 2. 5. Sew until the needle reaches the other bar tack. Stop the machine with the needle in the material on the right of the stitches (position D). I Paso D: Lado izquierdo 1. Levante elprensatelas. 2. Gire el tejido de 180 grados sirviOndose de la aguja como placa giratoria y ajuste el ancho de puntada en 0. El tejido va a mover ligeramente. Baje el prensatelas. 3. Gire Ia ruedecilla hacia usted (en el sentido contrario al de las manecillas de un relop para coserunapuntada yla aguja va a desplazarse de la izquierda a la derecha. 4. Ajuste el ancho de puntada en 2. 5. Cosa hasta quela aguja alcance elprimerremate. Parela maquina cuandola aguja esta picada en el tejido a la derecha de las puntadas (posici6n 13). C Securing the stitching and cutting the buttonhole 1. To secure the stitching, turn the material 90 degrees counterclockwise, set the stitch width to 0, the stitch length to 1 and sew 5-6 Straight Stitches as shown in fig. E. 2. Remove the material from the machine. 3. It is recommended that pins be placed across both bedeck ends of the buttonhole as protection against cutting the stitches. 4. Cut an opening in the middle of the buttonhole with a seam ripper tool. Be careful not to cut through any stitches. • D Para asegurar las puntadas y abrir el ojal 1. Para asegurar las puntadas, gire el tejido de 90 grados en elsentido contrarioaldelas manecillas de un reloj, ajuste el ancho de puntada en 0, el largo de puntada en 1 y cosa 5 6 6 puntadas rectas tal como indica la fig. E. 2. Retire el tejido de la maquina. 3. Se recomienda colocar alfileres en ambos remates extremos del ojal para evitar el corte de las puntadas. 4. Corte una apertura en el medio del ojal con el cortador especial destinado a abrir costuras. Ponga especial cuidado en no cortar ninguna puntada. BUTTONHOLE AND BUTTON SEWING (E) I 30
-
 1
1 -
2
-
3
-
4
-
5
-
6
-
7
-
8
-
9
-
10
-
11
-
12
-
13
-
14
-
15
-
16
-
17
-
18
-
19
-
20
-
21
-
22
-
23
-
24
-
25
-
26
-
27
-
28
-
29
-
30
-
31
-
 32
32 -
 33
33 -
 34
34 -
 35
35 -
 36
36 -
 37
37 -
 38
38 -
 39
39 -
 40
40 -
 41
41 -
 42
42 -
43
-
44
-
45
-
46
-
47
-
48
-
49
-
50
-
51
-
52
-
53
-
54
-
55
-
56
-
57
-
58
-
59
-
60
-
61
-
62
-
63
-
64
 |
 |
