Brother International VX-1120 Users Manual - English - Page 43
Fruncido, Zurcido
 |
View all Brother International VX-1120 manuals
Add to My Manuals
Save this manual to your list of manuals |
Page 43 highlights
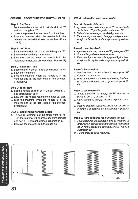
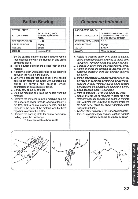
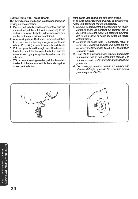
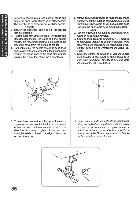
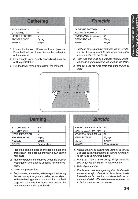
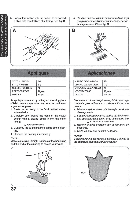
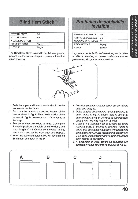
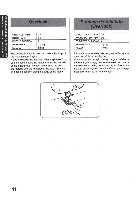
USING A- TACHMENTS AND APPLICATIONS USO DE ACCESORIOS Y APLICACIONES Gathering STITCH LENGTH STITCH WIDTH NEEDLE POSITION PRESSER FOOT NEEDLE 4 0 M Zigzag Single 1. Loosen the tension of the upper thread (to about 2) so that the lower thread lies on the underside of the material. 2. Sew a single row or evenly-spaced multiple rows of Straight Stitches. 3. Pull the lower thread(s) to gather the material. Fruncido LARGO DE PUNTADA ANCHO DE PUNTADA POSICION DE LA AGUJA PRENSATELAS AGUJA 0 M Zigzag Simple 1. Suelte la tensi6n del hilo superior (haste alrededor de 2) para que el hilo inferior se encuentre tirante en el reves del tejido. 2. Cosa una sola linea de puntadas rectas o distintas lineas a igual distancia las unas de las otras. 3. Tire del o de los hilos inferiores para fruncir el tejido. STITCH LENGTH STITCH WIDTH NEEDLE POSITION PRESSER FOOT NEEDLE OTHER F-2 0 M Zigzag Single Darning plate 1. Place the darning plate on the needle plate and press down into place as shown in fig. A on the next page. 2. Place the portion to be darned under the presser foot together with a fabric underlay for reinforcement. 3. Lower the presser foot. 4. Begin sewing alternating between gently drawing the work away from you and pulling it toward you. With the darning plate on the machine, the feed dogs will not move the fabric. You control the fabric movement with your hands. Zurcido LARGO DE LA PUNTADA ANCHO DE LA PUNTADA POSICION DE LA AGUJA PRENSATELAS AGUJA OTROS F-2 0 M Zigzag Simple Placa de zurcir 1. Instale la placa de zurcirsobre la placa de agujas yaprietepara engancharla talcomo se indica en la fig. A de la siguiente pagina. 2. Ponga el tejido a zurcir debajo del prensatelas con una pieza de tela de refuerzo debajo. 3. Baje elprensatelas. 4. Empiece a coser empujando y tirando altemativamentedeltejido. Cuandolaplace dezurcireste instalada en la maquina los alimentadores no mueven el tejido. El movimiento de este se controla unicamente con las manos. 36
-
 1
1 -
2
-
3
-
4
-
5
-
6
-
7
-
8
-
9
-
10
-
11
-
12
-
13
-
14
-
15
-
16
-
17
-
18
-
19
-
20
-
21
-
22
-
23
-
24
-
25
-
26
-
27
-
28
-
29
-
30
-
31
-
32
-
33
-
34
-
35
-
36
-
37
-
 38
38 -
 39
39 -
 40
40 -
 41
41 -
 42
42 -
 43
43 -
 44
44 -
 45
45 -
 46
46 -
 47
47 -
 48
48 -
49
-
50
-
51
-
52
-
53
-
54
-
55
-
56
-
57
-
58
-
59
-
60
-
61
-
62
-
63
-
64
 |
 |
