Canon PowerShot A200 Software Starter Guide DC SD Ver.10 - Page 49
Shooting with RemoteCapture
 |
View all Canon PowerShot A200 manuals
Add to My Manuals
Save this manual to your list of manuals |
Page 49 highlights
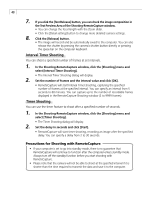
45 Shooting with RemoteCapture RemoteCapture will start if you click the [Edit] menu in ZoomBrowser EX and select [RemoteCapture] when the camera is connected to the computer via a USB interface. RemoteCapture lets you control the camera's shutter remotely from the computer to shoot still images. • You can also save images directly to the computer by pressing the camera's shutter button. Other buttons and switches on the camera, including the zoom, will not operate with a transmission in progress. • You may notice that the interval between the shutter release and activation is slightly longer when RemoteCapture is used to shoot than when the camera is used in the normal fashion. • Images shot with RemoteCapture are automatically saved to the folder selected in ZoomBrowser EX. Windows • Save-RemoteCapture Window Thumbnail View Displays thumbnails of all the images shot after RemoteCapture is started. Image Display Area Displays the image selected in the Thumbnail View. Connect/Disconnect Button Click here to open a connection to the camera and display the RemoteCapture Shooting window. It will change to the Disconnect button while a connection is open. Click it to close the connection. View Button Select an image in the Thumbnail View and click here to display it in the Image Display Area. Delete Button Select an image in the Thumbnail View and click here to delete it. Since it is deleted from the computer too, ensure that you have the correct image. Histogram Check the distribution of brightness data here. Image Information Check the image settings here. Comments Add a comment about the image here.
-
 1
1 -
2
-
3
-
4
-
5
-
6
-
7
-
8
-
9
-
10
-
11
-
12
-
13
-
14
-
15
-
16
-
17
-
18
-
19
-
20
-
21
-
22
-
23
-
24
-
25
-
26
-
27
-
28
-
29
-
30
-
31
-
32
-
33
-
34
-
35
-
36
-
37
-
38
-
39
-
40
-
41
-
42
-
43
-
 44
44 -
 45
45 -
 46
46 -
 47
47 -
 48
48 -
 49
49 -
 50
50 -
 51
51 -
 52
52 -
 53
53 -
 54
54 -
55
-
56
-
57
-
58
-
59
-
60
-
61
-
62
-
63
-
64
-
65
-
66
-
67
-
68
-
69
-
70
-
71
-
72
-
73
-
74
-
75
-
76
-
77
-
78
-
79
-
80
-
81
-
82
-
83
-
84
-
85
-
86
-
87
-
88
-
89
-
90
-
91
-
92
-
93
-
94
 |
 |
