Canon PowerShot A200 Software Starter Guide DC SD Ver.10 - Page 51
Shooting
 |
View all Canon PowerShot A200 manuals
Add to My Manuals
Save this manual to your list of manuals |
Page 51 highlights
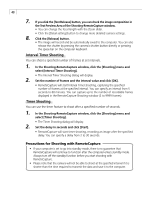
Windows 47 Shooting 1. Attach the supplied USB cable to the computer's USB port and the camera's DIGITAL terminal. Prepare the camera for communication with the computer. • For USB interface connection instructions, see Connecting to a USB Port (p. 14). • Open the camera lens cover after the connection is established. • Windows 98/Windows 2000: the event dialog will appear, allowing you to select an application program to start. • Windows Me: the Scanners and Cameras Wizard will appear. Click the [Cancel] button and double-click the [Canon ZoomBrowser EX] icon on the desktop to start ZoomBrowser EX. From its [Edit] menu, select [RemoteCapture]. The Shooting - RemoteCapture window will display. Proceed to Step 6. • Windows XP: ZoomBrowser EX will start immediately when it has been set to auto start in the Setting an Event to Start Automatically (Windows XP only) section (p. 24). In this case, proceed to step 3 below. If the Scanners and Cameras Wizard has been set to auto start, the [Scanners and Cameras Wizard] dialog will display. Click the [Cancel] button and double-click the [Canon ZoomBrowser EX] icon on the desktop to start ZoomBrowser EX. After ZoomBrowser EX starts, click the [Edit] menu and select [RemoteCapture]. When the Shooting-RemoteCapture window opens, proceed to Step 6 below. 2. Select [Canon ZoomBrowser EX] and click [OK]. • ZoomBrowser EX will start and open the ZoomBrowser EX Automation Wizard. 3. Click the [Modify Settings] button. • The ZoomBrowser EX Automation Wizard dialog will display. 4. Select [Launch RemoteCapture] and click the [Finish] button. • RemoteCapture will start and display the "Connect to Camera?" dialog. • If ZoomBrowser EX is already running, click the [Edit] menu and select [RemoteCapture] to start RemoteCapture. 5. Click [Connect]. • Shooting-RemoteCapture window will display. 6. Set the Size/Quality, Flash, White Balance and Exposure Compensation settings. • If you turn the camera on either side to shoot, you can rotate the recorded image 90º either way when it is saved by selecting [90 degrees left] or [90 degrees right] in the Rotation section. To change where the image is saved, see Changing the Save Location and Other Preferences (p. 49).
-
 1
1 -
2
-
3
-
4
-
5
-
6
-
7
-
8
-
9
-
10
-
11
-
12
-
13
-
14
-
15
-
16
-
17
-
18
-
19
-
20
-
21
-
22
-
23
-
24
-
25
-
26
-
27
-
28
-
29
-
30
-
31
-
32
-
33
-
34
-
35
-
36
-
37
-
38
-
39
-
40
-
41
-
42
-
43
-
44
-
45
-
 46
46 -
 47
47 -
 48
48 -
 49
49 -
 50
50 -
 51
51 -
 52
52 -
 53
53 -
 54
54 -
 55
55 -
 56
56 -
57
-
58
-
59
-
60
-
61
-
62
-
63
-
64
-
65
-
66
-
67
-
68
-
69
-
70
-
71
-
72
-
73
-
74
-
75
-
76
-
77
-
78
-
79
-
80
-
81
-
82
-
83
-
84
-
85
-
86
-
87
-
88
-
89
-
90
-
91
-
92
-
93
-
94
 |
 |
