Canon PowerShot ELPH 300 HS PowerShot ELPH 300 HS / IXUS 220 HS Camera User Gu - Page 152
Printing Images
 |
View all Canon PowerShot ELPH 300 HS manuals
Add to My Manuals
Save this manual to your list of manuals |
Page 152 highlights
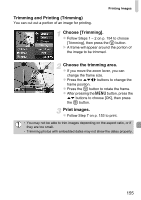
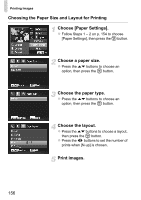
Printing Images Easy Print You can easily print the pictures you take by connecting the camera to a PictBridge compliant printer (sold separately) using the supplied interface cable (p. 2). Turn off the camera and printer. Connect the camera to the printer. z Open the cover and insert the cable's small plug firmly into the camera terminal in the direction shown. z Insert the cable's large plug into the printer. For connection details, refer to the user guide provided with the printer. Turn on the printer. Turn on the camera. z Press the 1 button to turn on the camera. Choose an image. z Press the qr buttons to choose an image. Choose 2. z After pressing the m button, press the op buttons to choose 2, then press the m button again. 152
-
 1
1 -
2
-
3
-
4
-
5
-
6
-
7
-
8
-
9
-
10
-
11
-
12
-
13
-
14
-
15
-
16
-
17
-
18
-
19
-
20
-
21
-
22
-
23
-
24
-
25
-
26
-
27
-
28
-
29
-
30
-
31
-
32
-
33
-
34
-
35
-
36
-
37
-
38
-
39
-
40
-
41
-
42
-
43
-
44
-
45
-
46
-
47
-
48
-
49
-
50
-
51
-
52
-
53
-
54
-
55
-
56
-
57
-
58
-
59
-
60
-
61
-
62
-
63
-
64
-
65
-
66
-
67
-
68
-
69
-
70
-
71
-
72
-
73
-
74
-
75
-
76
-
77
-
78
-
79
-
80
-
81
-
82
-
83
-
84
-
85
-
86
-
87
-
88
-
89
-
90
-
91
-
92
-
93
-
94
-
95
-
96
-
97
-
98
-
99
-
100
-
101
-
102
-
103
-
104
-
105
-
106
-
107
-
108
-
109
-
110
-
111
-
112
-
113
-
114
-
115
-
116
-
117
-
118
-
119
-
120
-
121
-
122
-
123
-
124
-
125
-
126
-
127
-
128
-
129
-
130
-
131
-
132
-
133
-
134
-
135
-
136
-
137
-
138
-
139
-
140
-
141
-
142
-
143
-
144
-
145
-
146
-
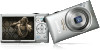
 147
147 -
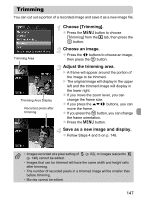
 148
148 -
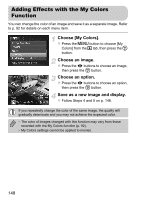
 149
149 -
 150
150 -
 151
151 -
 152
152 -
 153
153 -
 154
154 -
 155
155 -
 156
156 -
 157
157 -
158
-
159
-
160
-
161
-
162
-
163
-
164
-
165
-
166
-
167
-
168
-
169
-
170
-
171
-
172
-
173
-
174
-
175
-
176
-
177
-
178
-
179
-
180
-
181
-
182
-
183
-
184
-
185
-
186
-
187
-
188
-
189
-
190
-
191
-
192
-
193
-
194
-
195
-
196
-
197
-
198
-
199
-
200
-
201
-
202
-
203
-
204
-
205
-
206
-
207
-
208
-
209
-
210
-
211
-
212
 |
 |
152
Easy Print
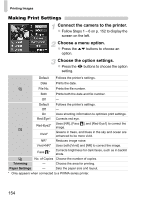
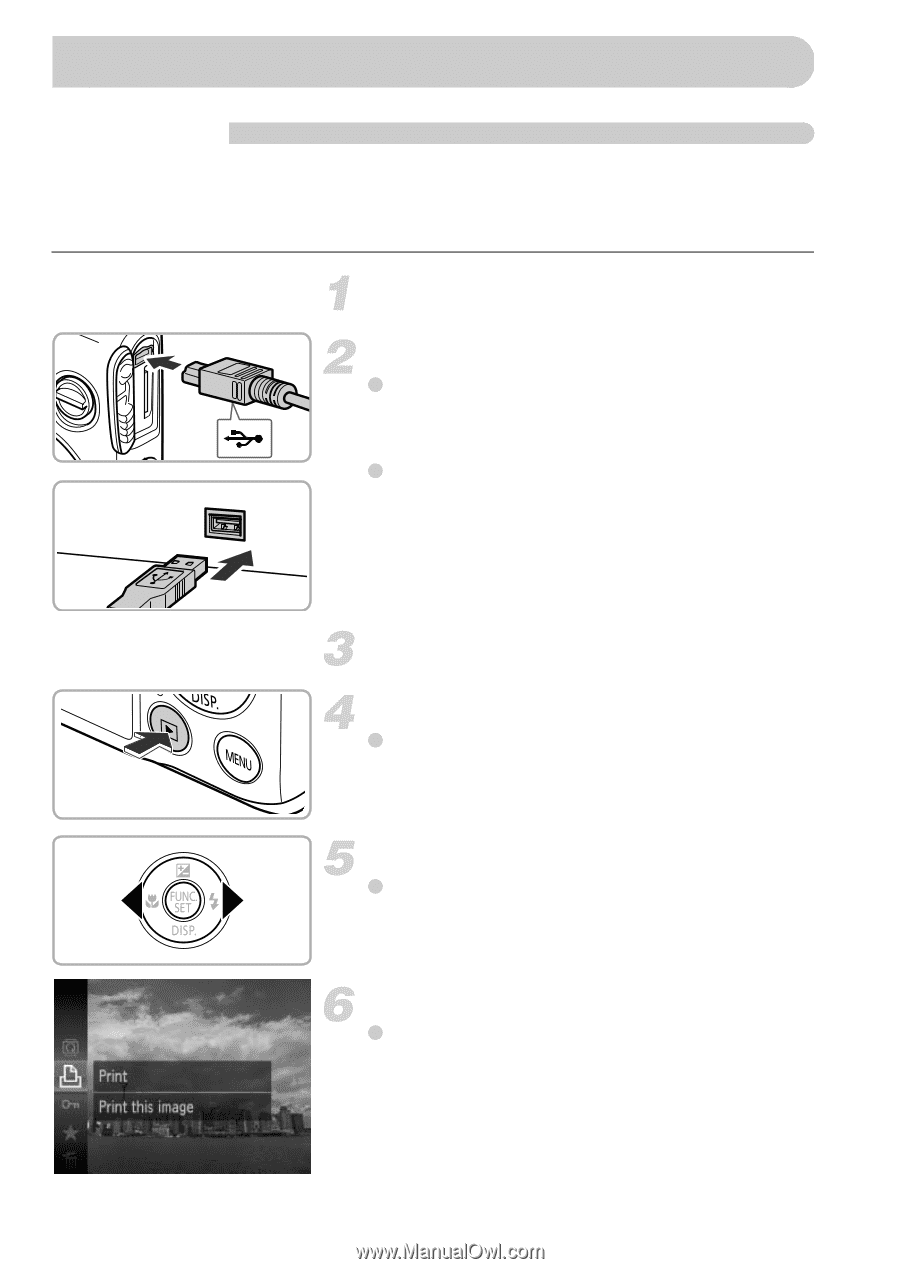
You can easily print the pictures you take by connecting the camera to a
PictBridge compliant printer (sold separately) using the supplied interface
cable (p. 2).
Turn off the camera and printer.
Connect the camera to the printer.
Open the cover and insert the cable’s
small plug firmly into the camera terminal
in the direction shown.
Insert the cable’s large plug into the
printer. For connection details, refer to the
user guide provided with the printer.
Turn on the printer.
Turn on the camera.
Press the
1
button to turn on the camera.
Choose an image.
Press the
qr
buttons to choose an image.
Choose
2
.
After pressing the
m
button, press the
op
buttons to choose
2
, then press the
m
button again.
Printing Images