Dell 944 All In One Inkjet Printer User's Guide - Page 37
Saving Photos to Your Computer, Viewing a Slide Show, Printing All Photos on Memory Card or USB
 |
View all Dell 944 All In One Inkjet Printer manuals
Add to My Manuals
Save this manual to your list of manuals |
Page 37 highlights
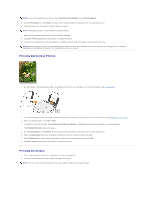
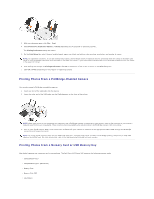
Saving Photos to Your Computer From the Photo Mode menu on the display, scroll to Save to Computer, and then press the Select button on the operator panel. All photos on the memory card or USB memory key are transfered to your computer and are opened in the Memory Card Manager. For more information on Memory Card Manager, see Using Memory Card Manager. Viewing a Slide Show From the Photo Mode menu on the display, scroll to Slide Show, and then press the Select button on the memory card or USB memory key. on the operator panel. The printer displays each photo Printing All Photos on Memory Card or USB Memory Key From the Photo Mode menu on the display, scroll to Print All X Photos, and then press the Select button photos on the memory card or USB memory key. on the operator panel. The printer prints all the NOTE: Only images in JPG or a limited set of TIFF formats can be printed directly from the memory card or USB memory key. If you want to print photos stored on the memory card or USB memory key in a different file format, the photos must be transferred to your computer before printing. Adjusting Photos on a Memory Card or USB Memory Key You can make adjustments to images on a memory card or USB memory key such as cropping, red eye reduction, and rotating before printing them. Cropping Photos 1. Insert a memory card or USB memory key into the printer. 2. Press the up or down Arrow buttons to highlight View Photos or Print, and then press the Select button . 3. Press the up or down Arrow buttons until you see the image you want to crop, and then press the Select button . 4. Press the Menu button . 5. Press the up or down Arrow buttons until you see Crop. 6. Press the Select button . 7. Press the left or right Arrow buttons to resize the image, and then press the Select button . 8. Press the Arrow buttons to adjust the section of the image to be cropped, then press the Select button . 9. Press the up or down Arrow buttons to select the number of copies you want to print, and then press the Start button to preview the image. 10. Press the Start button to print. Rotating Photos 1. Insert a memory card or USB memory key into the printer. 2. Press the up or down Arrow buttons to highlight View Photos or Print, and then press the Select button . 3. Press the up or down Arrow buttons until you see the image you want to rotate, and then press the Select button . 4. Press the Menu button . 5. Press the up or down Arrow buttons until you see Rotate 90 degrees. 6. Press the Select button . 7. Press the up or down Arrow buttons to select the number of copies you want to print, and then press the Start button to preview the image. 8. Press the Start button to print. Using Red Eye Reduction 1. Insert a memory card or USB memory key into the printer. 2. Press the Menu button . 3. Press the up or down Arrow buttons until you see Red Eye Reduction.
-
 1
1 -
2
-
3
-
4
-
5
-
6
-
7
-
8
-
9
-
10
-
11
-
12
-
13
-
14
-
15
-
16
-
17
-
18
-
19
-
20
-
21
-
22
-
23
-
24
-
25
-
26
-
27
-
28
-
29
-
30
-
31
-
 32
32 -
 33
33 -
 34
34 -
 35
35 -
 36
36 -
 37
37 -
 38
38 -
 39
39 -
 40
40 -
 41
41 -
 42
42 -
43
-
44
-
45
-
46
-
47
-
48
-
49
-
50
-
51
-
52
-
53
-
54
-
55
-
56
-
57
-
58
-
59
-
60
-
61
-
62
 |
 |