Dell 944 All In One Inkjet Printer User's Guide - Page 6

Scan Mode
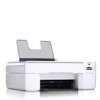
Page 6 highlights

Press the Menu button to access these other Photo menu items. Photo menu item Color Photo Size Quality Brightness Paper Size Paper Type Crop Rotate 90 Degrees Preview Red Eye Reduction Automatic Image Enhancement Sepia Tone Print * Factory default setting Scan Mode Settings l Color* l Black and White l 2¼ x 3¼ in. l 3½ x 5 in. l 4 x 6 in. l 5 x 7 in. l 8 x 10 in. lL l 2L l 6 x 8 cm l 10 x 15 cm l 13 x 18 cm l 8½ x 11 in l A4 l A5 l B5 l A6 l Hagaki l Draft l Normal l Photo l Automatic* Press the Select button l 3 x 5 in. l 3½ x 5 in. l 4 x 6 in. l 10 x 15 cm l 5 x 7 in. l 13 x 18 cm l 8½ x 11 in. l 8½ x 14 in. l A6 l A5 l B5 l A4 lL l 2L l Hagaki l 6 x 8 cm , and then use the Arrow buttons l Auto-Detect* l Plain l Coated l Glossy l Transparency to adjust the brightness setting. Press the Select button Press the Select button Press the Select button l On l Off* , and then use the Arrow buttons . . l On l Off* l On l Off* to adjust the image for cropping. The Scan submenu is only available if the printer is connected to a computer or a network adapter. If you choose Scan as the mode, you are prompted to choose the destination computer for the scanned document. You can scroll through the available computers by pressing the Arrow buttons . Pressing the Menu button selects the currently displayed computer name. NOTE: If your printer is connected locally, the Scan submenu does not appear; the host computer is automatically selected. Scan menu item Color Settings l Color*

  • 1
  • 2
  • 3
  • 4
  • 5
  • 6
  • 7
  • 8
  • 9
  • 10
  • 11
  • 12
  • 13
  • 14
  • 15
  • 16
  • 17
  • 18
  • 19
  • 20
  • 21
  • 22
  • 23
  • 24
  • 25
  • 26
  • 27
  • 28
  • 29
  • 30
  • 31
  • 32
  • 33
  • 34
  • 35
  • 36
  • 37
  • 38
  • 39
  • 40
  • 41
  • 42
  • 43
  • 44
  • 45
  • 46
  • 47
  • 48
  • 49
  • 50
  • 51
  • 52
  • 53
  • 54
  • 55
  • 56
  • 57
  • 58
  • 59
  • 60
  • 61
  • 62

Press the
Menu
button
to access these other
Photo
menu items.
Scan Mode
The
Scan
submenu is only available if the printer is connected to a computer or a network adapter. If you choose
Scan
as the mode, you are prompted to
choose the destination computer for the scanned document. You can scroll through the available computers by pressing the Arrow buttons
. Pressing the
Menu
button
selects the currently displayed computer name.
Photo menu item
Settings
Color
l
Color*
l
Black and White
Photo Size
l
2¼ x 3¼ in.
l
3½ x 5 in.
l
4 x 6 in.
l
5 x 7 in.
l
8 x 10 in.
l
L
l
2L
l
6 x 8 cm
l
10 x 15 cm
l
13 x 18 cm
l
8½ x 11 in
l
A4
l
A5
l
B5
l
A6
l
Hagaki
Quality
l
Draft
l
Normal
l
Photo
l
Automatic*
Brightness
Press the
Select
button
, and then use the Arrow buttons
to adjust the brightness setting.
Paper Size
l
3 x 5 in.
l
3½ x 5 in.
l
4 x 6 in.
l
10 x 15 cm
l
5 x 7 in.
l
13 x 18 cm
l
8½ x 11 in.
l
8½ x 14 in.
l
A6
l
A5
l
B5
l
A4
l
L
l
2L
l
Hagaki
l
6 x 8 cm
Paper Type
l
Auto-Detect*
l
Plain
l
Coated
l
Glossy
l
Transparency
Crop
Press the
Select
button
, and then use the Arrow buttons
to adjust the image for cropping.
Rotate 90 Degrees
Press the
Select
button
.
Preview
Press the
Select
button
.
Red Eye Reduction
l
On
l
Off*
Automatic Image Enhancement
l
On
l
Off*
Sepia Tone Print
l
On
l
Off*
* Factory default setting
NOTE:
If your printer is connected locally, the
Scan
submenu does not appear; the host computer is automatically selected.
Scan menu item
Settings
Color
l
Color*