Dell 944 All In One Inkjet Printer User's Guide - Page 58
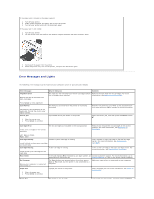
Cables
 |
View all Dell 944 All In One Inkjet Printer manuals
Add to My Manuals
Save this manual to your list of manuals |
Page 58 highlights
cards, postcards, or photo cards l The cards are centered on the paper support, in between the left and right edge guides. l The paper guide rests against the left edge of the cards. l You select Normal or Photo print quality. 25 sheets of photo or glossy paper l The glossy side of the paper faces up. l The paper is centered on the paper support, in between the left and right edge guides. l You select Normal or Photo print quality. l The paper is loaded vertically against the right side of the paper support. 1 iron-on transfer l You follow the loading instructions on the packaging. l The blank side of the transfer faces up. l The transfer is centered on the paper support, in between the left and right paper guides. l You select Normal or Photo print quality. 20 transparencies l The rough side of the transparencies faces up. l The transparencies are centered on the paper support, in between the left and right paper guides. NOTE: You can load a single transparency into the paper support without removing plain paper. l You select Normal or Photo print quality. Cables Your Dell Photo AIO Printer 944 uses a Universal Serial Bus (USB) cable (sold separately).
-
 1
1 -
2
-
3
-
4
-
5
-
6
-
7
-
8
-
9
-
10
-
11
-
12
-
13
-
14
-
15
-
16
-
17
-
18
-
19
-
20
-
21
-
22
-
23
-
24
-
25
-
26
-
27
-
28
-
29
-
30
-
31
-
32
-
33
-
34
-
35
-
36
-
37
-
38
-
39
-
40
-
41
-
42
-
43
-
44
-
45
-
46
-
47
-
48
-
49
-
50
-
51
-
52
-
 53
53 -
 54
54 -
 55
55 -
 56
56 -
 57
57 -
 58
58 -
 59
59 -
 60
60 -
 61
61 -
 62
62
 |
 |