Dell B2360DN Mono Laser User Guide - Page 140
Step 2, technical, support
 |
View all Dell B2360DN Mono Laser manuals
Add to My Manuals
Save this manual to your list of manuals |
Page 140 highlights
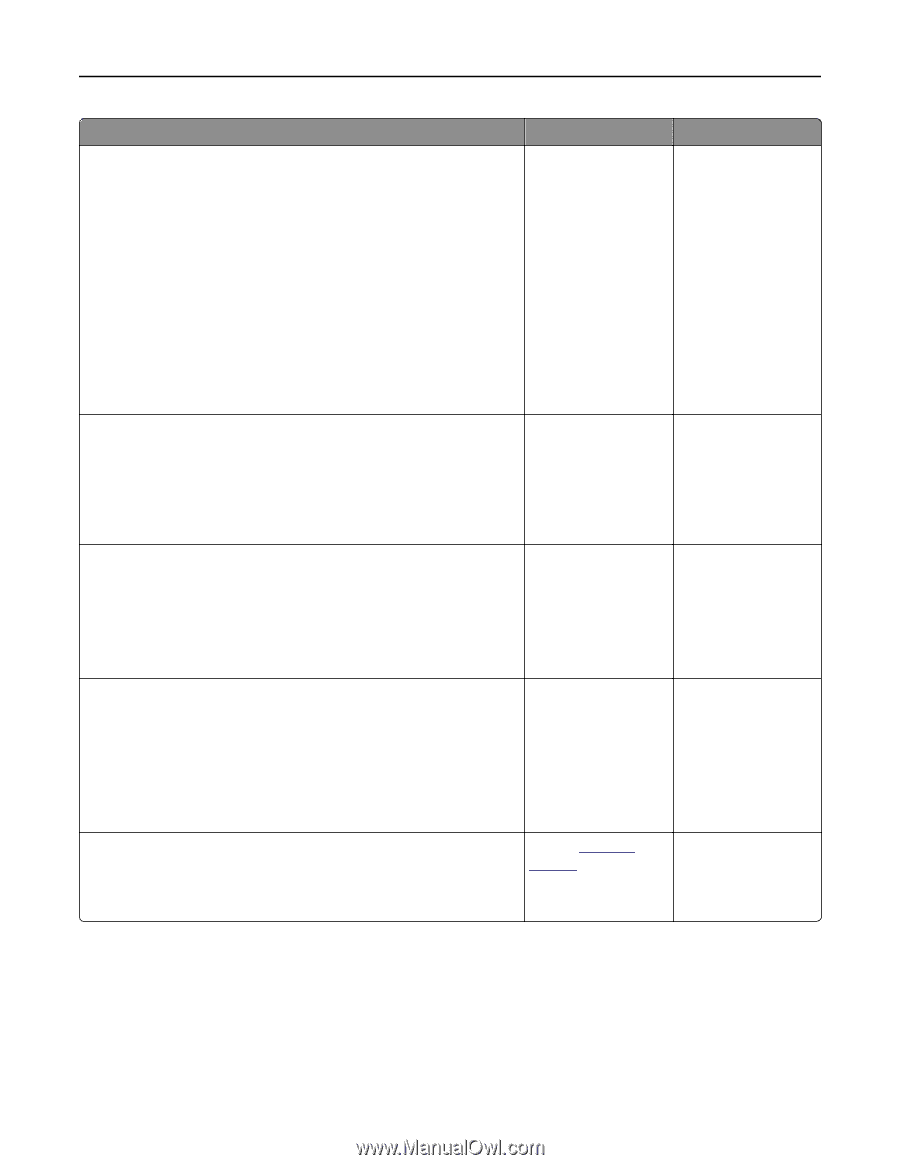
Troubleshooting 140 Action Yes Step 2 Go to step 3. a From the printer control panel, set the paper type, texture and weight in the Paper menu to match the paper loaded in the tray. b Resend the print job. Is the tray set to the type, texture, and weight of the paper loaded? Step 3 Go to step 4. a Depending on your operating system, specify the paper type, texture and weight from Printing Preferences or from the Print dialog. b Resend the print job. No Do one or more of the following: • Specify the paper type, texture, and weight from the tray settings to match the paper loaded in the tray. • Change the paper loaded in the tray to match the paper type, texture and weight specified in the tray settings. The problem is solved. Is the print still too dark? Step 4 Check if the paper loaded in the tray has texture or rough finishes. Are you printing on textured or rough paper? Step 5 a Load paper from a fresh package. Note: Paper absorbs moisture due to high humidity. Store paper in its original wrapper until you use it. b Resend the print job. From the printer control panel, change the texture settings in the Paper Texture menu to match the paper you are printing on. Go to step 5. Go to step 6. The problem is solved. Is the print still too dark? Step 6 Replace the imaging unit, and then resend the print job. Contact technical support. The problem is solved. Is the print still too dark?
-
 1
1 -
2
-
3
-
4
-
5
-
6
-
7
-
8
-
9
-
10
-
11
-
12
-
13
-
14
-
15
-
16
-
17
-
18
-
19
-
20
-
21
-
22
-
23
-
24
-
25
-
26
-
27
-
28
-
29
-
30
-
31
-
32
-
33
-
34
-
35
-
36
-
37
-
38
-
39
-
40
-
41
-
42
-
43
-
44
-
45
-
46
-
47
-
48
-
49
-
50
-
51
-
52
-
53
-
54
-
55
-
56
-
57
-
58
-
59
-
60
-
61
-
62
-
63
-
64
-
65
-
66
-
67
-
68
-
69
-
70
-
71
-
72
-
73
-
74
-
75
-
76
-
77
-
78
-
79
-
80
-
81
-
82
-
83
-
84
-
85
-
86
-
87
-
88
-
89
-
90
-
91
-
92
-
93
-
94
-
95
-
96
-
97
-
98
-
99
-
100
-
101
-
102
-
103
-
104
-
105
-
106
-
107
-
108
-
109
-
110
-
111
-
112
-
113
-
114
-
115
-
116
-
117
-
118
-
119
-
120
-
121
-
122
-
123
-
124
-
125
-
126
-
127
-
128
-
129
-
130
-
131
-
132
-
133
-
134
-
 135
135 -
 136
136 -
 137
137 -
 138
138 -
 139
139 -
 140
140 -
 141
141 -
 142
142 -
 143
143 -
 144
144 -
 145
145 -
146
-
147
-
148
-
149
-
150
-
151
-
152
-
153
-
154
-
155
-
156
-
157
-
158
 |
 |