Epson PowerLite 9300i User's Guide - Page 114
The image is stretched, compressed, cut off, or doesn't fit on, the screen., The image isn't square
 |
View all Epson PowerLite 9300i manuals
Add to My Manuals
Save this manual to your list of manuals |
Page 114 highlights
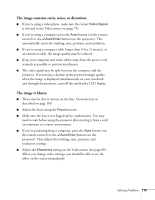
The image is stretched, compressed, cut off, or doesn't fit on the screen. ■ Press the Resize button on the remote control to make sure the projector is displaying at the correct resolution or aspect ratio. ■ If you've connected equipment to the Computer 1, Computer 2, or BNC port, the wrong input signal setting may be selected. Select the correct setting, depending on the type of computer or video player you've connected (see page 75). ■ If you're projecting from a computer, press the Auto button (on the remote control) or the Auto/Enter button (on the projector). This automatically resets the projector's tracking, sync, resolution, and position settings. (To adjust these settings yourself, see page 69.) ■ If you're projecting from a computer, the computer may have been set for dual display. This causes the projector to display only half the image (the right or left side). Access your computer's display settings (as you would to adjust other display properties- see page 39), then turn off dual display. See your computer's manual or online help for details. ■ You may have to adjust the Position setting if the image is slightly off-center (see page 71). The image isn't square, but tapered on the sides. ■ If you've tilted up the projector by extending the legs, the image will be broader at the top. Try retracting the legs (so that the projector lies flat) and then use the Lens Shift button to adjust the height of the image (see page 43). If you need to extend the legs, you can still square up the image with the Keystone button (see page 44). ■ If the projector is angled toward the screen from the left or right, the image will be broader on one side. Center the projector in the middle of the screen, facing the screen squarely. If you can't place the projector this way, correct the shape using the QuickCorner feature in the projector's menu system (see page 45). 114 Solving Problems
-
 1
1 -
2
-
3
-
4
-
5
-
6
-
7
-
8
-
9
-
10
-
11
-
12
-
13
-
14
-
15
-
16
-
17
-
18
-
19
-
20
-
21
-
22
-
23
-
24
-
25
-
26
-
27
-
28
-
29
-
30
-
31
-
32
-
33
-
34
-
35
-
36
-
37
-
38
-
39
-
40
-
41
-
42
-
43
-
44
-
45
-
46
-
47
-
48
-
49
-
50
-
51
-
52
-
53
-
54
-
55
-
56
-
57
-
58
-
59
-
60
-
61
-
62
-
63
-
64
-
65
-
66
-
67
-
68
-
69
-
70
-
71
-
72
-
73
-
74
-
75
-
76
-
77
-
78
-
79
-
80
-
81
-
82
-
83
-
84
-
85
-
86
-
87
-
88
-
89
-
90
-
91
-
92
-
93
-
94
-
95
-
96
-
97
-
98
-
99
-
100
-
101
-
102
-
103
-
104
-
105
-
106
-
107
-
108
-
 109
109 -
 110
110 -
 111
111 -
 112
112 -
 113
113 -
 114
114 -
 115
115 -
 116
116 -
 117
117 -
 118
118 -
 119
119 -
120
-
121
-
122
-
123
-
124
-
125
-
126
-
127
-
128
-
129
-
130
-
131
-
132
-
133
-
134
-
135
-
136
-
137
-
138
-
139
-
140
-
141
-
142
 |
 |
