Epson WorkForce Pro GT-S80 User Manual - Page 18
LCD Screen, Button, Function
 |
View all Epson WorkForce Pro GT-S80 manuals
Add to My Manuals
Save this manual to your list of manuals |
Page 18 highlights
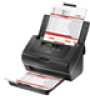
The buttons are below the LCD screen. Button a. Down arrow b. Up arrow c. Start d. Cancel Function Scrolls forward through the LCD screen menu list. Scrolls backward through the LCD screen menu list. Starts scanning. Cancels scanning. Top LCD Screen You can select a preset scan job from the LCD screen menu list. Press the Up arrow and Down arrow buttons to scroll through the jobs. The job name is displayed on the first line and the settings for the selected job are displayed on the second line on LCD screen. For detailed information, see Setting Up the LCD Screen Menu List. Note for Mac OS X users: Only the job number is displayed on the LCD screen. To confirm the job settings, check the Button Settings tab in the Epson Event Manager main window. See Adding and Assigning Scan Jobs (Mac OS X) for instructions. Top
-
 1
1 -
2
-
3
-
4
-
5
-
6
-
7
-
8
-
9
-
10
-
11
-
12
-
 13
13 -
 14
14 -
 15
15 -
 16
16 -
 17
17 -
 18
18 -
 19
19 -
 20
20 -
 21
21 -
 22
22 -
 23
23 -
24
-
25
-
26
-
27
-
28
-
29
-
30
-
31
-
32
-
33
-
34
-
35
-
36
-
37
-
38
-
39
-
40
-
41
-
42
-
43
-
44
-
45
-
46
-
47
-
48
-
49
-
50
-
51
-
52
-
53
-
54
-
55
-
56
-
57
-
58
-
59
-
60
-
61
-
62
-
63
-
64
-
65
-
66
-
67
-
68
-
69
-
70
-
71
-
72
-
73
-
74
-
75
-
76
-
77
-
78
-
79
-
80
-
81
-
82
-
83
-
84
-
85
-
86
-
87
-
88
-
89
-
90
-
91
-
92
-
93
-
94
-
95
-
96
-
97
-
98
-
99
-
100
-
101
-
102
-
103
-
104
-
105
-
106
 |
 |
