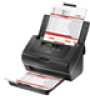
Epson WorkForce Pro GT-S80 User Manual - Page 33
Carrier Sheet Stitch Images, Image Option Setting - color document scanner
 |
View all Epson WorkForce Pro GT-S80 manuals
Add to My Manuals
Save this manual to your list of manuals |
Page 33 highlights
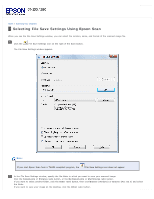
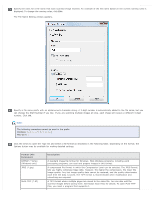
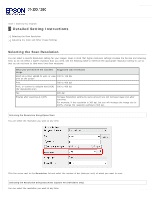
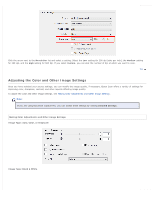
Double-Sided: Select this setting to scan both sides of your document page. Carrier Sheet (Single-Sided): Select this setting to scan irregularly shaped documents or documents with folds or wrinkles using the carrier sheet. Carrier Sheet (Stitch Images): Select this setting to scan documents larger than letter- or A4-size using the carrier sheet. Epson Scan scans both sides of the document, then outputs a stitched image. Select the size of your original document as the Size setting. Select the orientation of your original document as the Orientation setting. Select Dual Image Output (Windows only) to simultaneously create two images with different output settings. Note: You can select separate Resolution, Image Type, Image Option, Edge Fill, and file save settings for each output. Click the arrow to open the Resolution list and select an appropriate resolution for your original. See Selecting the Scan Resolution for instructions. Select Auto, Color, Grayscale, or Black & White as the Image Type setting. Note: If you select Grayscale or Black & White, you can also select an Image Option setting, as described below. Image Option Setting None Dropout: Red Dropout: Green Dropout: Blue Color Enhance: Red Color Enhance: Green Color Enhance: Blue Description No Image Option setting is applied. Drops out red from the scan. Drops out green from the scan. Drops out blue from the scan. Enhances red in the scan. Enhances green in the scan. Enhances blue in the scan. Make any other necessary Image Adjustment settings. See Adjusting the Color and Other Image Settings for details. Note: You can save all of the selected settings as a group of custom settings with a Name, and later apply these custom settings to scanning. The custom settings are also available for Epson Event Manager. See Epson Scan Help for details. Click Scan. Note: If you need to stop scanning, press the Cancel button on the scanner. What happens next depends on how you started your scan. See Finishing the Scan for instructions. If you have problems while scanning, see Paper Feeding Problems.
-
 1
1 -
2
-
3
-
4
-
5
-
6
-
7
-
8
-
9
-
10
-
11
-
12
-
13
-
14
-
15
-
16
-
17
-
18
-
19
-
20
-
21
-
22
-
23
-
24
-
25
-
26
-
27
-
 28
28 -
 29
29 -
 30
30 -
 31
31 -
 32
32 -
 33
33 -
 34
34 -
 35
35 -
 36
36 -
 37
37 -
 38
38 -
39
-
40
-
41
-
42
-
43
-
44
-
45
-
46
-
47
-
48
-
49
-
50
-
51
-
52
-
53
-
54
-
55
-
56
-
57
-
58
-
59
-
60
-
61
-
62
-
63
-
64
-
65
-
66
-
67
-
68
-
69
-
70
-
71
-
72
-
73
-
74
-
75
-
76
-
77
-
78
-
79
-
80
-
81
-
82
-
83
-
84
-
85
-
86
-
87
-
88
-
89
-
90
-
91
-
92
-
93
-
94
-
95
-
96
-
97
-
98
-
99
-
100
-
101
-
102
-
103
-
104
-
105
-
106
 |
 |
