Gateway M255 Gateway Notebook Hardware Reference - Page 34
Viewing the display on a television
 |
View all Gateway M255 manuals
Add to My Manuals
Save this manual to your list of manuals |
Page 34 highlights
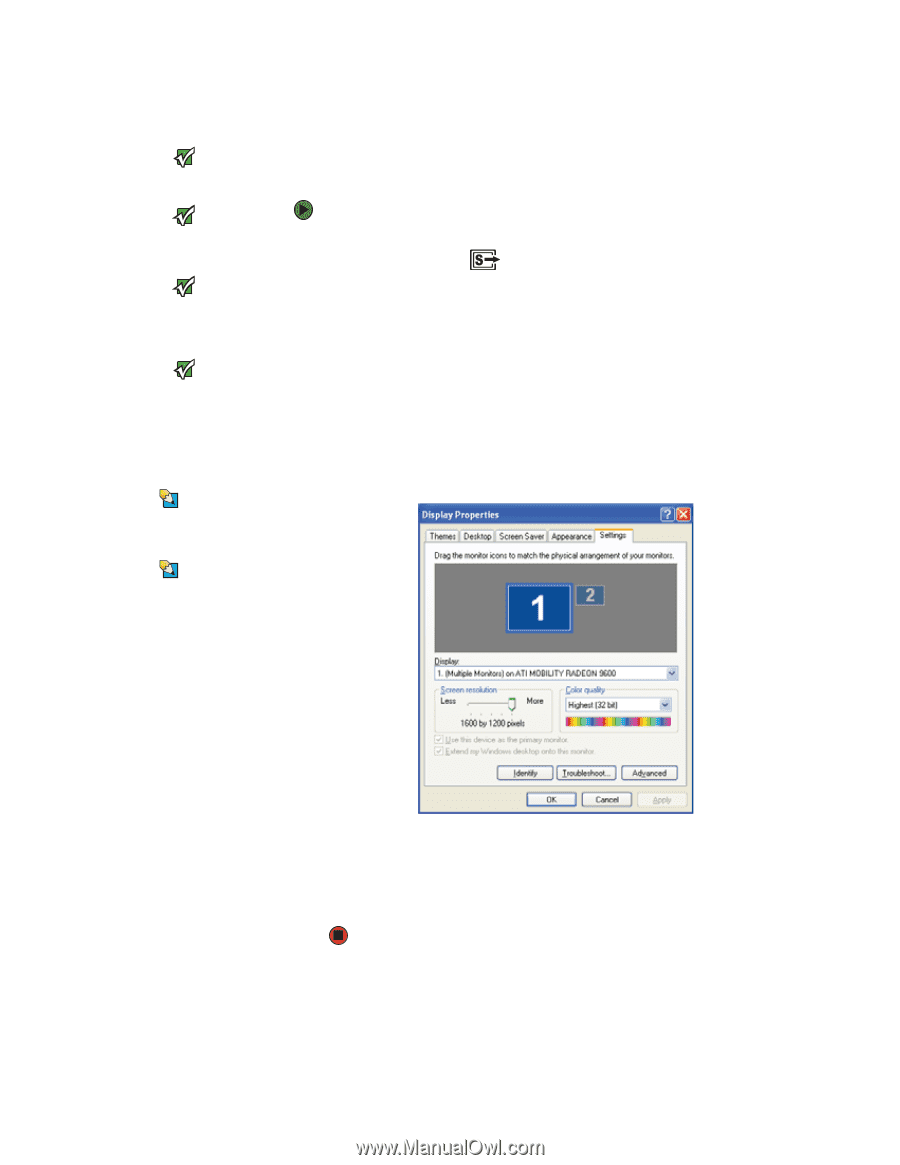
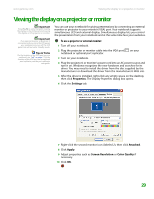
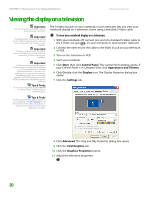
CHAPTER 2: Checking Out Your Gateway Notebook www.gateway.com Viewing the display on a television Important The TV out feature is available only on select Gateway notebooks. Important The dialog boxes shown in this section are for demonstrative purposes only and may not represent the screens on your notebook. Important To turn on external video by default, connect the television (or other external video device) before starting your notebook. Important Audio is not transmitted through an S-Video out jack. Use the built-in speakers or a set of headphones or external powered speakers, or connect your notebook to a stereo system using the headphone jack to hear sound while playing a DVD. DVD playback to a VCR will be scrambled by copyright protection software. Tips & Tricks To see if your notebook supports FN+F4 to control TV out, see the poster or hardware guide. The S-Video out jack on your notebook or port replicator lets you view your notebook display on a television screen using a standard S-Video cable. To view your notebook display on a television: 1 With your notebook off, connect one end of a standard S-Video cable to the S-Video out jack on your notebook or optional port replicator. 2 Connect the other end of the cable to the Video in jack on your television or VCR. 3 Turn on the television or VCR. 4 Start your notebook. 5 Click Start, then click Control Panel. The Control Panel window opens. If your Control Panel is in Category View, click Appearance and Themes. 6 Click/Double-click the Display icon. The Display Properties dialog box opens. 7 Click the Settings tab. Tips & Tricks For the location of the S-Video out jack on your notebook, see "Left" on page 7. For the location of the S-Video out jack on an optional port replicator, see the port replicator user guide. 8 Click Advanced. The Plug and Play Properties dialog box opens. 9 Click the Intel Graphics tab. 10 Click the Graphics Properties button. 11 Adjust the television properties. 30
-
 1
1 -
2
-
3
-
4
-
5
-
6
-
7
-
8
-
9
-
10
-
11
-
12
-
13
-
14
-
15
-
16
-
17
-
18
-
19
-
20
-
21
-
22
-
23
-
24
-
25
-
26
-
27
-
28
-
 29
29 -
 30
30 -
 31
31 -
 32
32 -
 33
33 -
 34
34 -
 35
35 -
 36
36 -
 37
37 -
 38
38 -
 39
39 -
40
-
41
-
42
-
43
-
44
-
45
-
46
-
47
-
48
-
49
-
50
-
51
-
52
-
53
-
54
-
55
-
56
-
57
-
58
-
59
-
60
-
61
-
62
-
63
-
64
-
65
-
66
-
67
-
68
-
69
-
70
-
71
-
72
 |
 |