Gateway M255 Gateway Notebook Hardware Reference - Page 49
Connect the power adapter, modem cable, and network cable - drivers
 |
View all Gateway M255 manuals
Add to My Manuals
Save this manual to your list of manuals |
Page 49 highlights
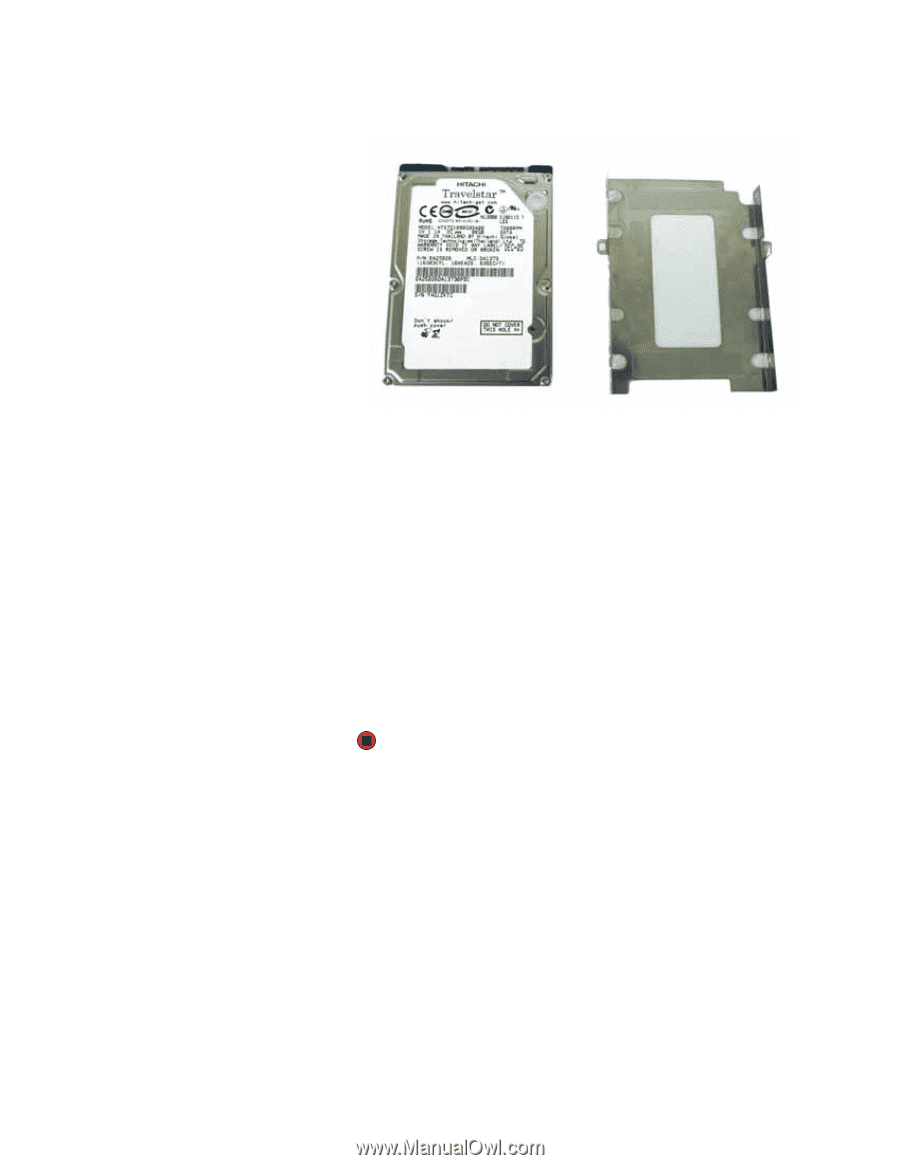
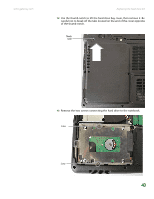
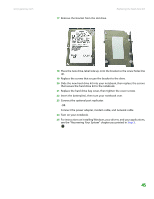
www.gateway.com 17 Remove the bracket from the old drive. Replacing the hard drive kit 18 Place the new drive, label side up, onto the bracket so the screw holes line up. 19 Replace the screws that secure the bracket to the drive. 20 Slide the new hard drive kit into your notebook, then replace the screws that secure the hard drive kit to the notebook. 21 Replace the hard drive bay cover, then tighten the cover screws. 22 Insert the battery(ies), then turn your notebook over. 23 Connect the optional port replicator. -OR- Connect the power adapter, modem cable, and network cable 24 Turn on your notebook. 25 For instructions on installing Windows, your drivers, and your applications, see the "Recovering Your System" chapter you printed in Step 2. 45
-
 1
1 -
2
-
3
-
4
-
5
-
6
-
7
-
8
-
9
-
10
-
11
-
12
-
13
-
14
-
15
-
16
-
17
-
18
-
19
-
20
-
21
-
22
-
23
-
24
-
25
-
26
-
27
-
28
-
29
-
30
-
31
-
32
-
33
-
34
-
35
-
36
-
37
-
38
-
39
-
40
-
41
-
42
-
43
-
 44
44 -
 45
45 -
 46
46 -
 47
47 -
 48
48 -
 49
49 -
 50
50 -
 51
51 -
 52
52 -
 53
53 -
 54
54 -
55
-
56
-
57
-
58
-
59
-
60
-
61
-
62
-
63
-
64
-
65
-
66
-
67
-
68
-
69
-
70
-
71
-
72
 |
 |