Gateway M255 Gateway Notebook Hardware Reference - Page 47
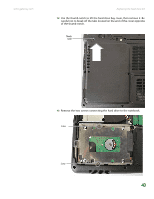
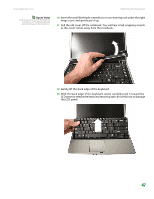
Remove the two screws connecting the hard drive to the notebook.
 |
View all Gateway M255 manuals
Add to My Manuals
Save this manual to your list of manuals |
Page 47 highlights
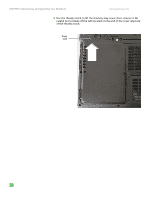
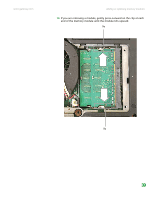
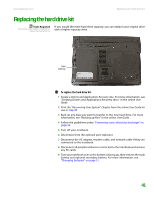
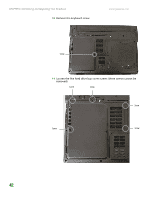
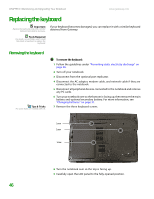
www.gateway.com Replacing the hard drive kit 12 Use the thumb notch to lift the hard drive bay cover, then remove it. Be careful not to break off the tabs located on the end of the cover opposite of the thumb notch. Thumb notch 13 Remove the two screws connecting the hard drive to the notebook. Screw Screw 43
-
 1
1 -
2
-
3
-
4
-
5
-
6
-
7
-
8
-
9
-
10
-
11
-
12
-
13
-
14
-
15
-
16
-
17
-
18
-
19
-
20
-
21
-
22
-
23
-
24
-
25
-
26
-
27
-
28
-
29
-
30
-
31
-
32
-
33
-
34
-
35
-
36
-
37
-
38
-
39
-
40
-
41
-
 42
42 -
 43
43 -
 44
44 -
 45
45 -
 46
46 -
 47
47 -
 48
48 -
 49
49 -
 50
50 -
 51
51 -
 52
52 -
53
-
54
-
55
-
56
-
57
-
58
-
59
-
60
-
61
-
62
-
63
-
64
-
65
-
66
-
67
-
68
-
69
-
70
-
71
-
72
 |
 |
Replacing the hard drive kit
www.gateway.com
43
12
Use the thumb notch to lift the hard drive bay cover, then remove it. Be
careful not to break off the tabs located on the end of the cover opposite
of the thumb notch.
13
Remove the two screws connecting the hard drive to the notebook.
Thumb
notch
Screw
Screw