GE E1250TW User Manual (English) - Page 86
Using the PictBridge menu
 |
UPC - 810027012500
View all GE E1250TW manuals
Add to My Manuals
Save this manual to your list of manuals |
Page 86 highlights
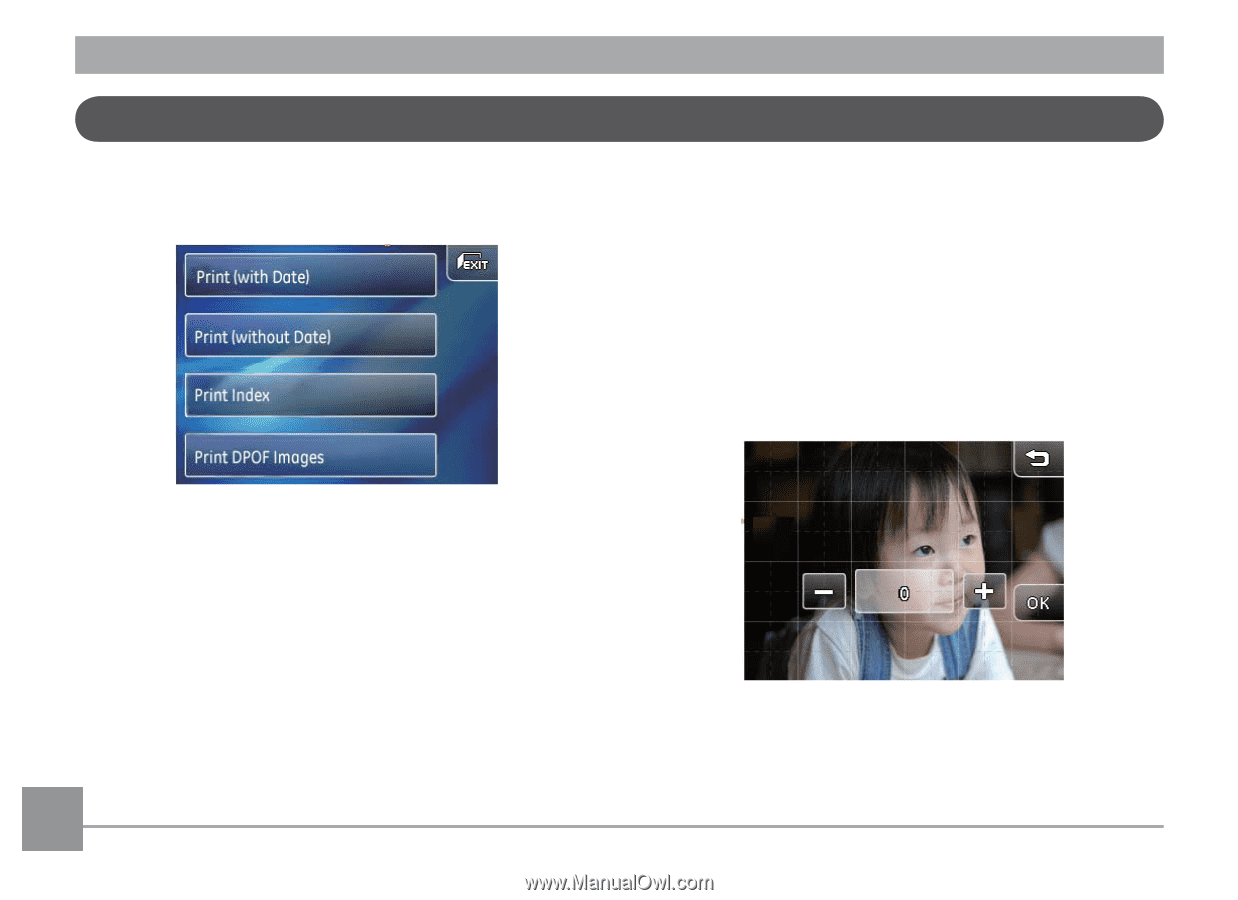
Using the PictBridge menu After setting the USB mode to printer, the DPS menu will appear. With/Without the picture date printed When you have set the date and time in the camera, all pictures you have taken will be saved with the date and time. See the following steps to print out the pictures with date/time. 1. In the DPS menu, select With date/time printed or Without date/time printed. The screen below will be shown: Select and press a setting button to enter the submenu. Refer to the following sections for details of all the settings. 82 2. Slide left and right on the touch screen to select the images you wish to print.
-
 1
1 -
2
-
3
-
4
-
5
-
6
-
7
-
8
-
9
-
10
-
11
-
12
-
13
-
14
-
15
-
16
-
17
-
18
-
19
-
20
-
21
-
22
-
23
-
24
-
25
-
26
-
27
-
28
-
29
-
30
-
31
-
32
-
33
-
34
-
35
-
36
-
37
-
38
-
39
-
40
-
41
-
42
-
43
-
44
-
45
-
46
-
47
-
48
-
49
-
50
-
51
-
52
-
53
-
54
-
55
-
56
-
57
-
58
-
59
-
60
-
61
-
62
-
63
-
64
-
65
-
66
-
67
-
68
-
69
-
70
-
71
-
72
-
73
-
74
-
75
-
76
-
77
-
78
-
79
-
80
-
 81
81 -
 82
82 -
 83
83 -
 84
84 -
 85
85 -
 86
86 -
 87
87 -
 88
88 -
 89
89 -
 90
90 -
 91
91 -
92
-
93
-
94
-
95
-
96
-
97
-
98
 |
 |
¹³
After setting the USB mode to printer, the
DPS
menu
will appear.
Select and press a setting button to enter the sub-
menu.
Refer to the following sections for details of all the
settings.
W±th/W±thout the p±cture date pr±nted
When you have set the date and time in the camera, all
pictures you have taken will be saved with the date and
time. See the following steps to print out the pictures
with date/time.
1. In the
DPS
menu, select
W±th date/t±me
pr±nted
or
W±thout date/t±me pr±nted
. The screen below
will be shown:
2. Slide left and right on the touch screen to select the
images you wish to print.
Using the PictBridge menu