HP 4400C HP Scanjet 4400C/5400C Series Scanner Windows - (English) User Manual - Page 42
Performing a new scan, Back to TOC, Scanning from HP Precisionscan Pro
 |
UPC - 725184800566
View all HP 4400C manuals
Add to My Manuals
Save this manual to your list of manuals |
Page 42 highlights
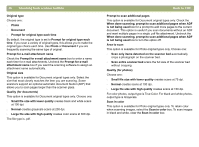
Back to TOC Performing a new scan Once you start a new scan, the scanner does a preliminary scan of the item and displays the scanned image in the HP Precisionscan Pro software. Then, you can see the scanned image and edit it, if necessary, before sending it to a destination or saving it as a file. Use these steps to start a scan from the HP Precisionscan Pro software. To start a scan from a scanner button, see "Scanning quickly with scanner buttons" on page 26. 1 Place the original face down on the scanner glass and close the lid. Scanning from HP Precisionscan Pro 41 3 Start the scan in one of these ways: l In the HP Precisionscan Pro software, click or the Guided Steps (if visible). on the toolbar l In the HP Precisionscan Pro software, click New Scan on the Scan menu. The scanned image appears in the HP Precisionscan Pro software. This scanned image is the preview image. You can make changes, such as selecting only part of the image or adjusting the contrast. When you send the image to another program such as e-mail, place the image on a website, or save it as a file, the scanner performs a final scan of the item that includes any changes you made. Directions for making optional adjustments and completing the scan appear in this section. Note: To load items in the HP Scanjet Automatic Document Feeder (ADF), see "Scanning from the ADF" on page 76. 2 On the Start menu, point to Programs, and click HP Precisionscan Pro. The software starts.
-
 1
1 -
2
-
3
-
4
-
5
-
6
-
7
-
8
-
9
-
10
-
11
-
12
-
13
-
14
-
15
-
16
-
17
-
18
-
19
-
20
-
21
-
22
-
23
-
24
-
25
-
26
-
27
-
28
-
29
-
30
-
31
-
32
-
33
-
34
-
35
-
36
-
 37
37 -
 38
38 -
 39
39 -
 40
40 -
 41
41 -
 42
42 -
 43
43 -
 44
44 -
 45
45 -
 46
46 -
 47
47 -
48
-
49
-
50
-
51
-
52
-
53
-
54
-
55
-
56
-
57
-
58
-
59
-
60
-
61
-
62
-
63
-
64
-
65
-
66
-
67
-
68
-
69
-
70
-
71
-
72
-
73
-
74
-
75
-
76
-
77
-
78
-
79
-
80
-
81
-
82
-
83
-
84
-
85
-
86
-
87
-
88
-
89
-
90
-
91
-
92
-
93
-
94
-
95
-
96
-
97
-
98
-
99
-
100
-
101
-
102
-
103
-
104
-
105
-
106
-
107
-
108
-
109
-
110
-
111
-
112
-
113
-
114
-
115
-
116
-
117
-
118
-
119
-
120
-
121
-
122
-
123
-
124
-
125
-
126
-
127
-
128
-
129
-
130
-
131
-
132
-
133
-
134
-
135
-
136
-
137
-
138
-
139
-
140
-
141
 |
 |
