HP 6310 User Guide - Page 87
Stop scanning, Scan To, Scan Menu, Select Computer, Accept, Cancel - officejet network scan
 |
UPC - 882780472747
View all HP 6310 manuals
Add to My Manuals
Save this manual to your list of manuals |
Page 87 highlights
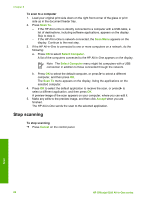
Chapter 8 To scan to a computer 1. Load your original print side down on the right front corner of the glass or print side up in the document feeder tray. 2. Press Scan To. - If the HP All-in-One is directly connected to a computer with a USB cable, a list of destinations, including software applications, appears on the display. Skip to step 4. - If the HP All-in-One is network-connected, the Scan Menu appears on the display. Continue to the next step. 3. If the HP All-in-One is connected to one or more computers on a network, do the following: a. Press OK to select Select Computer. A list of the computers connected to the HP All-in-One appears on the display. Note The Select Computer menu might list computers with a USB connection in addition to those connected through the network. b. Press OK to select the default computer, or press to select a different computer, and then press OK. The Scan To menu appears on the display, listing the applications on the selected computer. 4. Press OK to select the default application to receive the scan, or press to select a different application, and then press OK. A preview image of the scan appears on your computer, where you can edit it. 5. Make any edits to the preview image, and then click Accept when you are finished. The HP All-in-One sends the scan to the selected application. Stop scanning To stop scanning ➔ Press Cancel on the control panel. Scan 84 HP Officejet 6300 All-in-One series
-
 1
1 -
2
-
3
-
4
-
5
-
6
-
7
-
8
-
9
-
10
-
11
-
12
-
13
-
14
-
15
-
16
-
17
-
18
-
19
-
20
-
21
-
22
-
23
-
24
-
25
-
26
-
27
-
28
-
29
-
30
-
31
-
32
-
33
-
34
-
35
-
36
-
37
-
38
-
39
-
40
-
41
-
42
-
43
-
44
-
45
-
46
-
47
-
48
-
49
-
50
-
51
-
52
-
53
-
54
-
55
-
56
-
57
-
58
-
59
-
60
-
61
-
62
-
63
-
64
-
65
-
66
-
67
-
68
-
69
-
70
-
71
-
72
-
73
-
74
-
75
-
76
-
77
-
78
-
79
-
80
-
81
-
 82
82 -
 83
83 -
 84
84 -
 85
85 -
 86
86 -
 87
87 -
 88
88 -
 89
89 -
 90
90 -
 91
91 -
 92
92 -
93
-
94
-
95
-
96
-
97
-
98
-
99
-
100
-
101
-
102
-
103
-
104
-
105
-
106
-
107
-
108
-
109
-
110
-
111
-
112
-
113
-
114
-
115
-
116
-
117
-
118
-
119
-
120
-
121
-
122
-
123
-
124
-
125
-
126
-
127
-
128
-
129
-
130
-
131
-
132
-
133
-
134
-
135
-
136
-
137
-
138
-
139
-
140
-
141
-
142
-
143
-
144
-
145
-
146
-
147
-
148
-
149
-
150
-
151
-
152
-
153
-
154
-
155
-
156
-
157
-
158
-
159
-
160
-
161
-
162
-
163
-
164
-
165
-
166
-
167
 |
 |
