HP 6310 User Guide - Page 90
Select photos and videos for printing, Select Photos, Custom
 |
UPC - 882780472747
View all HP 6310 manuals
Add to My Manuals
Save this manual to your list of manuals |
Page 90 highlights
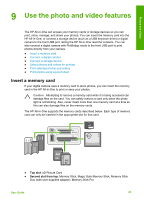
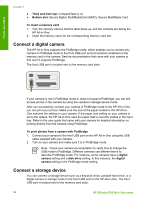
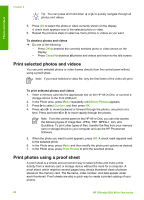
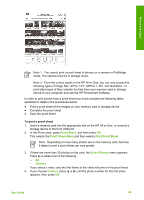
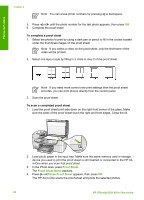
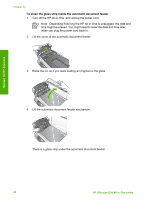
Photos and videos Note Digital cameras that are in storage mode can be attached to the front USB port. The HP All-in-One treats cameras in this mode as a normal storage device. Digital cameras in storage mode are referred to as storage devices throughout this section. Check your camera documentation to verify how to change the USB mode to storage mode. Different cameras use different terms to describe the storage mode. For instance, some cameras have a digital camera setting and a disk drive setting. In this instance, the disk drive setting is the storage mode setting. If storage mode does not work on your camera, you might need to upgrade the camera firmware. For more information, see the documentation that came with the camera. Once you have connected the storage device, you can do the following with the files stored on your storage device: ● Transfer the files to your computer ● View photos ● Edit photos and videos using the control panel ● Print photos on the HP All-in-One ● Send photos and videos to your friends and family Caution Never attempt to disconnect a storage device while it is being accessed. Doing so can damage files on the storage device. You can safely remove a storage device only when the status light next to the memory card slots is not blinking. Select photos and videos for printing You can use the control panel on the HP All-in-One to select photos and videos for printing. To select individual photos and videos 1. Insert a memory card into the appropriate slot on the HP All-in-One, or connect a storage device to the front USB port. 2. In the Photo area, press Menu repeatedly until Select Photos appears. 3. Press to select Custom, and then press OK. 4. Press or to scroll to the photo or video file you want to select. Note From the control panel on the HP All-in-One, you can only access the following types of image files: JPEG, TIFF, MPEG-1, AVI, and Quicktime. To print other types of files, transfer the files from your memory card or storage device to your computer and use the HP Photosmart Software. User Guide 87
-
 1
1 -
2
-
3
-
4
-
5
-
6
-
7
-
8
-
9
-
10
-
11
-
12
-
13
-
14
-
15
-
16
-
17
-
18
-
19
-
20
-
21
-
22
-
23
-
24
-
25
-
26
-
27
-
28
-
29
-
30
-
31
-
32
-
33
-
34
-
35
-
36
-
37
-
38
-
39
-
40
-
41
-
42
-
43
-
44
-
45
-
46
-
47
-
48
-
49
-
50
-
51
-
52
-
53
-
54
-
55
-
56
-
57
-
58
-
59
-
60
-
61
-
62
-
63
-
64
-
65
-
66
-
67
-
68
-
69
-
70
-
71
-
72
-
73
-
74
-
75
-
76
-
77
-
78
-
79
-
80
-
81
-
82
-
83
-
84
-
 85
85 -
 86
86 -
 87
87 -
 88
88 -
 89
89 -
 90
90 -
 91
91 -
 92
92 -
 93
93 -
 94
94 -
 95
95 -
96
-
97
-
98
-
99
-
100
-
101
-
102
-
103
-
104
-
105
-
106
-
107
-
108
-
109
-
110
-
111
-
112
-
113
-
114
-
115
-
116
-
117
-
118
-
119
-
120
-
121
-
122
-
123
-
124
-
125
-
126
-
127
-
128
-
129
-
130
-
131
-
132
-
133
-
134
-
135
-
136
-
137
-
138
-
139
-
140
-
141
-
142
-
143
-
144
-
145
-
146
-
147
-
148
-
149
-
150
-
151
-
152
-
153
-
154
-
155
-
156
-
157
-
158
-
159
-
160
-
161
-
162
-
163
-
164
-
165
-
166
-
167
 |
 |
