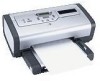
HP 7660 HP Photosmart 7600 series - (English) Basics Guide - Page 22
set Exif printing - color printer
 |
UPC - 844844844303
View all HP 7660 manuals
Add to My Manuals
Save this manual to your list of manuals |
Page 22 highlights
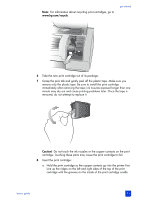
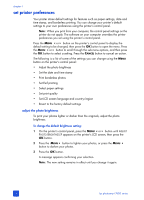
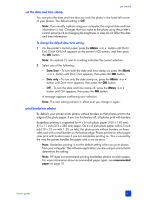
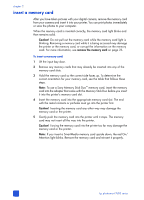
chapter 1 To change the default setting for borderless printing: 1 On the printer's control panel, press the MENU or button until BORDERLESS PRINTING OPTION? appears on the printer's LCD screen, and then press the OK button. The printer's LCD screen displays *ON. Note: An asterisk next to a setting indicates the current selection. 2 Select one of the following: - Off - To turn borderless printing off, press the MENU or button until OFF appears, and then press the OK button. - On - To turn borderless printing on, press the MENU or button until ON appears, and then press the OK button. A message appears confirming your selection. Note: The new setting remains in effect until you change it again. set Exif printing Your printer supports Exif Print (Exchangeable Image File format 2.2), an international open standard that simplifies digital imaging and enhances printed photos. When you take a photo with a digital camera that supports Exif Print, information such as exposure time, flash setting, and color saturation is encoded in the image file. You can set the printer to use the Exif Print information to automatically perform image-specific enhancements. To change the default setting for Exif printing: 1 On the printer's control panel, press the MENU or button until EXIF PRINTING? appears on the printer's LCD screen, and then press the OK button. Note: An asterisk next to a setting indicates the current selection. 2 Select one of the following: - On - To use Exif Print information to enhance your prints, press the MENU or button until ON appears, and then press the OK button. - Off - To ignore Exif Print information, press the MENU or button until OFF appears, and then press the OK button. A message appears confirming your selection. Note: The new setting remains in effect until you change it again. 18 hp photosmart 7600 series
-
 1
1 -
2
-
3
-
4
-
5
-
6
-
7
-
8
-
9
-
10
-
11
-
12
-
13
-
14
-
15
-
16
-
 17
17 -
 18
18 -
 19
19 -
 20
20 -
 21
21 -
 22
22 -
 23
23 -
 24
24 -
 25
25 -
 26
26 -
 27
27 -
28
-
29
-
30
-
31
-
32
-
33
-
34
-
35
-
36
-
37
-
38
-
39
-
40
-
41
-
42
-
43
-
44
-
45
-
46
-
47
-
48
-
49
-
50
-
51
-
52
-
53
-
54
-
55
-
56
-
57
-
58
-
59
-
60
-
61
-
62
-
63
-
64
 |
 |