HP Mv2120 HP MV2120, MV5020, MV5140, MV5150 Media Vault - User's Guide - Page 22
Installing Two or More HP Media Vaults, Getting to Know the HP Media Vault
 |
UPC - 883585549856
View all HP Mv2120 manuals
Add to My Manuals
Save this manual to your list of manuals |
Page 22 highlights
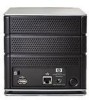
Installing Two or More HP Media Vaults If you add additional HP Media Vaults to your network, run the software installation disk on one network computer for each Media Vault that you added. You do not need to complete multiple installations of the software on all of the network computers, just one. If you have more than one Media Vault, the second is called HPMediaVault1, the third is called HPMediaVault2, and so on. Getting to Know the HP Media Vault The HP Media Vault has lots of features that enable you to manage and share your documents, music, photos, and videos. Starting the HP Media Vault Software Double-click the HP Media Vault desktop shortcut to open the HP Media Vault Control Center. Alternatively, click Start, All Programs, HP Media Vault, and then Control Center to open the Control Center from the Start menu in Windows XP or Vista. The Control Center has several tabs. Each tab and the features on it are discussed below. • Main Tab on page 1-14 • Backup Tab on page 1-15 • Tools Tab on page 1-16 • Help & Support Tab on page 1-17 Main Tab The main tab has buttons for browsing folders on the HP Media Vault and for opening the HP Photo Webshare. 1-14 Version
-
 1
1 -
2
-
3
-
4
-
5
-
6
-
7
-
8
-
9
-
10
-
11
-
12
-
13
-
14
-
15
-
16
-
 17
17 -
 18
18 -
 19
19 -
 20
20 -
 21
21 -
 22
22 -
 23
23 -
 24
24 -
 25
25 -
 26
26 -
 27
27 -
28
-
29
-
30
-
31
-
32
-
33
-
34
-
35
-
36
-
37
-
38
-
39
-
40
-
41
-
42
-
43
-
44
-
45
-
46
-
47
-
48
-
49
-
50
-
51
-
52
-
53
-
54
-
55
-
56
-
57
-
58
-
59
-
60
-
61
-
62
-
63
-
64
-
65
-
66
-
67
-
68
-
69
-
70
-
71
-
72
-
73
-
74
-
75
-
76
-
77
-
78
-
79
-
80
-
81
-
82
-
83
-
84
-
85
-
86
-
87
-
88
-
89
-
90
-
91
-
92
-
93
-
94
-
95
-
96
-
97
-
98
-
99
-
100
-
101
-
102
-
103
-
104
-
105
-
106
-
107
-
108
-
109
-
110
-
111
-
112
-
113
-
114
-
115
-
116
-
117
-
118
-
119
-
120
-
121
-
122
-
123
-
124
-
125
-
126
-
127
-
128
-
129
-
130
-
131
-
132
-
133
-
134
-
135
-
136
-
137
-
138
-
139
-
140
-
141
-
142
-
143
-
144
-
145
-
146
-
147
-
148
-
149
-
150
-
151
-
152
-
153
-
154
-
155
-
156
-
157
-
158
-
159
-
160
-
161
-
162
-
163
-
164
-
165
-
166
-
167
-
168
-
169
-
170
-
171
-
172
-
173
-
174
-
175
-
176
-
177
-
178
-
179
-
180
-
181
-
182
-
183
-
184
-
185
-
186
-
187
-
188
-
189
-
190
-
191
-
192
-
193
-
194
-
195
-
196
-
197
-
198
-
199
-
200
-
201
-
202
-
203
-
204
-
205
-
206
-
207
-
208
-
209
-
210
-
211
-
212
 |
 |
