HP Photosmart 3200 User Guide - Page 11
Name and Description, Start Color - series device settings
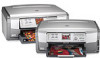 |
View all HP Photosmart 3200 manuals
Add to My Manuals
Save this manual to your list of manuals |
Page 11 highlights
Overview Chapter 1 (continued) Label Name and Description 8 Reverse, Play/Pause, Fast Forward: Play videos and navigate video frames. 9 Zoom in, Zoom out: Enlarge or reduce the appearance of the photo on the color graphics display for cropping. This image is approximately what the printed image will look like. 10 Rotate: Rotate the currently displayed photo on the color graphics display 90 degrees. Subsequent presses continue to rotate the photo 90 degrees. 11 Select Photo: Select a range of photos or all photos. 12 Start Color: Start a color copy, photo print, or scan job. 13 Start Black: Start a black-and-white copy, photo print, or scan job. 14 Cancel: Stop a job, exit a menu, or exit settings. 15 Up arrow: Navigate up through menu options, move the viewing area up in zoom mode, or navigate the visual keyboard. Down arrow: Navigate down through menu options, move the viewing area down in zoom mode, or navigate the visual keyboard. Right arrow: Increase values, move the viewing area right in zoom mode, navigate the visual keyboard, or go forward when viewing photos on the color graphics display. Left arrow: Decrease values, move the viewing area left in zoom mode, navigate the visual keyboard, go back when viewing photos on the color graphics display, or exit menus. 16 OK: Select a menu, image, setting, or value on the color graphics display. 17 Attention light: Indicates a problem occurred. See the color graphics display for more information. 18 Scan: Presents or removes the Scan To menu or the Scan Menu (depending on whether the HP All-in-One is connected to a computer with a USB cable, or through a network) for selecting options. Select the scan function. When the button is lit, the scan function is selected. 19 Copy: Presents or removes the Copy Menu for selecting options. Select the copy function. When the button is lit, the copy function is selected. The button is lit by default. 20 Help: Display a list of specific help topics. The topic that you select opens a help window on your computer screen. 21 Photo tray light: Indicates that paper from the photo tray is used. 22 Photo tray: Select the photo tray for a specific photo print job or copy job from the control panel. 23 Setup: Access the menu system for device preferences, reports, and maintenance. 8 HP Photosmart 3200 All-in-One series
-
 1
1 -
2
-
3
-
4
-
5
-
 6
6 -
 7
7 -
 8
8 -
 9
9 -
 10
10 -
 11
11 -
 12
12 -
 13
13 -
 14
14 -
 15
15 -
 16
16 -
17
-
18
-
19
-
20
-
21
-
22
-
23
-
24
-
25
-
26
-
27
-
28
-
29
-
30
-
31
-
32
-
33
-
34
-
35
-
36
-
37
-
38
-
39
-
40
-
41
-
42
-
43
-
44
-
45
-
46
-
47
-
48
-
49
-
50
-
51
-
52
-
53
-
54
-
55
-
56
-
57
-
58
-
59
-
60
-
61
-
62
-
63
-
64
-
65
-
66
-
67
-
68
-
69
-
70
-
71
-
72
-
73
-
74
-
75
-
76
-
77
-
78
-
79
-
80
-
81
-
82
-
83
-
84
-
85
-
86
-
87
-
88
-
89
-
90
-
91
-
92
-
93
-
94
-
95
-
96
-
97
-
98
-
99
-
100
-
101
-
102
-
103
-
104
-
105
-
106
-
107
-
108
-
109
-
110
-
111
-
112
-
113
-
114
-
115
-
116
-
117
-
118
-
119
-
120
-
121
-
122
-
123
-
124
-
125
-
126
-
127
-
128
-
129
-
130
-
131
-
132
-
133
-
134
-
135
-
136
-
137
-
138
-
139
-
140
-
141
-
142
-
143
-
144
 |
 |
