HP ProBook 4540s HP ProBook 4540s Notebook PC HP ProBook 4440s Notebook PC HP - Page 85
that secure the speakers to the computer.
 |
View all HP ProBook 4540s manuals
Add to My Manuals
Save this manual to your list of manuals |
Page 85 highlights
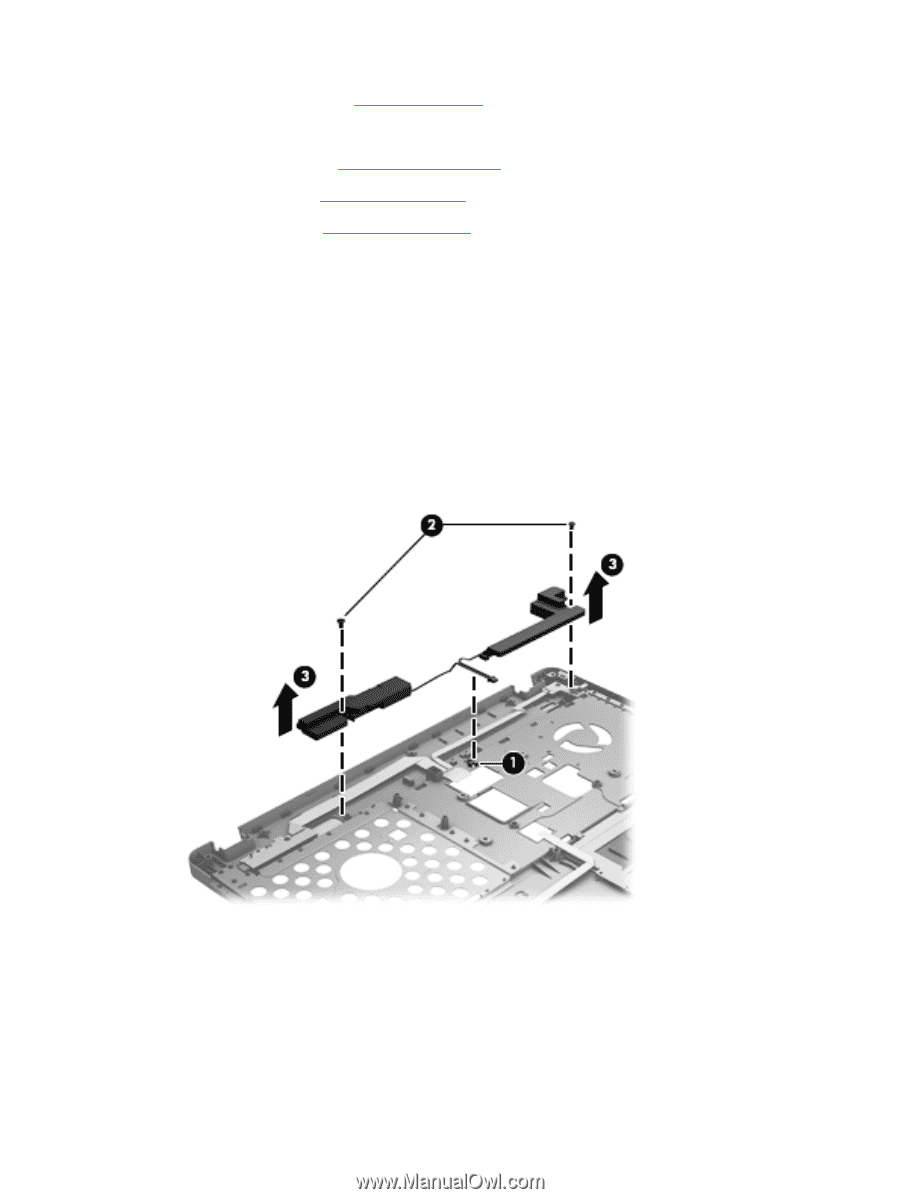
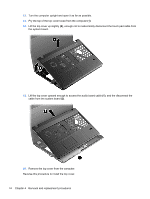
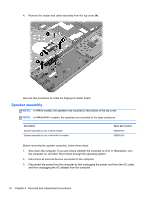
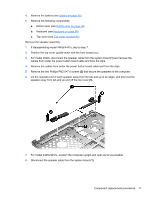
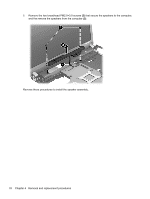
4. Remove the battery (see Battery on page 42). 5. Remove the following components: a. Bottom door (see Bottom door on page 44). b. Keyboard (see Keyboard on page 56) c. Top cover (see Top cover on page 67) Remove the speaker assembly: 1. If disassembling model 4440s/4441s, skip to step 7. 2. Position the top cover upside-down with the front toward you. 3. For model 4540s, disconnect the speaker cable from the system board (1) and remove the cables from under the power button board cable and from the clips. 4. Remove the cables from under the power button board cable and from the clips. 5. Remove the two Phillips PM2.0×7.0 screws (2) that secure the speakers to the computer. 6. Lift the opposite end of each speaker away from the tab and up at an angle, and then pull the speaker away from tab and up and off the top cover (3). 7. For model 4440s/4441s, position the computer upright and open as far as possible. 8. Disconnect the speaker cable from the system board (1). Component replacement procedures 77
-
 1
1 -
2
-
3
-
4
-
5
-
6
-
7
-
8
-
9
-
10
-
11
-
12
-
13
-
14
-
15
-
16
-
17
-
18
-
19
-
20
-
21
-
22
-
23
-
24
-
25
-
26
-
27
-
28
-
29
-
30
-
31
-
32
-
33
-
34
-
35
-
36
-
37
-
38
-
39
-
40
-
41
-
42
-
43
-
44
-
45
-
46
-
47
-
48
-
49
-
50
-
51
-
52
-
53
-
54
-
55
-
56
-
57
-
58
-
59
-
60
-
61
-
62
-
63
-
64
-
65
-
66
-
67
-
68
-
69
-
70
-
71
-
72
-
73
-
74
-
75
-
76
-
77
-
78
-
79
-
 80
80 -
 81
81 -
 82
82 -
 83
83 -
 84
84 -
 85
85 -
 86
86 -
 87
87 -
 88
88 -
 89
89 -
 90
90 -
91
-
92
-
93
-
94
-
95
-
96
-
97
-
98
-
99
-
100
-
101
-
102
-
103
-
104
-
105
-
106
-
107
-
108
-
109
-
110
-
111
-
112
-
113
-
114
-
115
-
116
-
117
-
118
-
119
-
120
-
121
-
122
-
123
-
124
-
125
-
126
-
127
-
128
-
129
-
130
-
131
-
132
-
133
-
134
-
135
-
136
-
137
-
138
-
139
-
140
-
141
-
142
-
143
-
144
-
145
 |
 |